安装MongoDB


点击msi安装程序进行安装,可以进行自定义安装,选择安装位置,我选择的是D盘
在D盘根目录下创建data\db目录,用来存放数据;创建data\dbConf\mongodb.log文件存放MongoDB的日志
双击运行MongoDB服务器

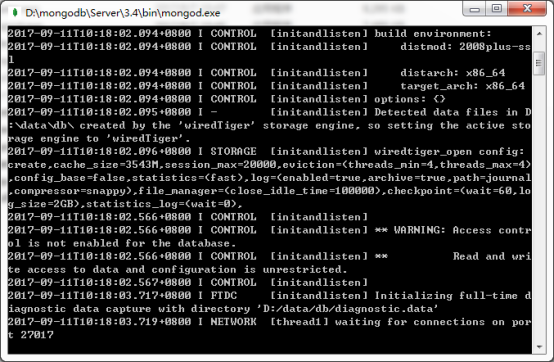
将MongoDB服务器作为Windows服务运行
执行以下命令将MongoDB服务器作为Windows服务运行:
mongod.exe --bind_ip 127.0.0.1 --logpath "D:\data\dbConf\mongodb.log" --logappend --dbpath "D:\data\db" --port 27017 --serviceName "MyServiceName" --serviceDisplayName "MyServiceName" --install
下表为mongodb启动的参数说明:
| 参数 | 描述 |
| --bind_ip | 绑定服务IP,若绑定127.0.0.1,则只能本机访问,不指定默认本地所有IP |
| --logpath | 定MongoDB日志文件,注意是指定文件不是目录 |
| --logappend | 使用追加的方式写日志 |
| --dbpath | 指定数据库路径 |
| --port | 指定服务端口号,默认端口27017 |
| --serviceName | 指定服务名称 |
| --serviceDisplayName | 指定服务名称,有多个mongodb服务时执行。 |
| --install | 指定作为一个Windows服务安装。 |
MongDB图形化工具的安装(Robomong)

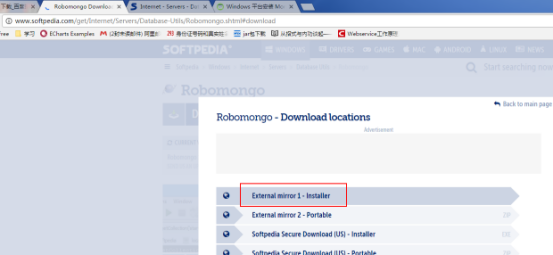
点击下一步进行安装
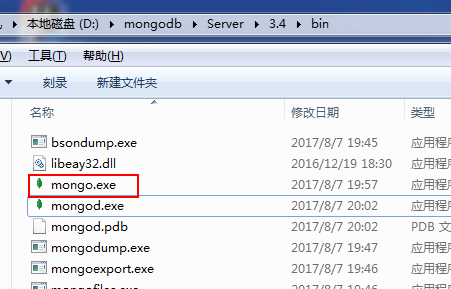
MongDB的简单实用使用
双击mongo.exe
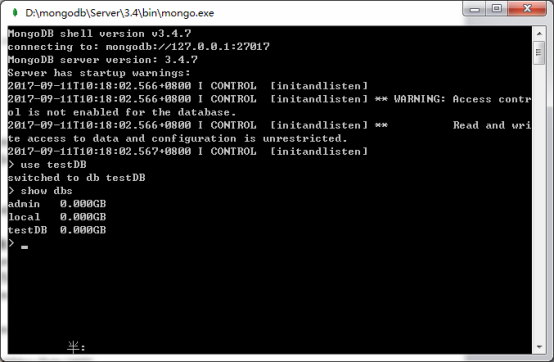
1.创建数据库
use DataBase_Name
如果数据库不存在,则创建数据库,否则切换到指定的数据库
2.查看数据库
show dbs
3.插入数据文档(有该集合则直接插入,没有该集合,则自动创建)
db.集合的名字.insert({
name:'张三',
age:27
}
)
Eg:


4.更新文档
db.集合名称.update(
{'name':'张三'},{$set:{'name':'lisi'}}
)
5.查询
db.集合的名字.find()
6.删除
删除名为张三的集合
db.col.remove({'name':'张三'})
删除第一条找到的记录
db.集合的名字.remove(DELETION_CRITERIA,1)
删除所有数据
db.集合的名字.remove({})
6.条件查询
db.集合的名字.find({likes:{$gte:100}})
类似
select * from col where likes>=100
小于---$lt
小于等于----$lte
明确的范围查询大于100小于200
db.集合的名字.find({likes:{$lt:100 ,$gt:100}})
7.limit查询
db.COLLECTION_NAME.find().limit(NUMBER)
db.集合名称.find({},{"title":1,_id:0}).limit(2)
8.排序(1升序-1降序)
db.集合名字.find().sort({KEY:1})
MongoDB语法与现有关系型数据库SQL语法比较
MongoDB语法 MySql语法
db.test.find({'name':'foobar'})<==> select * from test where name='foobar'
db.test.find() <==> select *from test
db.test.find({'ID':10}).count()<==> select count(*) from test where ID=10
db.test.find().skip(10).limit(20)<==> select * from test limit 10,20
db.test.find({'ID':{$in:[25,35,45]}})<==> select * from test where ID in (25,35,45)
db.test.find().sort({'ID':-1}) <==> select * from test order by IDdesc
db.test.distinct('name',{'ID':{$lt:20}}) <==> select distinct(name) from testwhere ID<20
db.test.group({key:{'name':true},cond:{'name':'foo'},reduce:function(obj,prev){prev.msum+=obj.marks;},initial:{msum:0}}) <==> select name,sum(marks) from testgroup by name
db.test.find('this.ID<20',{name:1}) <==> select name from test whereID<20
db.test.insert({'name':'foobar','age':25})<==>insertinto test ('name','age') values('foobar',25)
db.test.remove({}) <==> delete * from test
db.test.remove({'age':20}) <==> delete test where age=20
db.test.remove({'age':{$lt:20}}) <==> elete test where age<20
db.test.remove({'age':{$lte:20}}) <==> delete test where age<=20
db.test.remove({'age':{$gt:20}}) <==> delete test where age>20
db.test.remove({'age':{$gte:20}})<==> delete test where age>=20
db.test.remove({'age':{$ne:20}}) <==> delete test where age!=20
db.test.update({'name':'foobar'},{$set:{'age':36}})<==> update test set age=36 where name='foobar'
db.test.update({'name':'foobar'},{$inc:{'age':3}})<==> update test set age=age+3 where name='foobar'
模糊查询:$regex
db.test.find({"name":{$regex:"aaa"}})
MongoDB索引相关
查看索引:
db.getCollection('id_mapper').getIndexes()
创建索引:1表示按升序创建索引,-1表示按降序创建索引
db.getCollection('id_mapper').ensureIndex({"contract_id":1},{background: true})
注:如果在为已有数据的文档创建索引时,可以让background值为true,以使MongoDB在后台创建索引,这样的创建时就不会阻塞其他操作。但是相比而言,以阻塞方式创建索引,会使整个创建过程效率更高,但是在创建时MongoDB将无法接收其他的操作。
默认索引名称为:contract_id_1
创建复合唯一索引:
db.getCollection('id_mapper').ensureIndex({"apply_id":1,"insti_code":1},{"background":true},{"unique":true})
删除索引:删除前,一定要看好索引名称是什么
db.getCollection('id_mapper').dropIndex("contract_id_1")
db.getCollection('id_mapper').dropIndexes() 删除所有索引
双字段查询:
db.getCollection('id_mapper').find({"contract_id":"767862ce-0ca9-4673-92e5-c505d7d3686c"},{"insti_code":"1"})
有一个字段有索引就行了
创建索引后,通过程序新添加的Document会自动添加索引,已经验证过
