本文共 2456 字,大约阅读时间需要 8 分钟。
一 安装vnstat服务
1 步骤1.首先,您将需要为您的Linux版本启用EPEL存储库包
yum-yinstallepel-release
yum-yupdate
2步骤2.安装VnStat。
使用yum命令行实用程序在您的系统上安装vnstat包:
yum-yinstallvnstat
3 启动服务并设置开机启动
systemctl start vnstat
systemctl enable vnstat
4 检查命令是否安装成功
vnstat--help
vnstat -i ens33 (注意看自己的网卡 通过ip add查看)
二 安装LAMP环境
1关闭firewall:
systemctl stop firewalld.service #停止firewall
systemctl disable firewalld.service #禁止firewall开机启动
2关闭SELINUX
vi /etc/selinux/config
#SELINUX=enforcing #注释掉
#SELINUXTYPE=targeted #注释掉
SELINUX=disabled #增加
:wq! #保存退出
setenforce 0 #使配置立即生效
3安装Apache
yum install httpd #根据提示,输入Y安装即可成功安装
systemctl start httpd.service #启动apache
systemctl stop httpd.service #停止apache
systemctl restart httpd.service #重启apache
systemctl enable httpd.service #设置apache开机启动
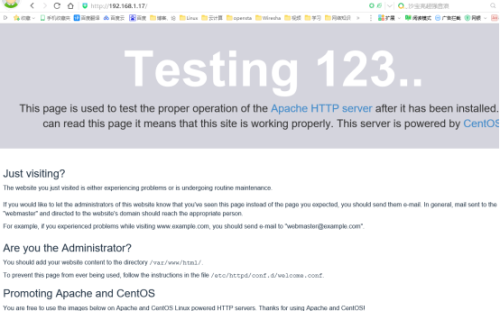
在客户端浏览器中打开服务器IP地址,会出现下面的界面,说明apache安装成功
4安装MariaDB
CentOS 7.0中,已经使用MariaDB替代了MySQL数据库
1、安装MariaDB
yum install mariadb mariadb-server #询问是否要安装,输入Y即可自动安装,直到安装完成
systemctl start mariadb.service #启动MariaDB
systemctl stop mariadb.service #停止MariaDB
systemctl restart mariadb.service #重启MariaDB
systemctl enable mariadb.service #设置开机启动
cp /usr/share/mysql/my-huge.cnf /etc/my.cnf #拷贝配置文件(注意:如果/etc目录下面默认有一个my.cnf,直接覆盖即可)
2、为root账户设置密码
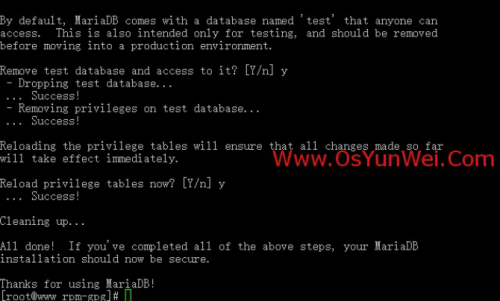
mysql_secure_installation
回车,根据提示输入Y
输入2次密码,回车
根据提示一路输入Y
最后出现:Thanks for using MySQL!
MySql密码设置完成,重新启动MySQL:
systemctl restart mariadb.service #重启MariaDB
5安装PHP
1、安装php
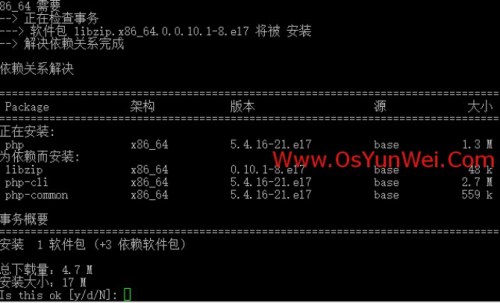
yum install php #根据提示输入Y直到安装完成
2、安装PHP组件,使PHP支持 MariaDB
yum install php-mysql php-gd libjpeg* php-ldap php-odbc php-pear php-xml php-xmlrpc php-mbstring php-bcmath php-mhash
#这里选择以上安装包进行安装,根据提示输入Y回车
systemctl restart mariadb.service #重启MariaDB
systemctl restart httpd.service #重启apache
三 配置vnstat图像界面
1 添加计划任务定时更新数据:
cat >> /etc/cron.d/vncstat <
*/5 * * * * root vnstat -u -i eth0
EOF
2安装vnStat PHP frontend使用web界面管理:
cd /var/www/html
wget http://www.sqweek.com/sqweek/files/vnstat_php_frontend-1.5.1.tar.gz
tar zxvf vnstat_php_frontend-1.5.1.tar.gz
mv vnstat_php_frontend-1.5.1 vnstat
3定时生成php接口数据 :
cat >> /etc/cron.d/vncstat <
*/5 * * * * root vnstat --dumpdb -i lo > /var/www/html/vnstat/dumps/vnstat_dump_lo
EOF
4 修改配置文件
注意将网卡改成你实际的网卡
vi /var/www/html/vnstat/config.php
$language = "en";
$iface_list = array("ens33", "sixxs");
$iface_title["eth0"] = "Public Interface";
$vnstat_bin = "/usr/bin/vnstat";
1 重启服务:
systemctl restart mariadb.service #重启MariaDB
systemctl restart httpd.service #重启apache
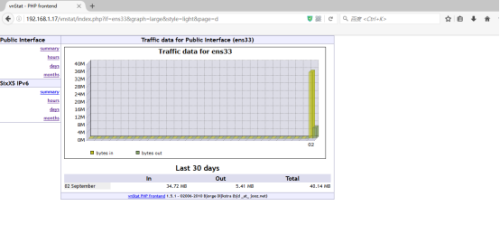
2 打开网页,输入http://192.168.1.17/vnstat/
备注:
1 借鉴网址:
2 以上操作方法只是基本的部署方案,实际使用还需多多研究配置和配置文件;以上我也是借鉴的别人的总结,可能存在一些问题,谢谢!
转载地址:https://blog.csdn.net/weixin_33045961/article/details/114489765 如侵犯您的版权,请留言回复原文章的地址,我们会给您删除此文章,给您带来不便请您谅解!
发表评论
最新留言
关于作者
