Android 9 Notification 创建显示流程 更改通知显示文本颜色
 4.通知的管理以及布局的解析都是在NotificationEntryManager类中。(省略) ExpandableNotificationRow具体通知的显示 NotificationShelf将通知变化成图标,在快捷面板拉伸时显示。 FooterView 显示“通知管理”和“全部清除”按钮
  NotificationEntryManagerupdateNotification -> updateNotificationInternal() -> inflateViews()->updateNotification()
发布日期:2021-06-29 01:27:25
浏览次数:2
分类:技术文章
本文共 3486 字,大约阅读时间需要 11 分钟。
1、在应用中创建Notification 这里是创建并发送一个通知,
Notification notification2 = null; CharSequence aVeryLongString="hello"; // 如果当前Android的版本相比Android O,一样或者版本更高,就建通知渠道(Notification Channels ) if (Build.VERSION.SDK_INT >= Build.VERSION_CODES.O) { //判断API //1.0 建渠道 NotificationChannel mChannel = new NotificationChannel(id, name, NotificationManager.IMPORTANCE_LOW); //2.0 把通知渠道通过createNotificationChannel( )方法给- // -状态栏通知的管理类 NotificationManager manager.createNotificationChannel(mChannel); //3.0 Notification这时候可以正常工作了 CharSequence cs="hello"; NotificationCompat.BigTextStyle bs = new NotificationCompat.BigTextStyle().bigText(cs); notification2 = new NotificationCompat.Builder(this, id) .setStyle(bs) .setContentTitle("这是一个内容标题2")//设置通知栏标题 .setContentText("这是一个内容文本2") //设置通知栏显示内容 .setWhen(System.currentTimeMillis())//通知产生的时间。 .setSmallIcon(R.mipmap.ic_launcher)//设置通知小ICON .setLargeIcon(BitmapFactory.decodeResource(getResources() , R.mipmap.ic_launcher))//设置通知大ICON .build(); } manager.notify(1, notification2); 2、systemUI 中显示通知
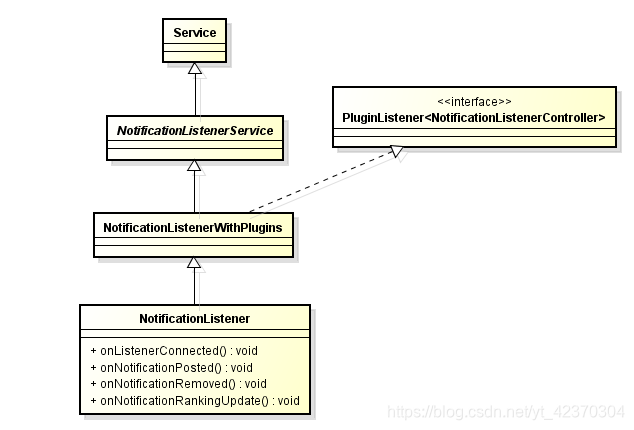
1.SystemUIFactory 创建NotificationListener,它是一个服务,用于plugin监听和通知的监听 2.如果有通知会onNotificationPosted 这里,分两类
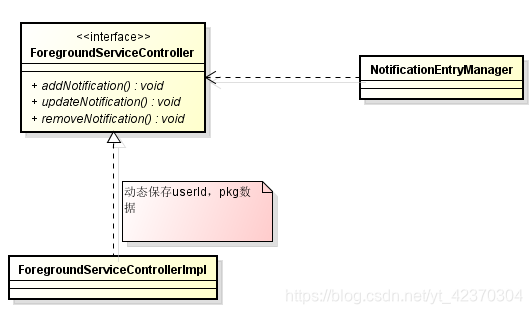
1) mEntryManager.updateNotification(sbn, rankingMap);更通知 2) mEntryManager.addNotification(sbn, rankingMap);添加通知 3.SystemUI用 Dependency 创建ForegroundServiceControllerImpl对象,这是以个控制器,真正的使用是在 4.通知的管理以及布局的解析都是在NotificationEntryManager类中。(省略) ExpandableNotificationRow具体通知的显示 NotificationShelf将通知变化成图标,在快捷面板拉伸时显示。 FooterView 显示“通知管理”和“全部清除”按钮 NotificationEntryManagerupdateNotification -> updateNotificationInternal() -> inflateViews()->updateNotification() private void inflateViews(NotificationData.Entry entry, ViewGroup parent) { PackageManager pmUser = StatusBar.getPackageManagerForUser(mContext, entry.notification.getUser().getIdentifier()); final StatusBarNotification sbn = entry.notification; if (entry.row != null) { entry.reset(); updateNotification(entry, pmUser, sbn, entry.row); } else { new RowInflaterTask().inflate(mContext, parent, entry, row -> { bindRow(entry, pmUser, sbn, row); updateNotification(entry, pmUser, sbn, row); }); } } 接下来会调到这里inflateNotificationViews解析布局。最终会计算出显示的文本颜色。
public void updateNotification(NotificationData.Entry entry) { mEntry = entry; mStatusBarNotification = entry.notification; mNotificationInflater.inflateNotificationViews(); cacheIsSystemNotification(); } 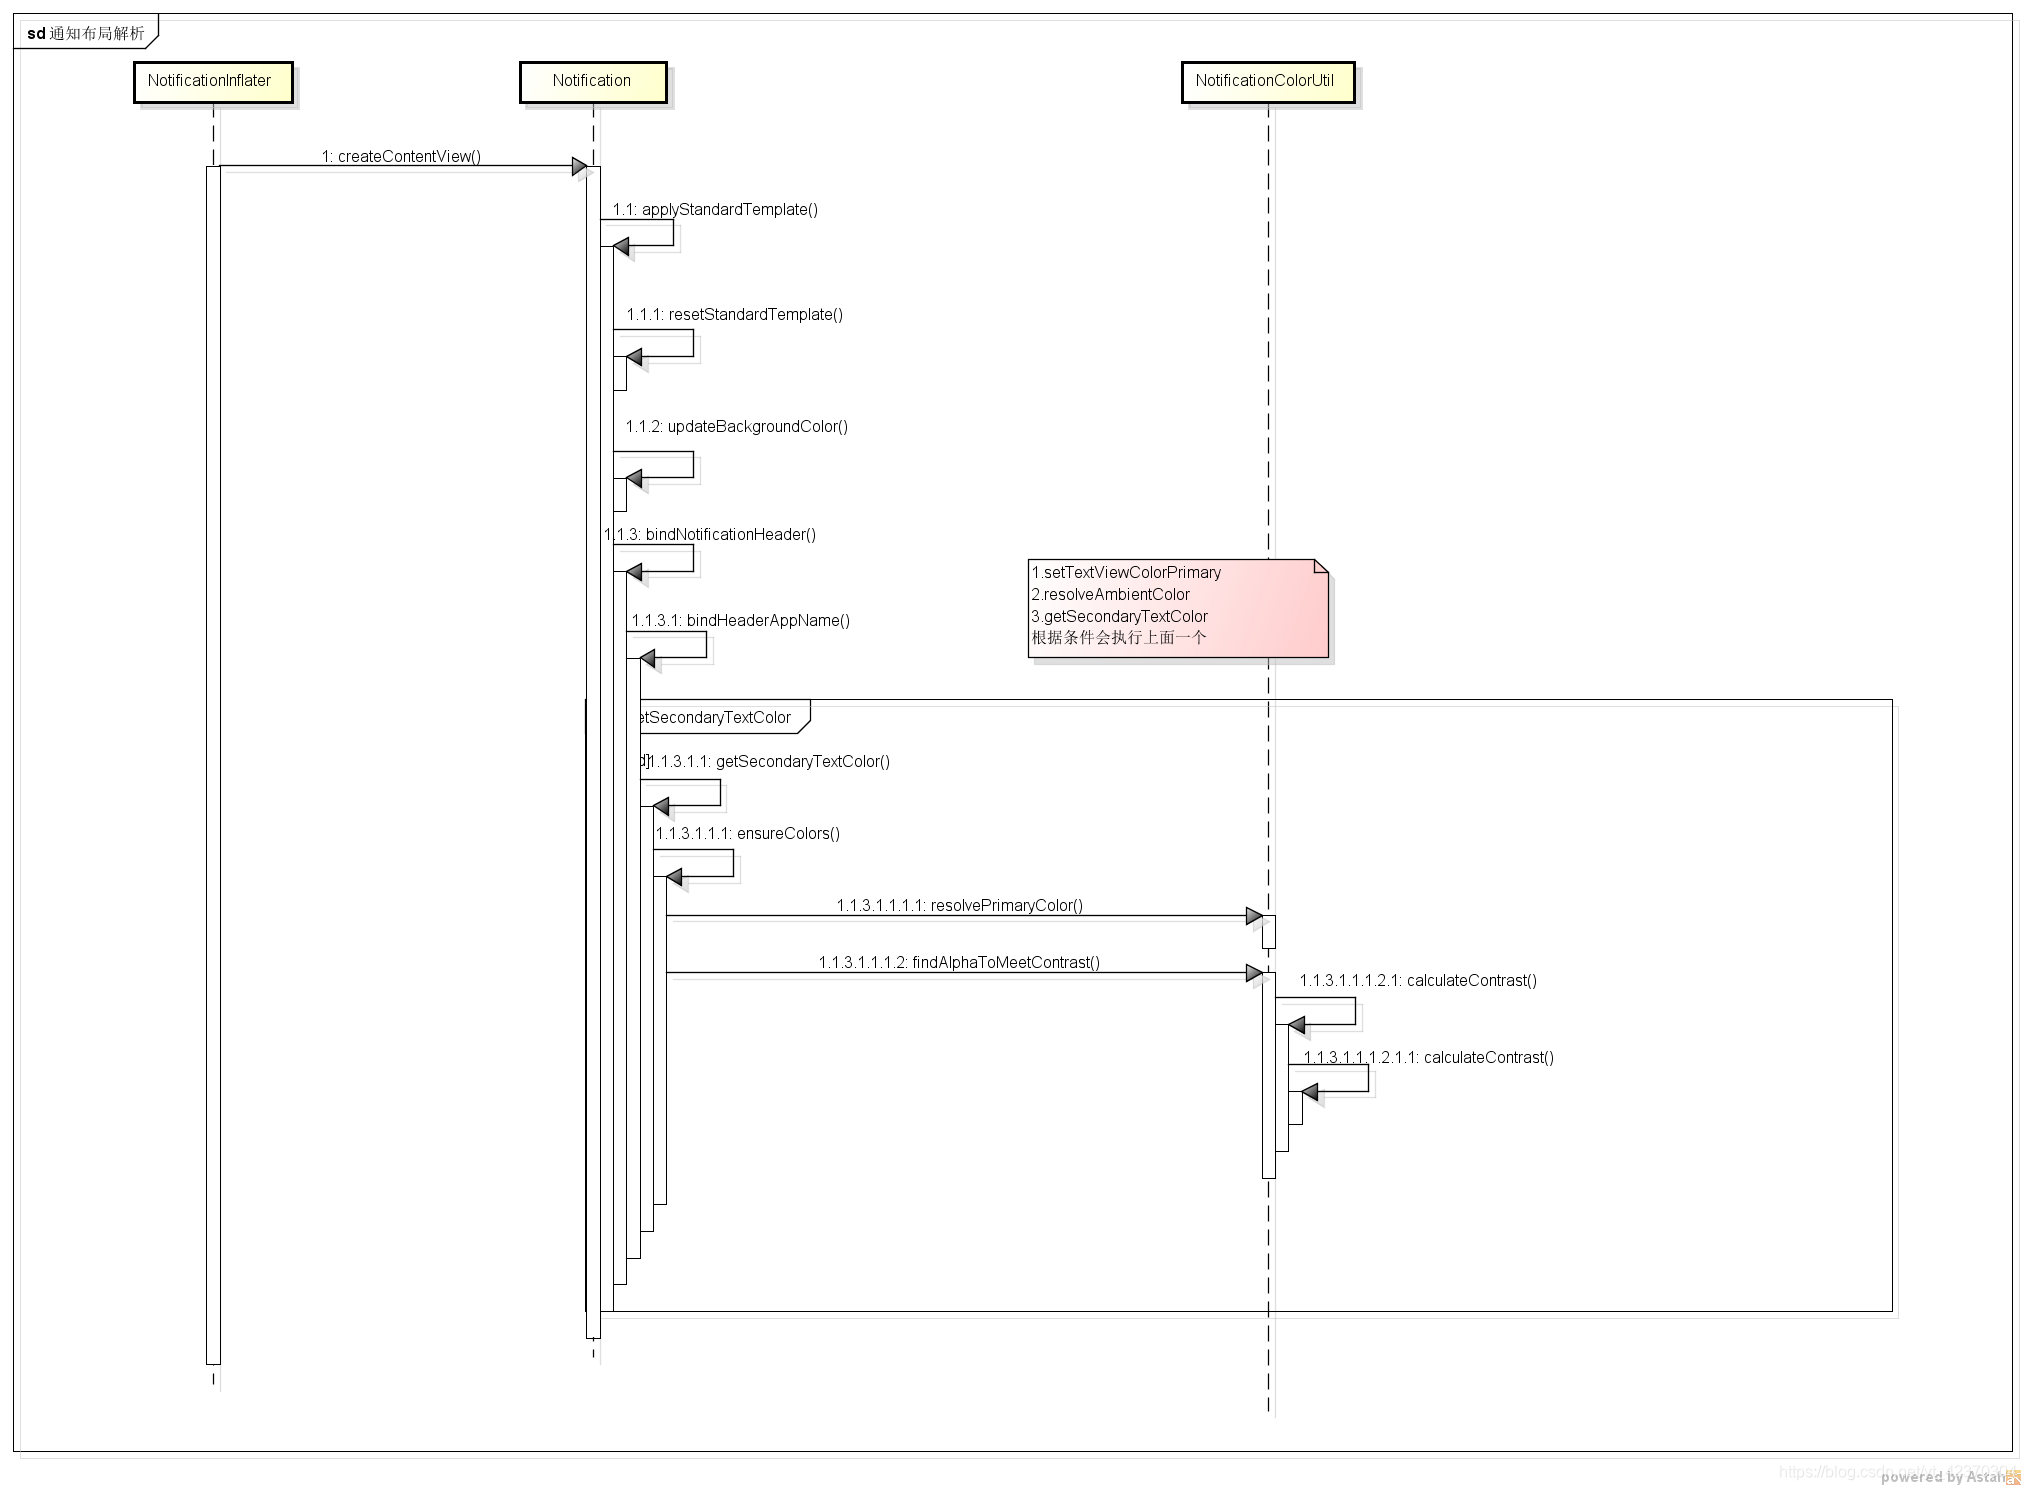
@color/primary_text_default_material_light //大标题显示的颜色 内容@color/primary_text_default_material_dark @color/primary_text_default_material_light // 小文本显示的颜色 时间- 0.38
@color/primary_text_default_material_dark @color/primary_text_default_material_light #a3202124 ```
转载地址:https://blog.csdn.net/yt_42370304/article/details/117784519 如侵犯您的版权,请留言回复原文章的地址,我们会给您删除此文章,给您带来不便请您谅解!
发表评论
最新留言
哈哈,博客排版真的漂亮呢~
[***.90.31.176]2024年04月25日 03时35分34秒
关于作者

喝酒易醉,品茶养心,人生如梦,品茶悟道,何以解忧?唯有杜康!
-- 愿君每日到此一游!
推荐文章
python爬取网站数据四种姿势,你值得拥有
2019-04-29
python爬虫JS逆向:X咕视频密码与指纹加密分析
2019-04-29
python爬取抖音短视频详细教程(附带源码)
2019-04-29
Python爬取腾讯动漫全站漫画详细教程(附带源码)
2019-04-29
python实现电商平台秒杀商品脚本程序
2019-04-29
520快乐~用python实现520祝福弹窗
2019-04-29
Python制作属于自己的有声小说
2019-04-29
Python制作专属有声小说(调用百度语音合成接口)
2019-04-29
用Python爬取淘宝2000款T T
2019-04-29
17行python代码爬取堆糖网所有MeiNv图片
2019-04-29
Python爬取15万条《我是余欢水》弹幕,还原一个丧到极致的中年人生
2019-04-29
快来pick你喜欢的小姐姐吧,Python爬取青春有你2和创造营2020小姐姐数据
2019-04-29
使用python简单的制作贪吃蛇小游戏
2019-04-29
使用python爬取英雄联盟官方英雄皮肤图片
2019-04-29
Python数据分析:根据大众点评数据挑选店铺地址
2019-04-29
Python实现超简单【抖音】无水印视频批量下载
2019-04-29
23行python代码爬取知乎全部回答
2019-04-29
Python 使用 PyQt5 开发的关机小工具分享
2019-04-29
Python 提取音乐频谱并可视化
2019-04-29
使用 Python 为女神挑选口红
2019-04-29
白红宇的个人博客 - 记录点点滴滴的事 - 您是第 309304812 位访客
访问时间: 2024-04-30 09:35:34
访问IP: 18.118.9.146
Copyright © 2020 - 2023 blog.css8.cn 京ICP备2021015314号-1
手机版