SSH项目整合:无障碍整合Struts2+Spring+Hibernate(详解+案例+源代码)


发布日期:2021-06-29 15:02:20
浏览次数:3
分类:技术文章
本文共 9032 字,大约阅读时间需要 30 分钟。
SSH整合方式一:无障碍整合
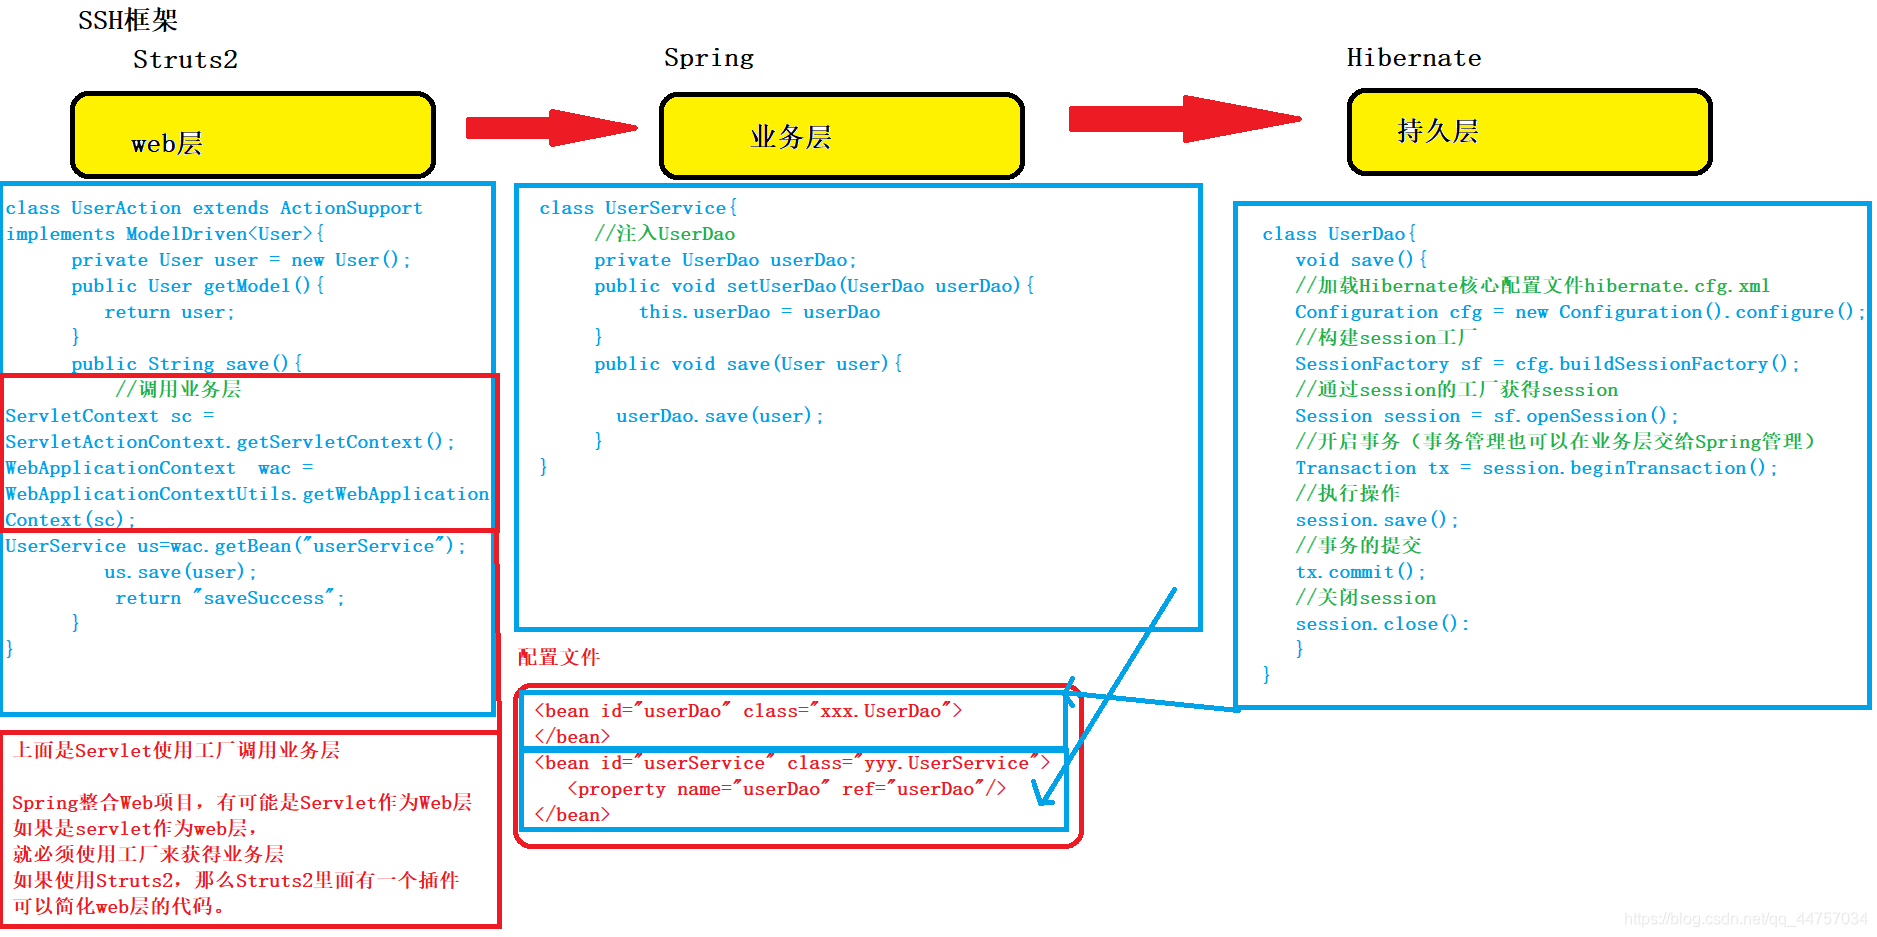
一、SSH框架的简述
1、SSH框架整合开发原理图
二、SSH框架的整合
1、第一步:创建web项目,引入jar包
(1)Struts2的jar包:
- jar包路径:
struts-2.3.24-all\struts-2.3.24\apps\struts2-blank\WEB-INF\lib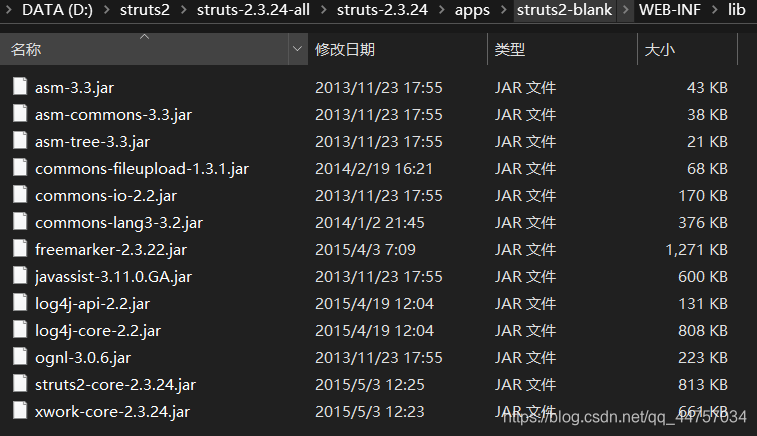
- Struts2当中有一些包需要了解的: struts2-convention-plugin-2.3.24.jar -------Struts2的注解开发包。 struts2-json-plugin-2.3.24.jar -----------------Struts2的整合AJAX的开发包 struts2-spring-plugin-2.3.24.jar---------------Struts2和Spring整合的插件包
(2)Hibernate的jar包:
- a、Hibernate的开发的必须的包:
- jar包路径:
hibernate-release-5.0.7.Final\lib\required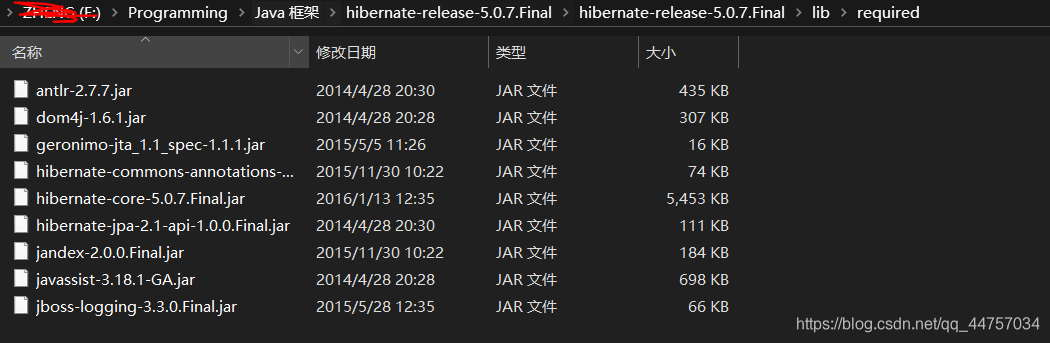
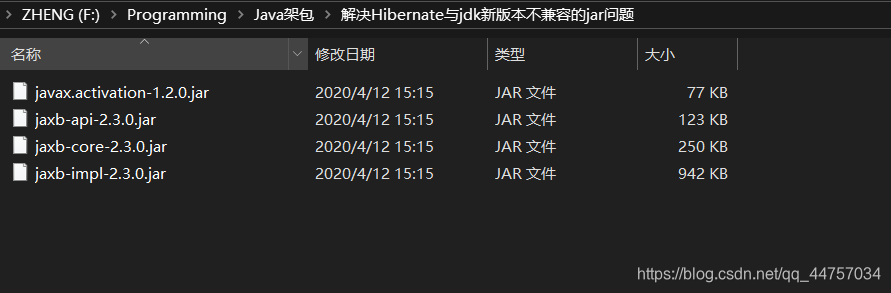
- b、hibernate和新版jdk可能有一些不兼容,引入4个兼容jar 下载链接:
- c、引入mysql驱动

- d、日志记录jar:

- e、使用C3P0链接池 jar路径:
\hibernate-release-5.0.7.Final\hibernate-release-5.0.7.Final\lib\optional\c3p0
- f、注意:Struts2和Hibernate都引入了一个相同的jar包(javassist包)。需要删除一个
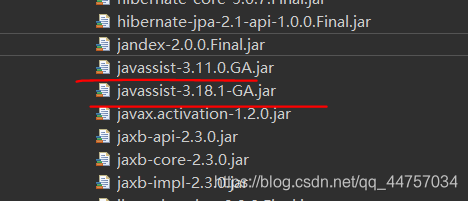 删除版本低的
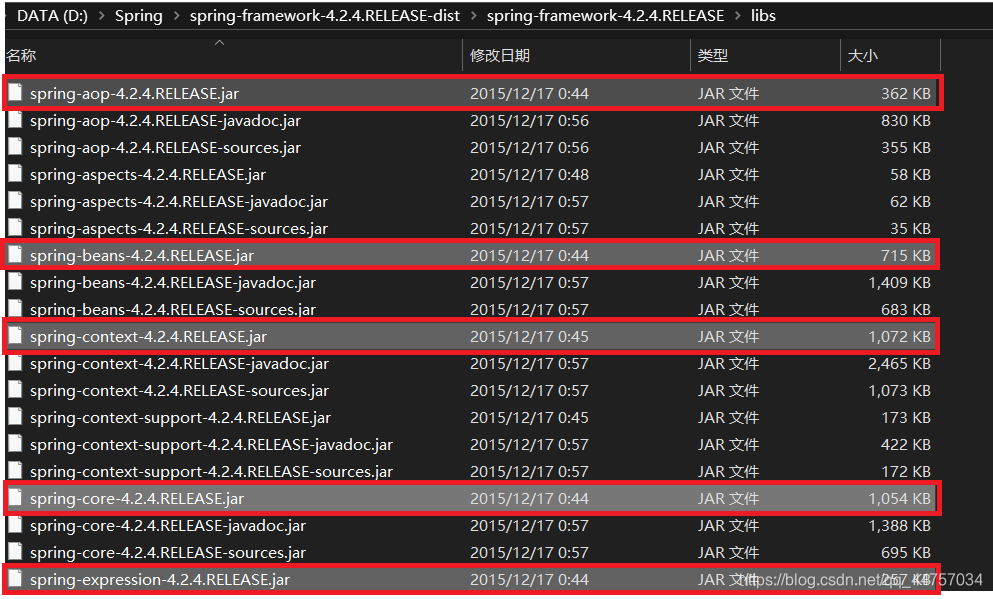
(3)Spring的jar包:
-
IOC的开发:
 引入Spring的日志文件
-
AOP的开发:

-
JDBC模板的开发:

-
只是做事务管理开发

-
整合web项目的开发:

-
整合单元测试的开发:

-
整合Hibernate的开发:
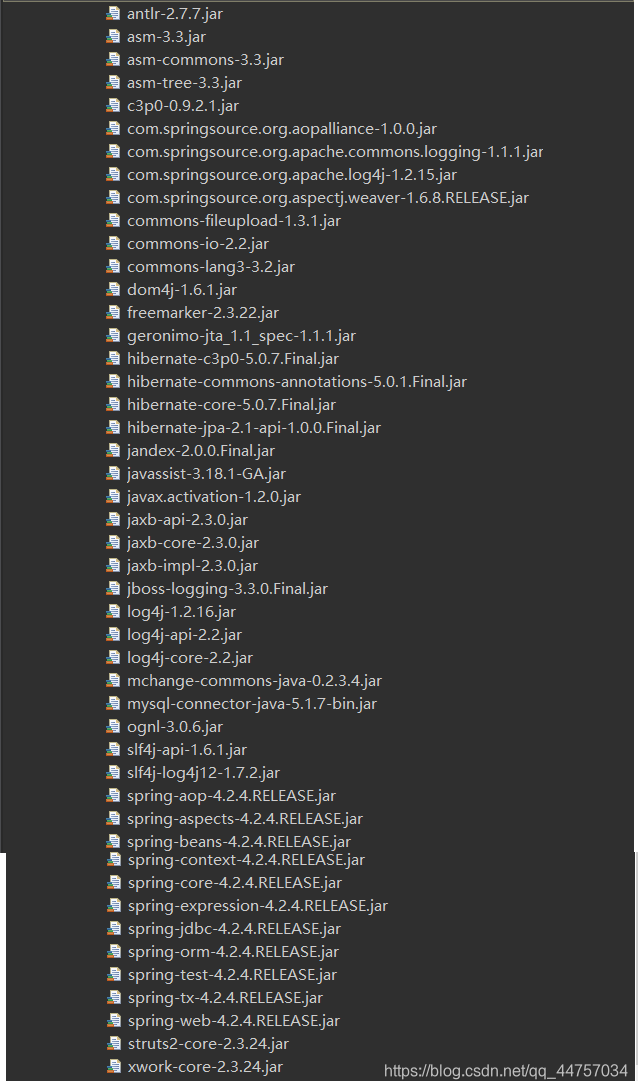
(4)全部的jar
2、第二步:引入配置文件
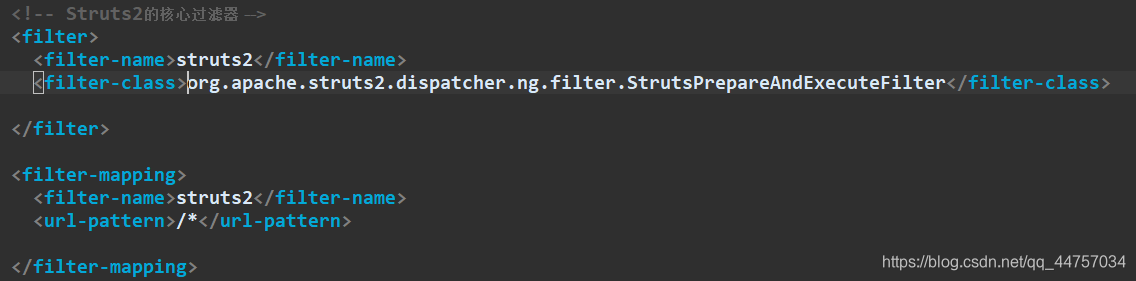
(1)Struts2的配置文件
- web.xml: web.xml当中配置核心过滤器
- struts.xml: 在src下创建struts.xml的配置文件
(2)Hibernate的配置文件
- 核心配置:hibernate.cfg.xml 在src下创建hibernate.cfg.xml
com.mysql.jdbc.Driver jdbc:mysql:///ssh1 root root org.hibernate.dialect.MySQLDialect true true update org.hibernate.connection.C3P0ConnectionProvider 5 20 120 3000
- 映射文件:
(3)Spring的配置文件
- web.xml 在web.xml当中配置核心监听器,启动的时候加载Spring的配置文件,创建工厂,将工厂放入到ServletCont ext当中

- applicationContext.xml: 在src创建applicationContext.xml
- 日志记录: 在src下创建log4j.properties
### direct log messages to stdout ###log4j.appender.stdout=org.apache.log4j.ConsoleAppenderlog4j.appender.stdout.Target=System.errlog4j.appender.stdout.layout=org.apache.log4j.PatternLayoutlog4j.appender.stdout.layout.ConversionPattern=%d{ ABSOLUTE} %5p %c{ 1}:%L - %m%n### direct messages to file mylog.log ###log4j.appender.file=org.apache.log4j.FileAppenderlog4j.appender.file.File=c\:mylog.loglog4j.appender.file.layout=org.apache.log4j.PatternLayoutlog4j.appender.file.layout.ConversionPattern=%d{ ABSOLUTE} %5p %c{ 1}:%L - %m%n### set log levels - for more verbose logging change 'info' to 'debug' #### error warn info debug tracelog4j.rootLogger= info, stdout 3、第三步:创建包结构
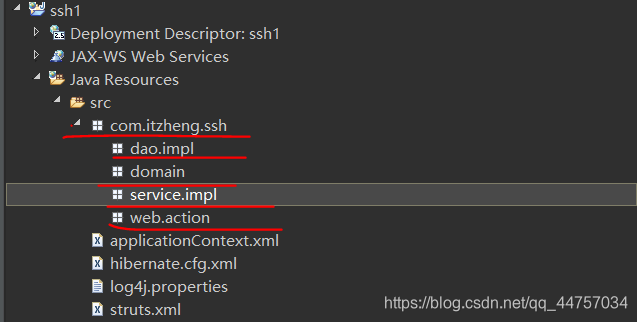
4、第四步:创建相关的类
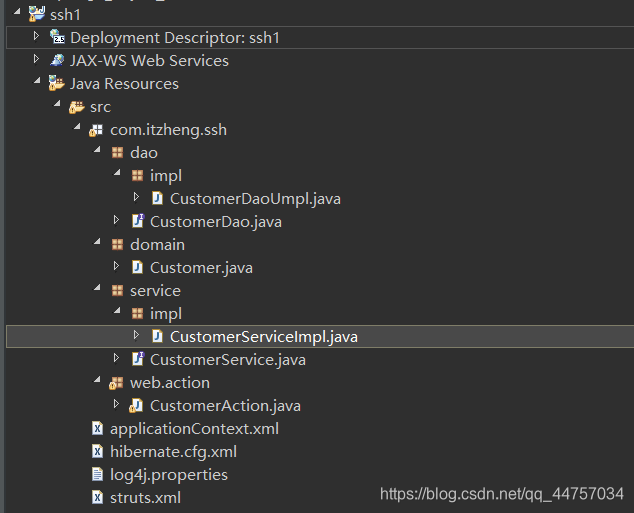
(1)创建实例对象Customer对象
在domain包下先创建
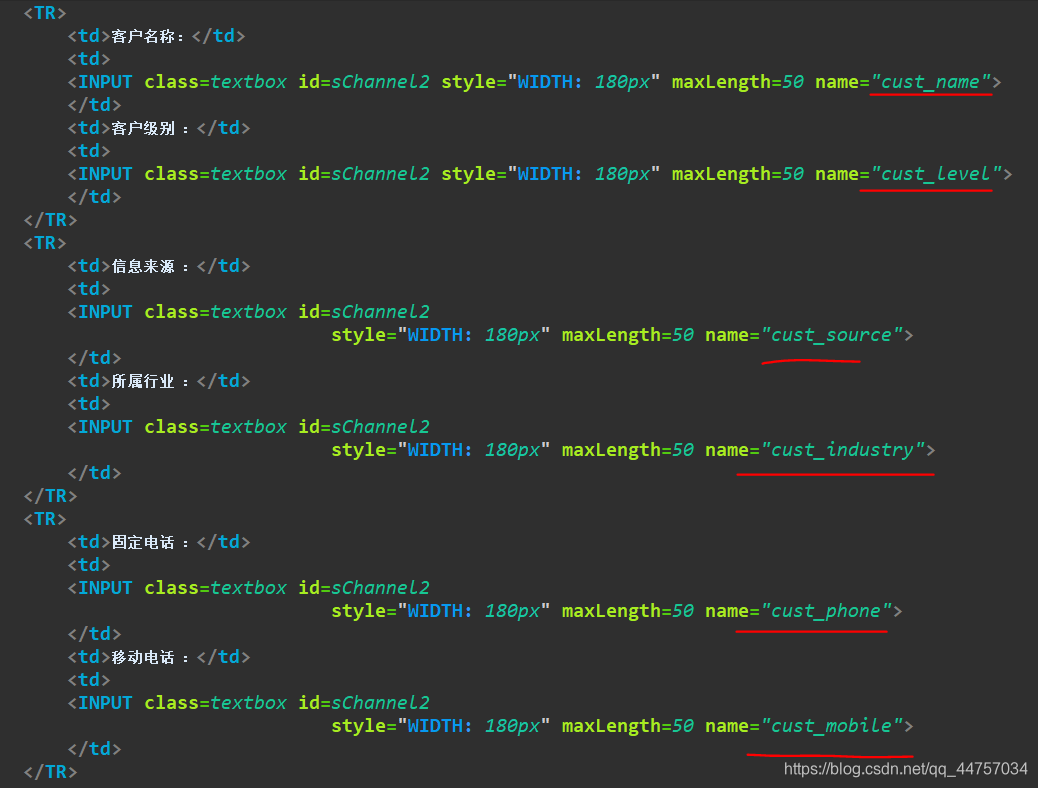
package com.itzheng.ssh.domain;/* * 客户管理的实体类、 CREATE TABLE `cst_customer` ( `cust_id` bigint(32) NOT NULL AUTO_INCREMENT COMMENT '客户编号(主键)', `cust_name` varchar(32) NOT NULL COMMENT '客户名称(公司名称)', `cust_source` varchar(32) DEFAULT NULL COMMENT '客户信息来源', `cust_industry` varchar(32) DEFAULT NULL COMMENT '客户所属行业', `cust_level` varchar(32) DEFAULT NULL COMMENT '客户级别', `cust_phone` varchar(64) DEFAULT NULL COMMENT '固定电话', `cust_mobile` varchar(16) DEFAULT NULL COMMENT '移动电话', PRIMARY KEY (`cust_id`)) ENGINE=InnoDB AUTO_INCREMENT=1 DEFAULT CHARSET=utf8; */public class Customer { private Long cust_id; private String cust_name; private String cust_source; private String cust_industry; private String cust_level; private String cust_phone; private String cust_mobile; public Long getCust_id() { return cust_id; } public void setCust_id(Long cust_id) { this.cust_id = cust_id; } public String getCust_name() { return cust_name; } public void setCust_name(String cust_name) { this.cust_name = cust_name; } public String getCust_source() { return cust_source; } public void setCust_source(String cust_source) { this.cust_source = cust_source; } public String getCust_industry() { return cust_industry; } public void setCust_industry(String cust_industry) { this.cust_industry = cust_industry; } public String getCust_level() { return cust_level; } public void setCust_level(String cust_level) { this.cust_level = cust_level; } public String getCust_phone() { return cust_phone; } public void setCust_phone(String cust_phone) { this.cust_phone = cust_phone; } public String getCust_mobile() { return cust_mobile; } public void setCust_mobile(String cust_mobile) { this.cust_mobile = cust_mobile; } public Customer() { // TODO Auto-generated constructor stub } public Customer(Long cust_id, String cust_name, String cust_source, String cust_industry, String cust_level, String cust_phone, String cust_mobile) { super(); this.cust_id = cust_id; this.cust_name = cust_name; this.cust_source = cust_source; this.cust_industry = cust_industry; this.cust_level = cust_level; this.cust_phone = cust_phone; this.cust_mobile = cust_mobile; } @Override public String toString() { return "Customer [cust_id=" + cust_id + ", cust_name=" + cust_name + ", cust_source=" + cust_source + ", cust_industry=" + cust_industry + ", cust_level=" + cust_level + ", cust_phone=" + cust_phone + ", cust_mobile=" + cust_mobile + "]"; }} (2)在web.action当中创建一个action
package com.itzheng.ssh.web.action;import com.itzheng.ssh.domain.Customer;import com.opensymphony.xwork2.ActionSupport;import com.opensymphony.xwork2.ModelDriven;/* * 客户管理的action的类 */public class CustomerAction extends ActionSupport implements ModelDriven{ //模型驱动使用的对象 private Customer customer = new Customer(); @Override public Customer getModel() { // TODO Auto-generated method stub return customer; }}
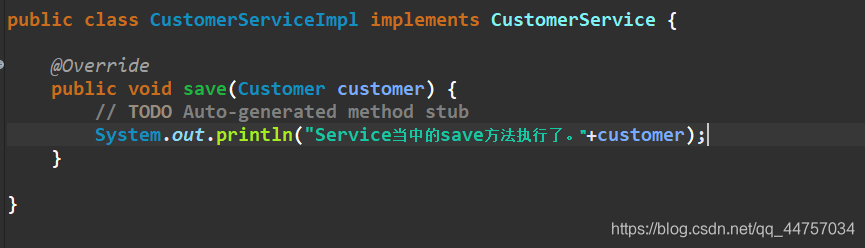
(3)创建CustomerService接口以及CustomerServiceImpl实现类(空的即可)
package com.itzheng.ssh.service;/* * 客户管理的业务层的接口 */public interface CustomerService { } package com.itzheng.ssh.service.impl;import com.itzheng.ssh.service.CustomerService;public class CustomerServiceImpl implements CustomerService { } (4)创建CustomerDao接口以及CustomerDaoImpl实现类(空的即可)
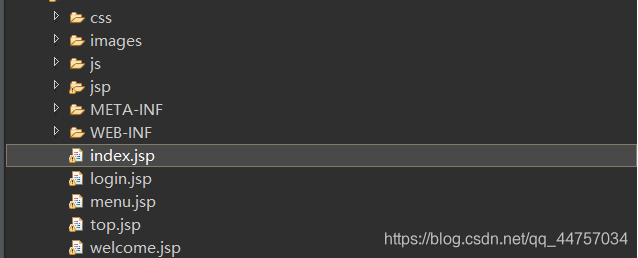
package com.itzheng.ssh.dao;/* * 客户管理DAO层的接口 */public interface CustomerDao { } package com.itzheng.ssh.dao.impl;import com.itzheng.ssh.dao.CustomerDao;/* * 客户管理的DAO层的实现类 */public class CustomerDaoUmpl implements CustomerDao { } 5、第五步:引入相关的页面
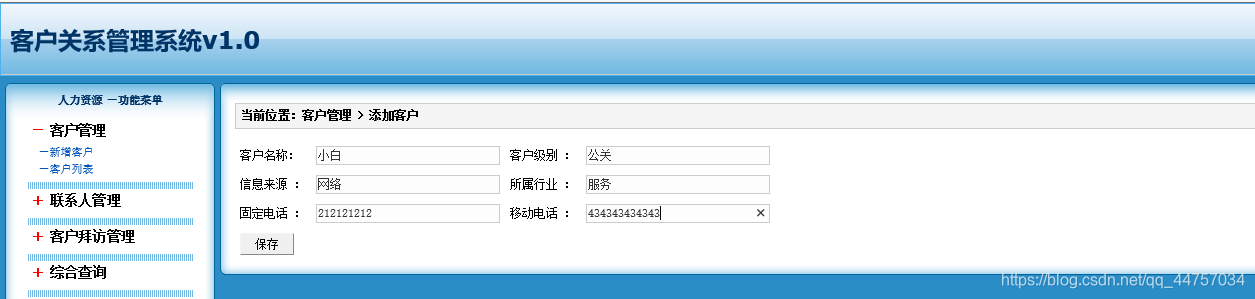
这里引入的是提前写好的jsp页面
页面下载链接: 6、第六步:修改jsp页面
(1)修改menu.jsp

7、第七步:Spring整合Struts2方式一:Action由Struts2自身来创建的。
修改add.jsp页面,提交数据到action
(1)编写action
package com.itzheng.ssh.web.action;import com.itzheng.ssh.domain.Customer;import com.opensymphony.xwork2.ActionSupport;import com.opensymphony.xwork2.ModelDriven;/* * 客户管理的action的类 */public class CustomerAction extends ActionSupport implements ModelDriven{ //模型驱动使用的对象 private Customer customer = new Customer(); @Override public Customer getModel() { // TODO Auto-generated method stub return customer; } /* * 保存客户的方法:save */ public String save() { System.out.println("Action当中的save方法执行类。。。。。"); return NONE; }}
(2) 设置add.jsp表单当中属性

(3) 配置Action
在struts.xml当中配置
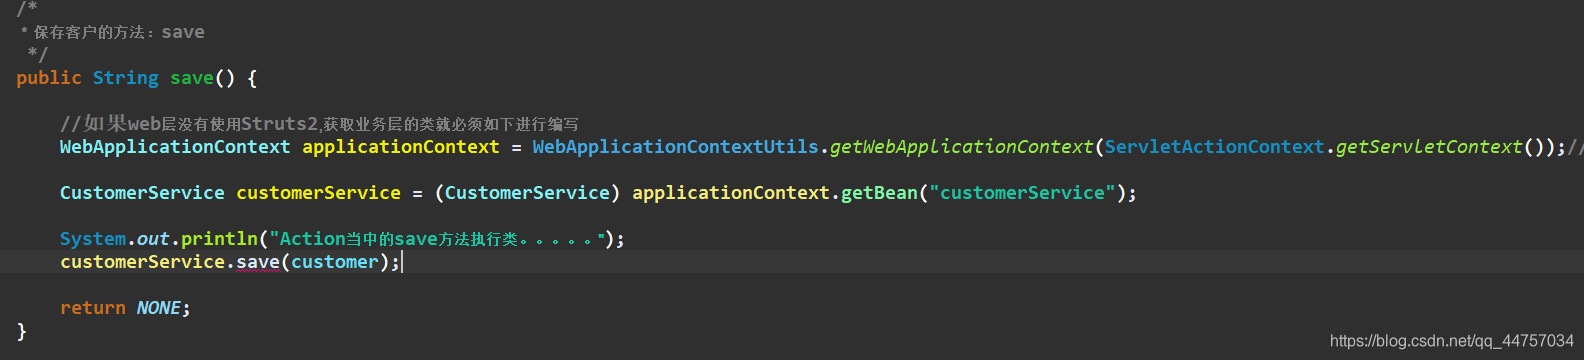
(4) 在Action当中引入service
- a、传统方式:
- b、进行Spring和Struts2的整合: 引入
struts-spring-plugin.jar这个jar包 下面是包名称和包路径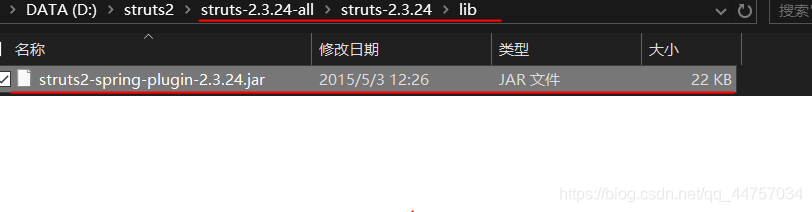 在这个插件包当有如下的一段配置:以下是jar当中配置文件位置
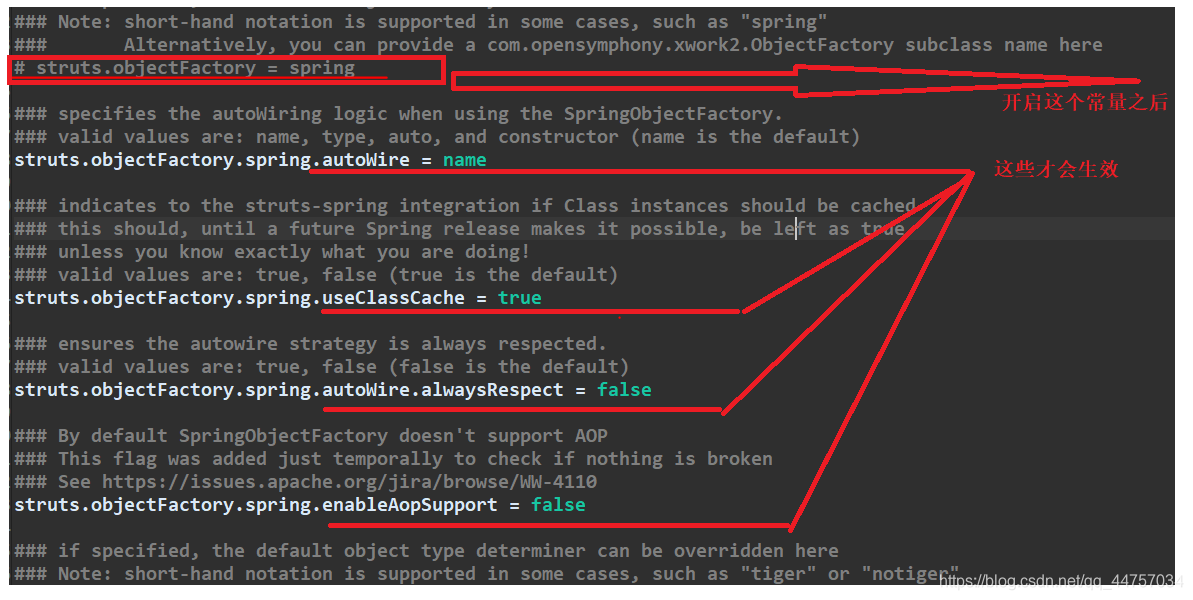
 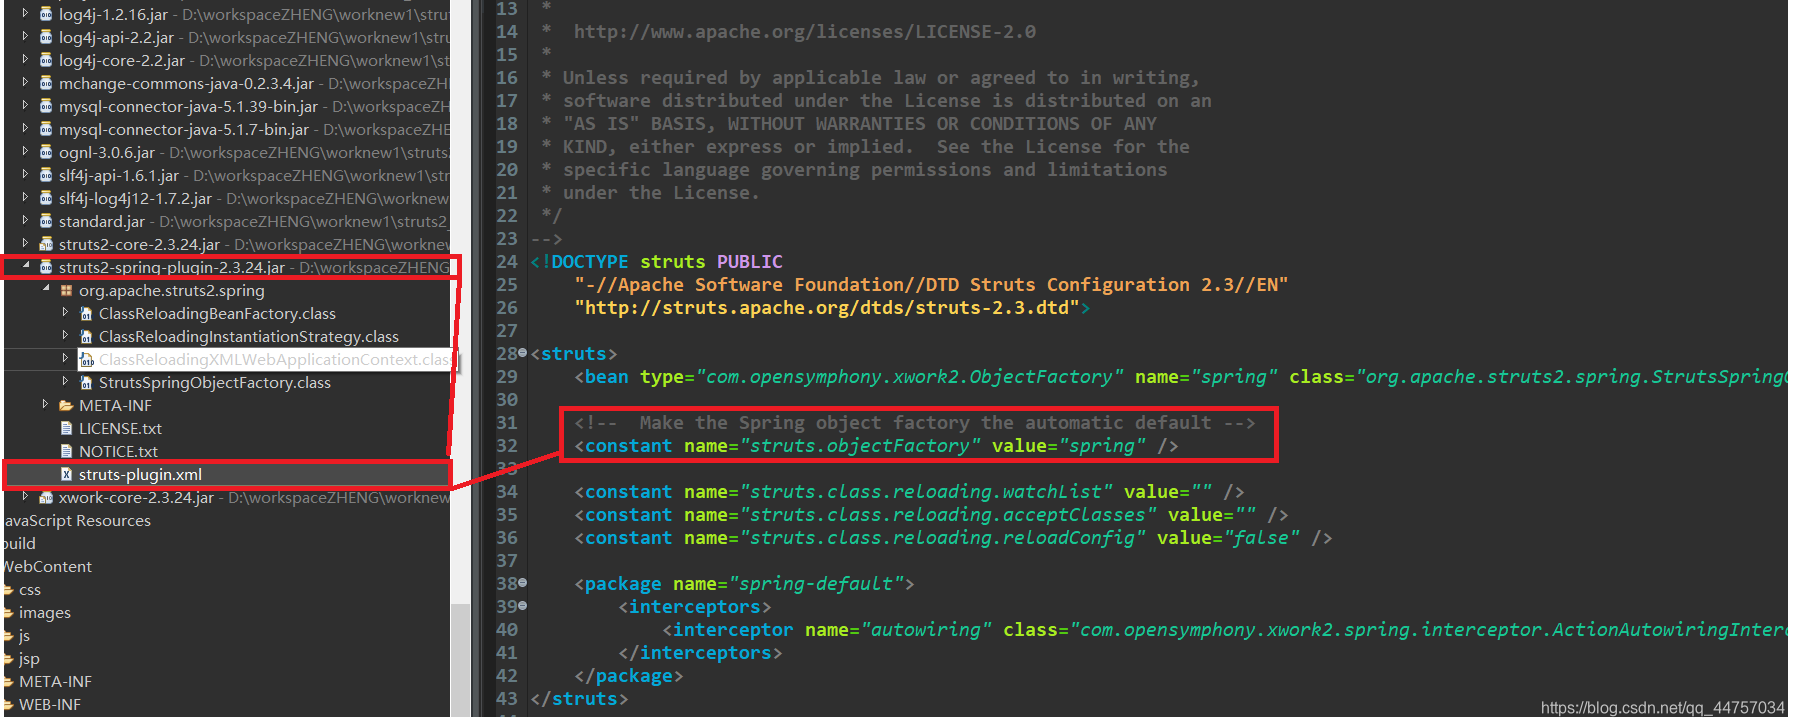 在struts-plugin.xml当中有这一段配置
以上的一段配置的作用是开启一个常量:在Struts中只有开启了这个常量就会引发下面的一些常量生效。
struts.objectFactory.Spring.autoWire = name:自动注入 - struts.objectFactory.Spring.autoWire = name:可以让Action自动完成Service的注入
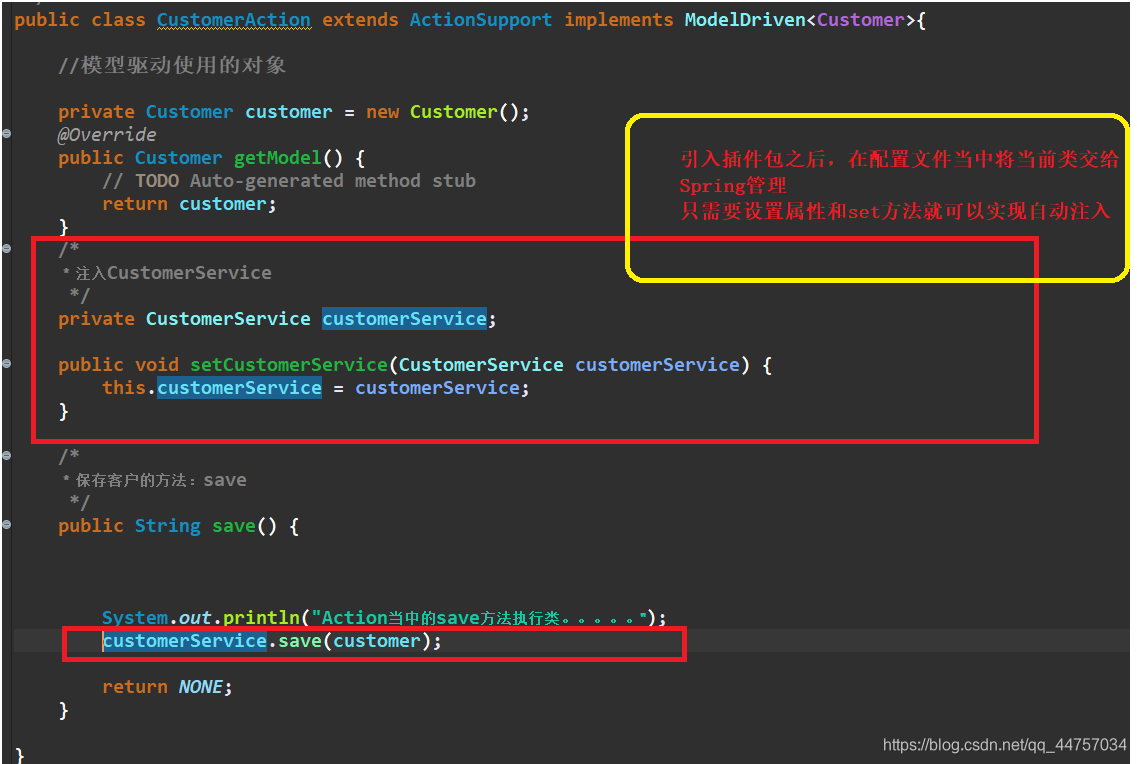
- c、将Service交给Spring管理 在applicationContext.xml当中

- d、Action注入Service在引入插件包之后,在配置文件当中将当前类交给Spring管理,然后只需要设置对应接口的的属性声明和set方法就可以实现属性的自动注入
- d、测试:
8、第八步:Spring整合Struts2方式二:Action交给Spring管理(推荐)Spring管理的类可以进行AOP开发
(1)引入插件包
引入struts-spring-pligin.jar
(2)将Action交给Spring,在applicationContext.xml当中

(3)在struts.xml的配置文件当中配置Action,要让Struts使用Spring配置的Action
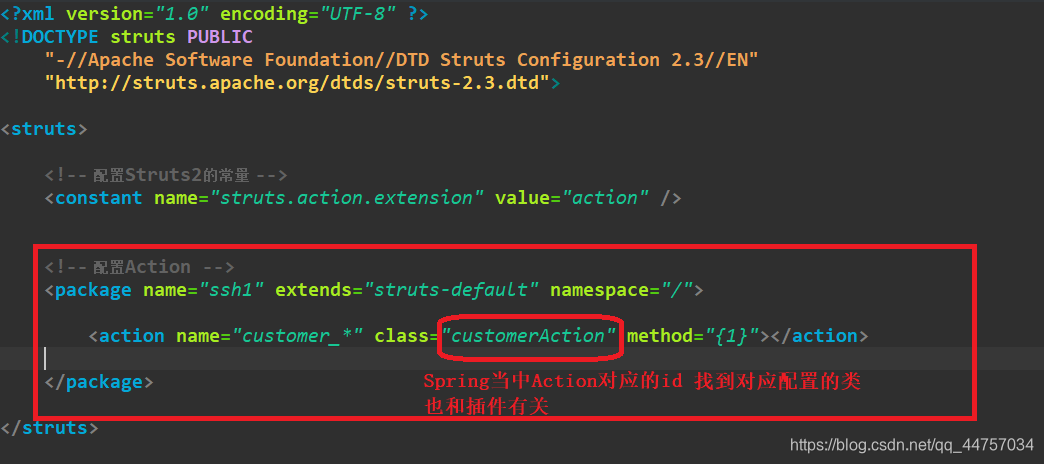
(4)注意:
- 需要配置Action为多例的;在applicationContext.xml当中

- 需要手动注入Service在applicationContext.xml当中

(5)测试:
9、第九步:Service调用DAO
(1)将DAO交给Spring管理
配置dao在applicationContext.xml当中
(2)在service注入DAO
- 在CustomerServiceImpl类当中设置CustomerDao属性和set方法

- 在applicationContext.xml当中将customerDao注入到CustomerServiceImpl的set方法当中

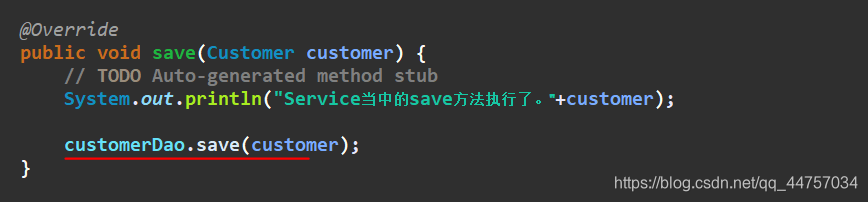
- 在CustomerServiceImpl类的save方法当中调用dao的save方法
10、第十步:Spring整合Hibernate框架
(1)创建数据库和表
CREATE DATABASE ssh1;use ssh1; CREATE TABLE `cst_customer` ( `cust_id` bigint(32) NOT NULL AUTO_INCREMENT COMMENT '客户编号(主键)', `cust_name` varchar(32) NOT NULL COMMENT '客户名称(公司名称)', `cust_source` varchar(32) DEFAULT NULL COMMENT '客户信息来源', `cust_industry` varchar(32) DEFAULT NULL COMMENT '客户所属行业', `cust_level` varchar(32) DEFAULT NULL COMMENT '客户级别', `cust_phone` varchar(64) DEFAULT NULL COMMENT '固定电话', `cust_mobile` varchar(16) DEFAULT NULL COMMENT '移动电话', PRIMARY KEY (`cust_id`)) ENGINE=InnoDB AUTO_INCREMENT=1 DEFAULT CHARSET=utf8;
(2) 编写实体和映射
实体在上面已经创建过
- 创建映射在domain下创建Customer.hbm.xml文件
- 在hibernate.cfg.xml当中引入映射文件

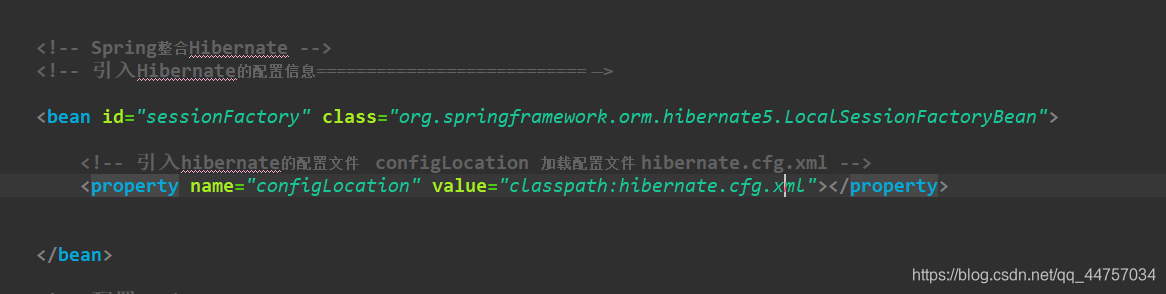
(3)Spring和Hibernate的整合
在Spring的配置文件applicationContext.xml当中引入,Hibernate的配置信息
(4)在Spring和Hibernate整合后,Spring提供了一个Hibernate的模板类用来简化Hibernate开发
- 改写DAO去继承HibernateDaoSupport
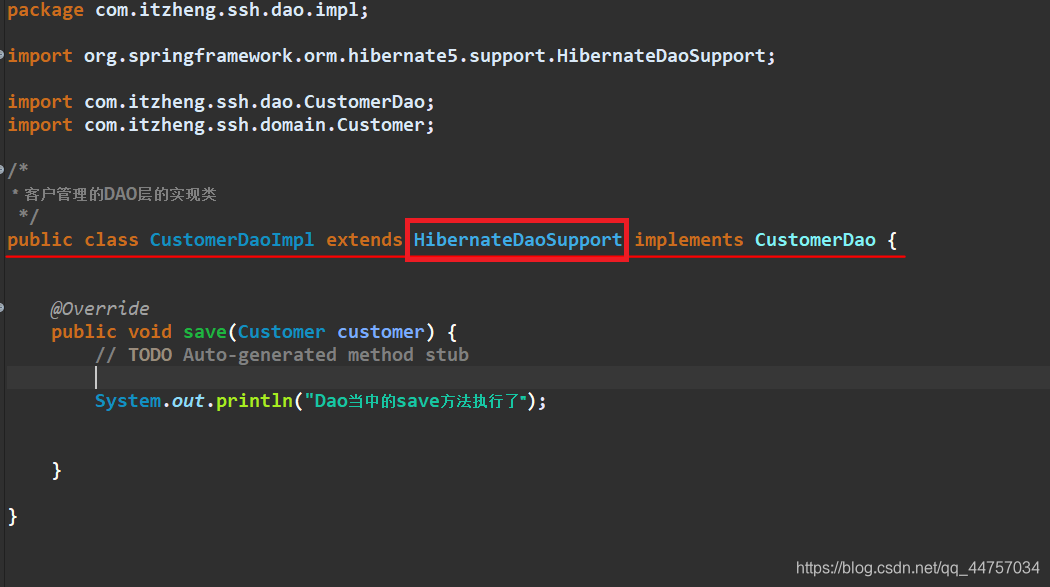
- applicationContext.xml配置的时候在DAO当中直接注入sessionFactory 在Dao当中注入sessionFactory可以理解为数据库连接池
 注入sessionFactory以后就会创建模板类
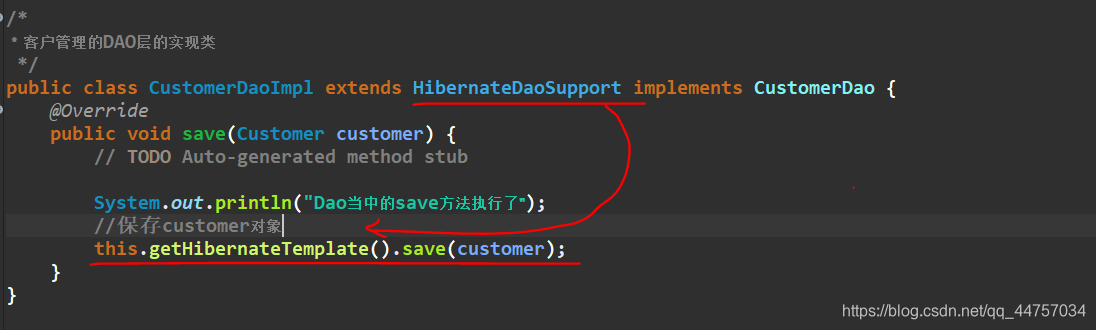
 - 在DAO当中使用Hibernate的模板完成保存操作
11、第十一步:配置Spring的事务管理
(1)在applicationContext当中配置事务事务管理器
可以理解为在transactionManager事务管理器当中注入sessionFactory数据库连接池
(2)开启注解事务
在applicationContext.xml
(3)在业务层使用注解
在CustomerServiceImpl类上添加@Transactional注解
(4)测试
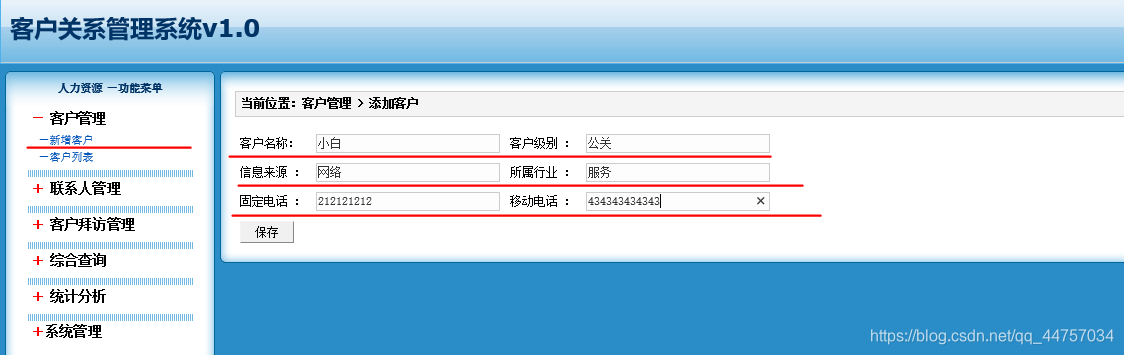
- 页面
- 控制台

- 数据库

转载地址:https://code100.blog.csdn.net/article/details/107323998 如侵犯您的版权,请留言回复原文章的地址,我们会给您删除此文章,给您带来不便请您谅解!
发表评论
最新留言
网站不错 人气很旺了 加油
[***.192.178.218]2024年04月20日 01时42分38秒
关于作者

喝酒易醉,品茶养心,人生如梦,品茶悟道,何以解忧?唯有杜康!
-- 愿君每日到此一游!
推荐文章
读博读废了是种什么样的体验?
2019-04-29
2020年,技术圈十大“翻车”事件!
2019-04-29
C语言状态机编程思想
2019-04-29
为什么很多电器设备都要使用单片机?
2019-04-29
在中国做操作系统研发 20 年是种什么体验?
2019-04-29
PCB走线角度为90度到底行不行?
2019-04-29
这个 17 岁的黑客天才,破解了第一代 iPhone!
2019-04-29
在STM32价格疯长下,哪些国产32可以替代?
2019-04-29
半导体芯片原厂涨价及调价声明新增了这些!
2019-04-29
为什么你学C++这么难?
2019-04-29
无人机破巡检难题,秒变电网卫士
2019-04-29
五年,我成为了一名嵌入式工程师。
2019-04-29
2020年电赛题目,命题专家们怎么看?
2019-04-29
PCB元器件摆放不可忽略的10个技巧
2019-04-29
掌握AI核心技术没有秘籍,能自己创造就是王道
2019-04-29
大学老师的月薪多少?实话实说:4万多一点……
2019-04-29
2020年电赛题目,命题专家权威解析!
2019-04-29
如何掌握“所有”的程序语言?没错,就是所有!
2019-04-29
39岁单身程序员入住养老院
2019-04-29
写论文,这个神器不能少!
2019-04-29
白红宇的个人博客 - 记录点点滴滴的事 - 您是第 309991578 位访客
访问时间: 2024-05-02 11:04:14
访问IP: 3.145.47.253
Copyright © 2020 - 2023 blog.css8.cn 京ICP备2021015314号-1
手机版