说说在 Android 中如何发送 HTTP 请求
发布日期:2021-06-29 21:11:33
浏览次数:2
分类:技术文章
本文共 4796 字,大约阅读时间需要 15 分钟。
客户端会向服务器发出一条 HTTP 请求,服务器收到请求后会返回一些数据给客户端,然后客户端再对这些数据进行解析与处理。
1 HttpURLConnection
可以使用 HttpURLConnection(官方推荐) 来发送 HTTP 请求。
布局文件:
活动类:
public class MainActivity extends AppCompatActivity { private TextView textView; @Override protected void onCreate(Bundle savedInstanceState) { super.onCreate(savedInstanceState); setContentView(R.layout.activity_main); findViewById(R.id.send_request).setOnClickListener(new View.OnClickListener() { @Override public void onClick(View v) { send(); } }); textView = (TextView) findViewById(R.id.response_data); } private void send() { //开启线程,发送请求 new Thread(new Runnable() { @Override public void run() { HttpURLConnection connection = null; BufferedReader reader = null; try { URL url = new URL("http://www.163.com"); connection = (HttpURLConnection) url.openConnection(); //设置请求方法 connection.setRequestMethod("GET"); //设置连接超时时间(毫秒) connection.setConnectTimeout(5000); //设置读取超时时间(毫秒) connection.setReadTimeout(5000); //返回输入流 InputStream in = connection.getInputStream(); //读取输入流 reader = new BufferedReader(new InputStreamReader(in)); StringBuilder result = new StringBuilder(); String line; while ((line = reader.readLine()) != null) { result.append(line); } show(result.toString()); } catch (MalformedURLException e) { e.printStackTrace(); } catch (ProtocolException e) { e.printStackTrace(); } catch (IOException e) { e.printStackTrace(); } finally { if (reader != null) { try { reader.close(); } catch (IOException e) { e.printStackTrace(); } } if (connection != null) {//关闭连接 connection.disconnect(); } } } }).start(); } /** * 展示 * * @param result */ private void show(final String result) { runOnUiThread(new Runnable() { @Override public void run() { textView.setText(result); } }); }} 因为在 Android 中不允许在子线程中执行 UI 操作,所以我们通过 runOnUiThread 方法,切换为主线程,然后再更新 UI 元素。
最后记得声明网络权限哦:
2 OKHttp
OKHttp 是一个处理网络请求的开源项目,目前是 Android 最火热的轻量级框架,由移动支付 Square 公司贡献(该公司还贡献了Picasso)。希望替代 HttpUrlConnection 和 Apache HttpClient。
首先引入 OKHttp 库依赖:
dependencies { compile fileTree(dir: 'libs', include: ['*.jar']) androidTestCompile('com.android.support.test.espresso:espresso-core:2.2.2', { exclude group: 'com.android.support', module: 'support-annotations' }) compile 'com.android.support:appcompat-v7:24.2.1' testCompile 'junit:junit:4.12'// 网络通信库 compile "com.squareup.okhttp3:okhttp:3.10.0"} 然后点击 Android Studio 右上角的 Sync Now,把库真正加载进来。
修改活动类:
/** * 发送请求(使用 OKHttp) */private void sendByOKHttp() { new Thread(new Runnable() { @Override public void run() { OkHttpClient client = new OkHttpClient(); Request request = new Request.Builder().url("http://www.163.com").build(); try { Response response = client.newCall(request).execute();//发送请求 String result = response.body().string(); Log.d(TAG, "result: "+result); show(result); } catch (IOException e) { e.printStackTrace(); } } }).start();} 可以在 build() 方法之前连缀很多其他方法来丰富这个 Request 对象。
如果是 POST 请求,那么需要构建 RequestBody 对象,形如:
RequestBody requestBody = new FormBody.Builder().add("param1", "value1").add("param2", "value2").build();Request request = new Request.Builder().url("www.163.com").post(requestBody).build(); 修改活动类:
/** * 发送请求(使用 OKHttp) */private void sendByOKHttp() { new Thread(new Runnable() { @Override public void run() { OkHttpClient client = new OkHttpClient(); Request request = new Request.Builder().url("http://www.163.com").build(); try { Response response = client.newCall(request).execute();//发送请求 String result = response.body().string(); Log.d(TAG, "result: " + result); show(result); } catch (IOException e) { e.printStackTrace(); } } }).start();} 注意: new Thread(...) 之后需要执行 start() 才会启动线程哦。
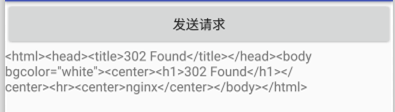
运行:

可以看出,OKHttp 比 HttpURLConnection 更强大:同一个网址,OKHttp 能够正确地返回响应数据哦O(∩_∩)O哈哈~
转载地址:https://deniro.blog.csdn.net/article/details/80631339 如侵犯您的版权,请留言回复原文章的地址,我们会给您删除此文章,给您带来不便请您谅解!
发表评论
最新留言
路过按个爪印,很不错,赞一个!
[***.219.124.196]2024年04月18日 09时42分29秒
关于作者

喝酒易醉,品茶养心,人生如梦,品茶悟道,何以解忧?唯有杜康!
-- 愿君每日到此一游!
推荐文章
MySQL 常用图形管理工具
2019-04-30
MySQL 创建数据库
2019-04-30
查看MySQL数据库定义信息
2019-04-30
MySQL 查看存储引擎
2019-04-30
MySQL 删除数据库
2019-04-30
TypeScript 安装
2019-04-30
TypeScript 基础类型
2019-04-30
typescript 用name作为变量名报错的原因
2019-04-30
TypeScript 变量声明
2019-04-30
typeScript 变量作用域
2019-04-30
TypeScript 运算符
2019-04-30
TypeScript 条件语句
2019-04-30
微信小程序 响应的数据绑定
2019-04-30
微信小程序框架
2019-04-30
微信小程序 场景值
2019-04-30
微信小程序 APP() 的那些事
2019-04-30
python 第一个程序 hello python
2019-04-30
python 注释
2019-04-30
python 变量类型
2019-04-30
Python int() 函数
2019-04-30
白红宇的个人博客 - 记录点点滴滴的事 - 您是第 310426404 位访客
访问时间: 2024-05-03 21:13:41
访问IP: 18.216.83.240
Copyright © 2020 - 2023 blog.css8.cn 京ICP备2021015314号-1
手机版