本文共 16648 字,大约阅读时间需要 55 分钟。
前言
在SpringBoot中一般使用RedisTemplate提供的方法来操作Redis。但是面临着大量Redis代码问题以及默认jdk序列化后乱码问题,因此本文采用统一配置类RedisConfig配置Redis序列化相关以及采用RedisUtil工具类简化开发,降低代码的复杂性。Maven依赖:
org.springframework.boot spring-boot-starter-data-redis org.projectlombok lombok true
redis.properties配置
spring.redis.host=192.168.135.74spring.redis.port=6379spring.redis.database=0
启动类上配置,这样我们的配置文才能被扫描到。
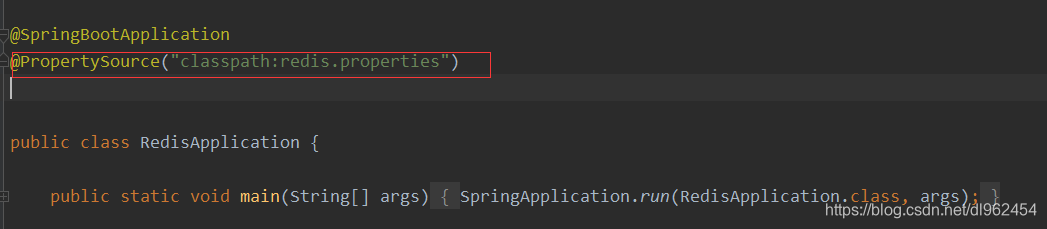
RedisConfig代码:
package com.dl.config;import com.fasterxml.jackson.annotation.JsonAutoDetect;import com.fasterxml.jackson.annotation.PropertyAccessor;import com.fasterxml.jackson.databind.ObjectMapper;import org.springframework.boot.autoconfigure.condition.ConditionalOnMissingBean;import org.springframework.boot.autoconfigure.condition.ConditionalOnSingleCandidate;import org.springframework.context.annotation.Bean;import org.springframework.context.annotation.ComponentScan;import org.springframework.context.annotation.Configuration;import org.springframework.data.redis.connection.RedisConnectionFactory;import org.springframework.data.redis.core.RedisTemplate;import org.springframework.data.redis.serializer.Jackson2JsonRedisSerializer;import org.springframework.data.redis.serializer.RedisSerializer;import org.springframework.data.redis.serializer.StringRedisSerializer;import javax.naming.event.ObjectChangeListener;import java.net.UnknownHostException;@Configurationpublic class RedisConfig { @Bean @SuppressWarnings("all") public RedisTemplate redisTemplate(RedisConnectionFactory factory) { RedisTemplate template = new RedisTemplate(); template.setConnectionFactory(factory);// 配置连接工厂 使用Jackson2JsonRedisSerializer来序列化和反序列化redis的value值(默认使用JDK的序列化方式) Jackson2JsonRedisSerializer jackson2JsonRedisSerializer = new Jackson2JsonRedisSerializer(Object.class); ObjectMapper objectMapper = new ObjectMapper();//自定义ObjectMapper // 指定要序列化的域,field,get和set,以及修饰符范围,ANY是都有包括private和public objectMapper.setVisibility(PropertyAccessor.ALL, JsonAutoDetect.Visibility.ANY); // 指定序列化输入的类型,类必须是非final修饰的,final修饰的类,比如String,Integer等会抛出异常 objectMapper.enableDefaultTyping(ObjectMapper.DefaultTyping.NON_FINAL); jackson2JsonRedisSerializer.setObjectMapper(objectMapper); //String序列化配置 StringRedisSerializer stringRedisSerializer = new StringRedisSerializer(); // key采用String的序列化方式 template.setKeySerializer(stringRedisSerializer); // hash的key也采用String的序列化方式 template.setHashKeySerializer(stringRedisSerializer); // value序列化方式采用jackson template.setValueSerializer(jackson2JsonRedisSerializer); // hash的value序列化方式采用jackson template.setHashValueSerializer(jackson2JsonRedisSerializer); template.afterPropertiesSet(); return template; }} 注意:这个RedisConfig不是说添加@Configuration注解就能被扫描到容器中的,我们都知道,想要自己配置的东西被扫描进Spring容器,第一种是跟随SpringBoot默认自动扫描方案,也就是说配置在启动类所在目录及下面的所有子包会被自动扫描进容器。如果配置在这之外,则需要自己手动扫描进容器,也就是添加@ComponentScan注解扫描自己的配置的类所在的包,但是这时候默认的启动类所在目录及下面的子包都不能被扫描了,因此还需要强制扫描启动类所在目录及下面的子包。形如:
@ComponentScans({ @ComponentScan("com.dl.springboot"),//启动类所在目录 @ComponentScan("com.dl.config")//配置类所在目录}) 由于使用@Component(@Configuration里面包含了@Component)加入到容器中了,因此使用时候直接@Autowired注入即可。形如:
@Autowired @Qualifier(value = "redisTemplate")//底层也是该名字,因此使用注解指定名字 private RedisTemplate redisTemplate; @Test public void test1() throws JsonProcessingException { User user = new User("丁利", 25);// String jsonUser=new ObjectMapper().writeValueAsString(user); //将对象转为json字符串,否则实现在POJO中实现序列化接口,可以自定义redisTemplate序列化方式,默认是采用jdk序列化 redisTemplate.opsForValue().set("user", user); System.out.println(redisTemplate.opsForValue().get("user")); } POJO中的User类,实现了序列化接口:
package com.dl.POJO;import lombok.AllArgsConstructor;import lombok.Data;import lombok.NoArgsConstructor;import java.io.Serializable;@NoArgsConstructor@AllArgsConstructor@Data //getter、setter、toStringpublic class User implements Serializable { private static final long serialVersionUID = 4666976430724889637L;//序列化号 private String name; private int age;} 这里使用Lombok插件省去getter、setter等方法。至于serialVersionUID,简单说一下,序列化操作的时候系统会把当前类的serialVersionUID写入到序列化文件中,当反序列化时系统会去检测文件中的serialVersionUID,判断它是否与当前类的serialVersionUID一致,如果一致就说明序列化类的版本与当前类版本是一样的,可以反序列化成功,否则失败。
简单说一下idea如何生成serialVersionUID。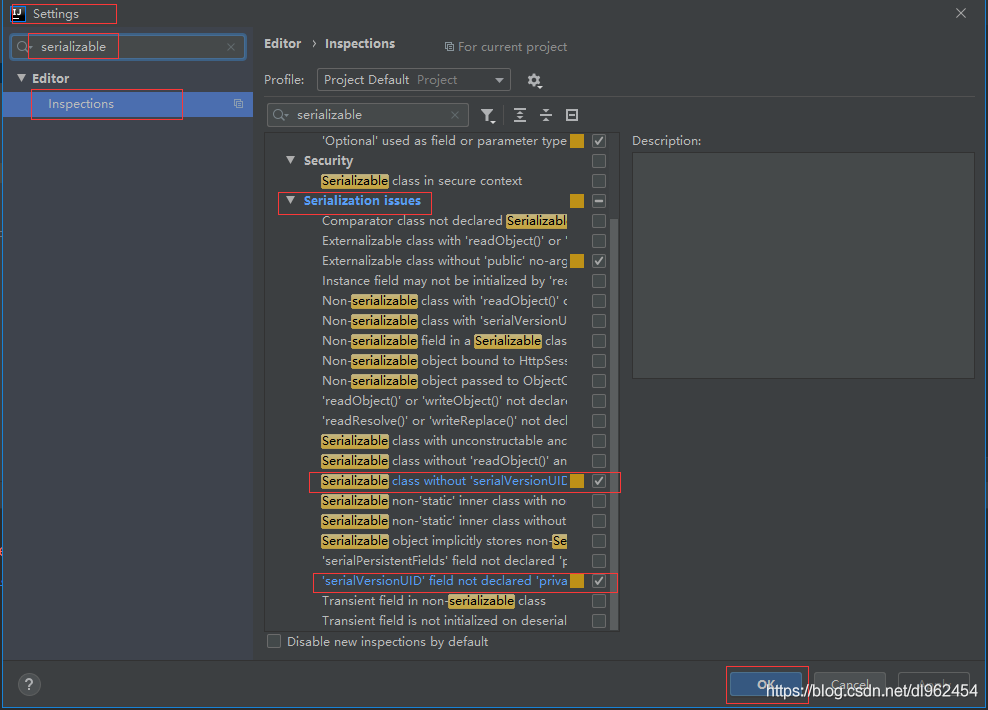 上面设置好了以后我们
光标定位到实现了Serializable接口的类名下面User为例,按ctrl+enter弹出选项框,选择Add ‘serialVersionUID’ field即可生成serialVersionUID。 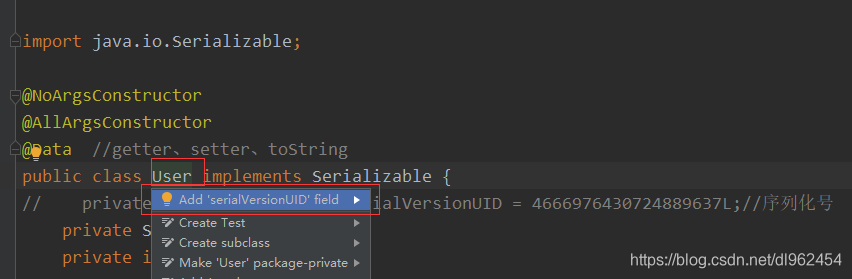
直接使用Redis难免会写很多代码,因此封装为工具类供调用。为避免影响阅读,工具类放在文末了,这里我们来看一下使用Junit单元测试调用工具类。
@Autowired private RedisUtil redisUtil; //注入工具类 @Autowired private ApplicationContext applicationContext;//该注解用于查看redisUtil注入成功没有 @Test public void testRedisUtil() { // String[] beanDefinitionNames = applicationContext.getBeanDefinitionNames();// for (String beanName:beanDefinitionNames){ // System.out.println("容器中的bean:"+beanName);// } User user = new User("Top童话", 25); redisUtil.set("user",user); user=null;//对象释放 System.out.println(redisUtil.get("user")); } 我们用Redis Desktop Manager查看测试结果:
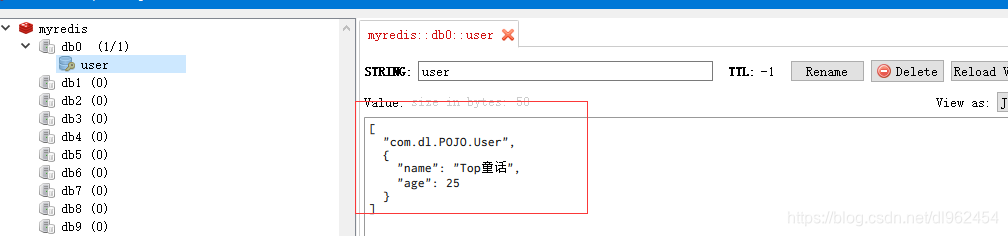 控制台打印:
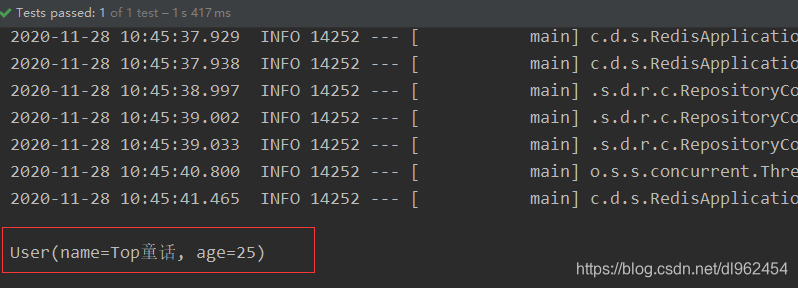
这样,一个简单的SpringBoot2.x整合Redis就完成了。
Redis工具类RedisUtil:package com.dl.utils;import java.util.Collection;import java.util.List;import java.util.Map;import java.util.Set;import java.util.concurrent.TimeUnit;import org.springframework.beans.factory.annotation.Autowired;import org.springframework.context.annotation.ComponentScan;import org.springframework.context.annotation.Configuration;import org.springframework.data.redis.core.RedisTemplate;import org.springframework.stereotype.Component;import org.springframework.util.CollectionUtils;/** * Redis工具类 * * @author tonghua * @date 2020年11月17日 */@Componentpublic final class RedisUtil { // 直接用RedisTemplate操作Redis,需要很多行代码,因此直接封装好一个RedisUtil,这样写代码更方便点。这个RedisUtil交给Spring容器实例化,使用时直接注解注入。 @Autowired private RedisTemplate redisTemplate; // =============================common============================ /** * 指定缓存失效时间 * * @param key 键 * @param time 时间(秒) * @return */ public boolean expire(String key, long time) { try { if (time > 0) { redisTemplate.expire(key, time, TimeUnit.SECONDS); } return true; } catch (Exception e) { e.printStackTrace(); return false; } } /** * 根据key 获取过期时间 * * @param key 键 不能为null * @return 时间(秒) 返回0代表为永久有效 */ public long getExpire(String key) { return redisTemplate.getExpire(key, TimeUnit.SECONDS); } /** * 判断key是否存在 * * @param key 键 * @return true 存在 false不存在 */ public boolean hasKey(String key) { try { return redisTemplate.hasKey(key); } catch (Exception e) { e.printStackTrace(); return false; } } /** * 删除缓存 * * @param key ...表示可以传一个值 或多个 */ @SuppressWarnings("unchecked") public void del(String... key) { if (key != null && key.length > 0) { if (key.length == 1) { redisTemplate.delete(key[0]); } else { redisTemplate.delete((Collection ) CollectionUtils.arrayToList(key)); } } } // ============================String============================= /** * 普通缓存获取 * * @param key 键 * @return 值 */ public Object get(String key) { return key == null ? null : redisTemplate.opsForValue().get(key); } /** * 普通缓存放入 * * @param key 键 * @param value 值 * @return true成功 false失败 */ public boolean set(String key, Object value) { try { redisTemplate.opsForValue().set(key, value); return true; } catch (Exception e) { e.printStackTrace(); return false; } } /** * 普通缓存放入并设置时间 * * @param key 键 * @param value 值 * @param time 时间(秒) time要大于0 如果time小于等于0 将设置无限期 * @return true成功 false 失败 */ public boolean set(String key, Object value, long time) { try { if (time > 0) { redisTemplate.opsForValue().set(key, value, time, TimeUnit.SECONDS); } else { set(key, value); } return true; } catch (Exception e) { e.printStackTrace(); return false; } } /** * 递增 * * @param key 键 * @param delta 要增加几(大于0) * @return */ public long incr(String key, long delta) { if (delta < 0) { throw new RuntimeException("递增因子必须大于0"); } return redisTemplate.opsForValue().increment(key, delta); } /** * 递减 * * @param key 键 * @param delta 要减少几(小于0) * @return */ public long decr(String key, long delta) { if (delta < 0) { throw new RuntimeException("递减因子必须大于0"); } return redisTemplate.opsForValue().increment(key, -delta); } // ================================Map================================= /** * HashGet * * @param key 键 不能为null * @param item 项 不能为null * @return 值 */ public Object hget(String key, String item) { return redisTemplate.opsForHash().get(key, item); } /** * 获取hashKey对应的所有键值 * * @param key 键 * @return 对应的多个键值 */ public Map hmget(String key) { return redisTemplate.opsForHash().entries(key); } /** * HashSet * * @param key 键 * @param map 对应多个键值 * @return true 成功 false 失败 */ public boolean hmset(String key, Map map) { try { redisTemplate.opsForHash().putAll(key, map); return true; } catch (Exception e) { e.printStackTrace(); return false; } } /** * HashSet 并设置时间 * * @param key 键 * @param map 对应多个键值 * @param time 时间(秒) * @return true成功 false失败 */ public boolean hmset(String key, Map map, long time) { try { redisTemplate.opsForHash().putAll(key, map); if (time > 0) { expire(key, time); } return true; } catch (Exception e) { e.printStackTrace(); return false; } } /** * 向一张hash表中放入数据,如果不存在将创建 * * @param key 键 * @param item 项 * @param value 值 * @return true 成功 false失败 */ public boolean hset(String key, String item, Object value) { try { redisTemplate.opsForHash().put(key, item, value); return true; } catch (Exception e) { e.printStackTrace(); return false; } } /** * 向一张hash表中放入数据,如果不存在将创建 * * @param key 键 * @param item 项 * @param value 值 * @param time 时间(秒) 注意:如果已存在的hash表有时间,这里将会替换原有的时间 * @return true 成功 false失败 */ public boolean hset(String key, String item, Object value, long time) { try { redisTemplate.opsForHash().put(key, item, value); if (time > 0) { expire(key, time); } return true; } catch (Exception e) { e.printStackTrace(); return false; } } /** * 删除hash表中的值 * * @param key 键 不能为null * @param item 项 可以使多个 不能为null */ public void hdel(String key, Object... item) { redisTemplate.opsForHash().delete(key, item); } /** * 判断hash表中是否有该项的值 * * @param key 键 不能为null * @param item 项 不能为null * @return true 存在 false不存在 */ public boolean hHasKey(String key, String item) { return redisTemplate.opsForHash().hasKey(key, item); } /** * hash递增 如果不存在,就会创建一个 并把新增后的值返回 * * @param key 键 * @param item 项 * @param by 要增加几(大于0) * @return */ public double hincr(String key, String item, double by) { return redisTemplate.opsForHash().increment(key, item, by); } /** * hash递减 * * @param key 键 * @param item 项 * @param by 要减少记(小于0) * @return */ public double hdecr(String key, String item, double by) { return redisTemplate.opsForHash().increment(key, item, -by); } // ============================set============================= /** * 根据key获取Set中的所有值 * * @param key 键 * @return */ public Set 转载地址:https://dh-butterfly.blog.csdn.net/article/details/110260770 如侵犯您的版权,请留言回复原文章的地址,我们会给您删除此文章,给您带来不便请您谅解!
发表评论
最新留言
关于作者
