Java实现多线程的三种方式
发布日期:2021-06-30 11:11:12
浏览次数:2
分类:技术文章
本文共 3980 字,大约阅读时间需要 13 分钟。
版权声明
- 本文原创作者:谷哥的小弟
- 作者博客地址:http://blog.csdn.net/lfdfhl
概述
在Java中可通过三种方式来实现多线程:
- 1、继承Thread类,重写run( )方法
- 2、实现Runnable接口,重写run( )方法
- 3、实现Callable接口,重写call( )方法并使用FutureTask获取call( )方法的返回结果
利用Thread类实现多线程
主要步骤
- 1、通过继承Thread创建线程的子类
- 2、重写Thread类的run( )方法
- 3、创建子类实例对象
- 4、调用子类实例对象start( )方法启动线程
使用示例
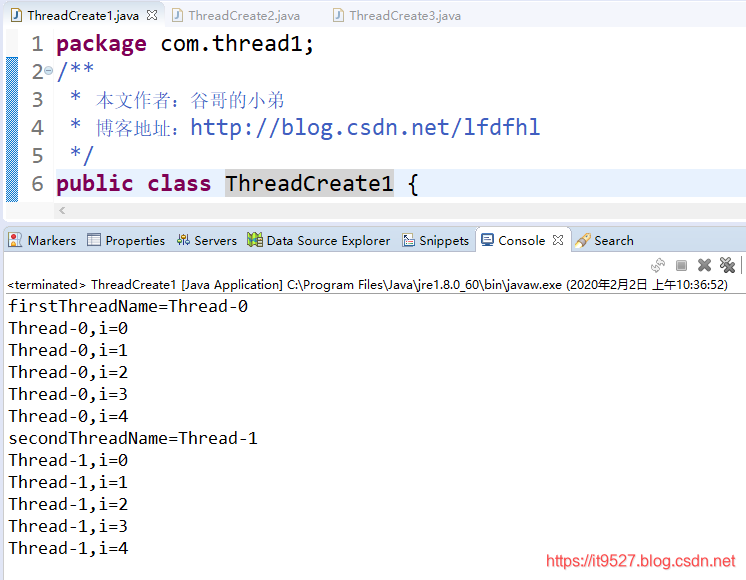
package com.thread1;/** * 本文作者:谷哥的小弟 * 博客地址:http://blog.csdn.net/lfdfhl */public class ThreadCreate1 { public static void main(String[] args) { //创建第一个子线程 MyThread firstThread=new MyThread(); firstThread.start(); String firstThreadName = firstThread.getName(); System.out.println("firstThreadName="+firstThreadName); //创建第二个子线程 MyThread secondThread=new MyThread(); secondThread.start(); String secondThreadName = secondThread.getName(); System.out.println("secondThreadName="+secondThreadName); }}//MyThread继承Thread类class MyThread extends Thread{ @Override public void run() { super.run(); String threadName = Thread.currentThread().getName(); for(int i=0;i<5;i++) { System.out.println(threadName+",i="+i); } }} 运行结果
利用Runnable接口实现多线程
主要步骤
- 1、创建Runnable接口实现类并重写该接口的run( )方法
- 2、创建Runnable接口实现类对象
- 3、利用Thread有参构造函数
public Thread(Runnable target)和Runnable接口实现类对象创建线程实例 - 4、调用线程实例的start( )方法启动线程
使用示例
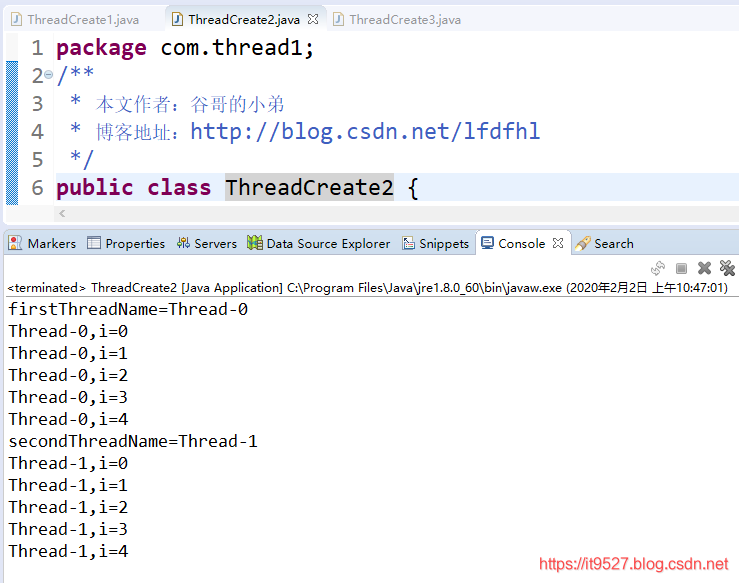
package com.thread1;/** * 本文作者:谷哥的小弟 * 博客地址:http://blog.csdn.net/lfdfhl */public class ThreadCreate2 { public static void main(String[] args) { // 创建第一个子线程 MyRunnable firstMyRunnable=new MyRunnable(); Thread firstThread = new Thread(firstMyRunnable); firstThread.start(); String firstThreadName = firstThread.getName(); System.out.println("firstThreadName=" + firstThreadName); // 创建第二个子线程 MyRunnable secondMyRunnable=new MyRunnable(); Thread secondThread = new Thread(secondMyRunnable); secondThread.start(); String secondThreadName = secondThread.getName(); System.out.println("secondThreadName=" + secondThreadName); }}//MyRunnable实现Runnable接口class MyRunnable implements Runnable { @Override public void run() { String threadName = Thread.currentThread().getName(); for (int i = 0; i < 5; i++) { System.out.println(threadName + ",i=" + i); } }} 运行结果
利用Callable接口实现多线程
主要步骤
- 1、创建Callable接口实现类并重写该接口的call( )方法
- 2、创建Callable接口实现类对象
- 3、使用Runnable子类FutureTask的有参构造函数
public FutureTask(Callable< V > callable)和Callable接口实现类对象创建FutureTask实例 - 4、利用Thread有参构造函数
public Thread(Runnable target)和FutureTask实例创建线程实例 - 5、调用线程实例的start( )方法启动线程
- 6、利用FutureTask的get( )方法获取子线程执行结果
使用示例
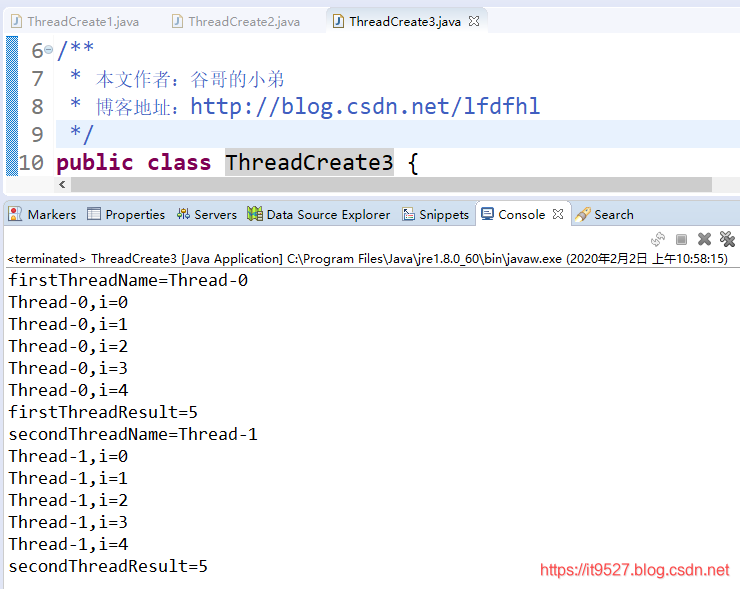
package com.thread1;import java.util.concurrent.Callable;import java.util.concurrent.ExecutionException;import java.util.concurrent.FutureTask;/** * 本文作者:谷哥的小弟 * 博客地址:http://blog.csdn.net/lfdfhl */public class ThreadCreate3 { public static void main(String[] args) throws InterruptedException, ExecutionException { // 创建第一个子线程 MyCallable firstMyCallable = new MyCallable(); FutureTask 运行结果
总结
为避免Java单继承带来的局限性,在实际开发中多采用实现Runnable接口或实现Callable接口的方式实现多线程。
转载地址:https://it9527.blog.csdn.net/article/details/104141926 如侵犯您的版权,请留言回复原文章的地址,我们会给您删除此文章,给您带来不便请您谅解!
发表评论
最新留言
留言是一种美德,欢迎回访!
[***.207.175.100]2024年04月16日 13时23分16秒
关于作者

喝酒易醉,品茶养心,人生如梦,品茶悟道,何以解忧?唯有杜康!
-- 愿君每日到此一游!
推荐文章
Linux获取执行脚本的脚本名
2019-04-30
Linux获取最后一个参数(参数统计)
2019-04-30
linux命令getopt及getopts命令应用
2019-04-30
Linux命令read
2019-04-30
Linux标准输出重定向及标准错误重定向
2019-04-30
linux关闭文件描述符及lsof命令
2019-04-30
Linux执行脚本遇到模糊的重定向问题,求助
2019-04-30
linux进程信号捕获及删除捕获
2019-04-30
linux重启停止的作业
2019-04-30
linux中设置每月最后一天执行crontab
2019-04-30
linux中gawk命令
2019-04-30
Linux命令sed多组命令集
2019-04-30
查找linux里的文件匹配行号的另一种方式
2019-04-30
BRE特殊字符组,正则表达式
2019-04-30
linux命令gawk指定区间范围
2019-04-30
linux逆序输出文件的内容
2019-04-30
linux给文件输出行号
2019-04-30
删除连续的空白行,删除开头的空白行,删除结尾的空白行
2019-04-30
oracle数据库全局性HANG的处理过程
2019-04-30
mount: unknown filesystem type ‘ntfs’ 问题
2019-04-30
白红宇的个人博客 - 记录点点滴滴的事 - 您是第 310479291 位访客
访问时间: 2024-05-04 01:52:04
访问IP: 3.142.199.138
Copyright © 2020 - 2023 blog.css8.cn 京ICP备2021015314号-1
手机版