本文共 37216 字,大约阅读时间需要 124 分钟。
Kubernetes - Xshell连接虚拟机 & 搭建Kubernetes基础集群
博主将会搭建一个master节点,两个工作节点的Kubernetes基础集群。
博主的虚拟机:
- 三台
CentOS7系统的虚拟机。 master节点虚拟内存是2G,工作节点虚拟内存是1G,虽然Kubernetes官方建议内存最好2G及以上,但博主电脑的内存不太够,况且博主只是为了演示,并不是生产环境;工作节点虚拟内存偏小,可以通过一些参数来避免出现问题,这里大家不用担心(毕竟博主因为虚拟内存分配过小的原因,已经重新搭建了好几次,master节点虚拟内存最好不要低于2G,不然kubectl get node这样的命令不能正常使用,至少博主出现了这样的情况)。- 虚拟硬盘都是
8G。
创建虚拟机:
现在假设大家已经创建好了三台虚拟机。
使用Xshell连接虚拟机
在VirtualBox中操作虚拟机来执行命令总是感觉不太方便,比如在虚拟机的命令行中不能复制和粘贴命令,还有就是虚拟机总是要独占鼠标和键盘。
所以博主使用Xshell来连接这些虚拟机。
想要使用Xshell来连接这些虚拟机,先要获取这些虚拟机的IP地址:。
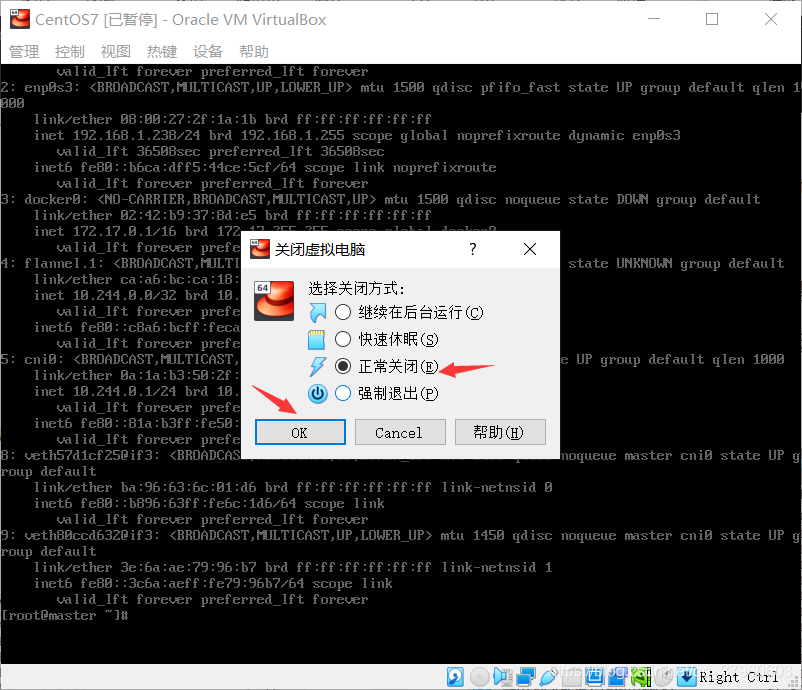
启动虚拟机,执行ip addr命令。

IP地址为192.168.1.238/24,这台虚拟机会是Kubernetes集群的master节点。
然后正常关闭该虚拟机即可。
另外两台虚拟机的IP地址查询就不演示了,是一样的操作。
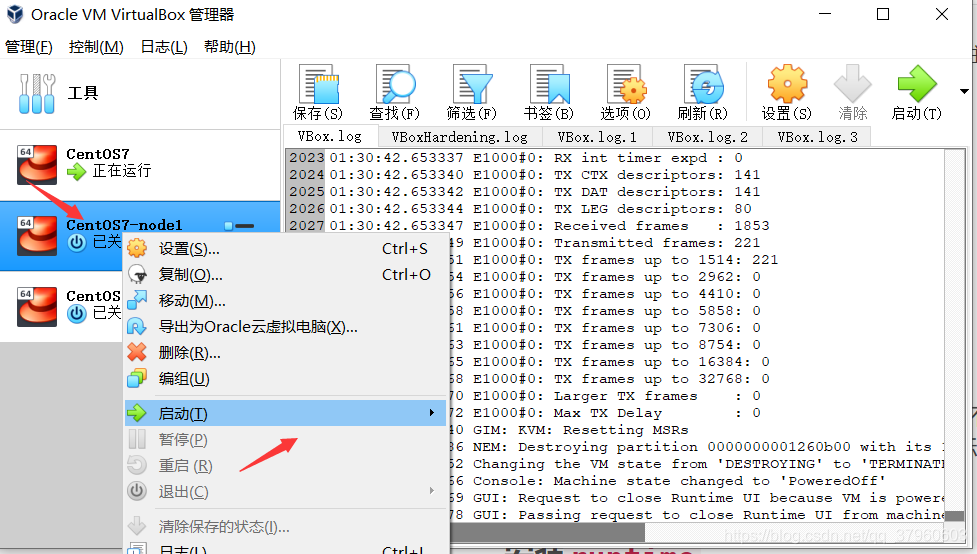
右击虚拟机,点击启动,选择无界面启动,因为我们使用Xshell来提供虚拟机的界面。
 打开
打开Xshell,点击新建图标。 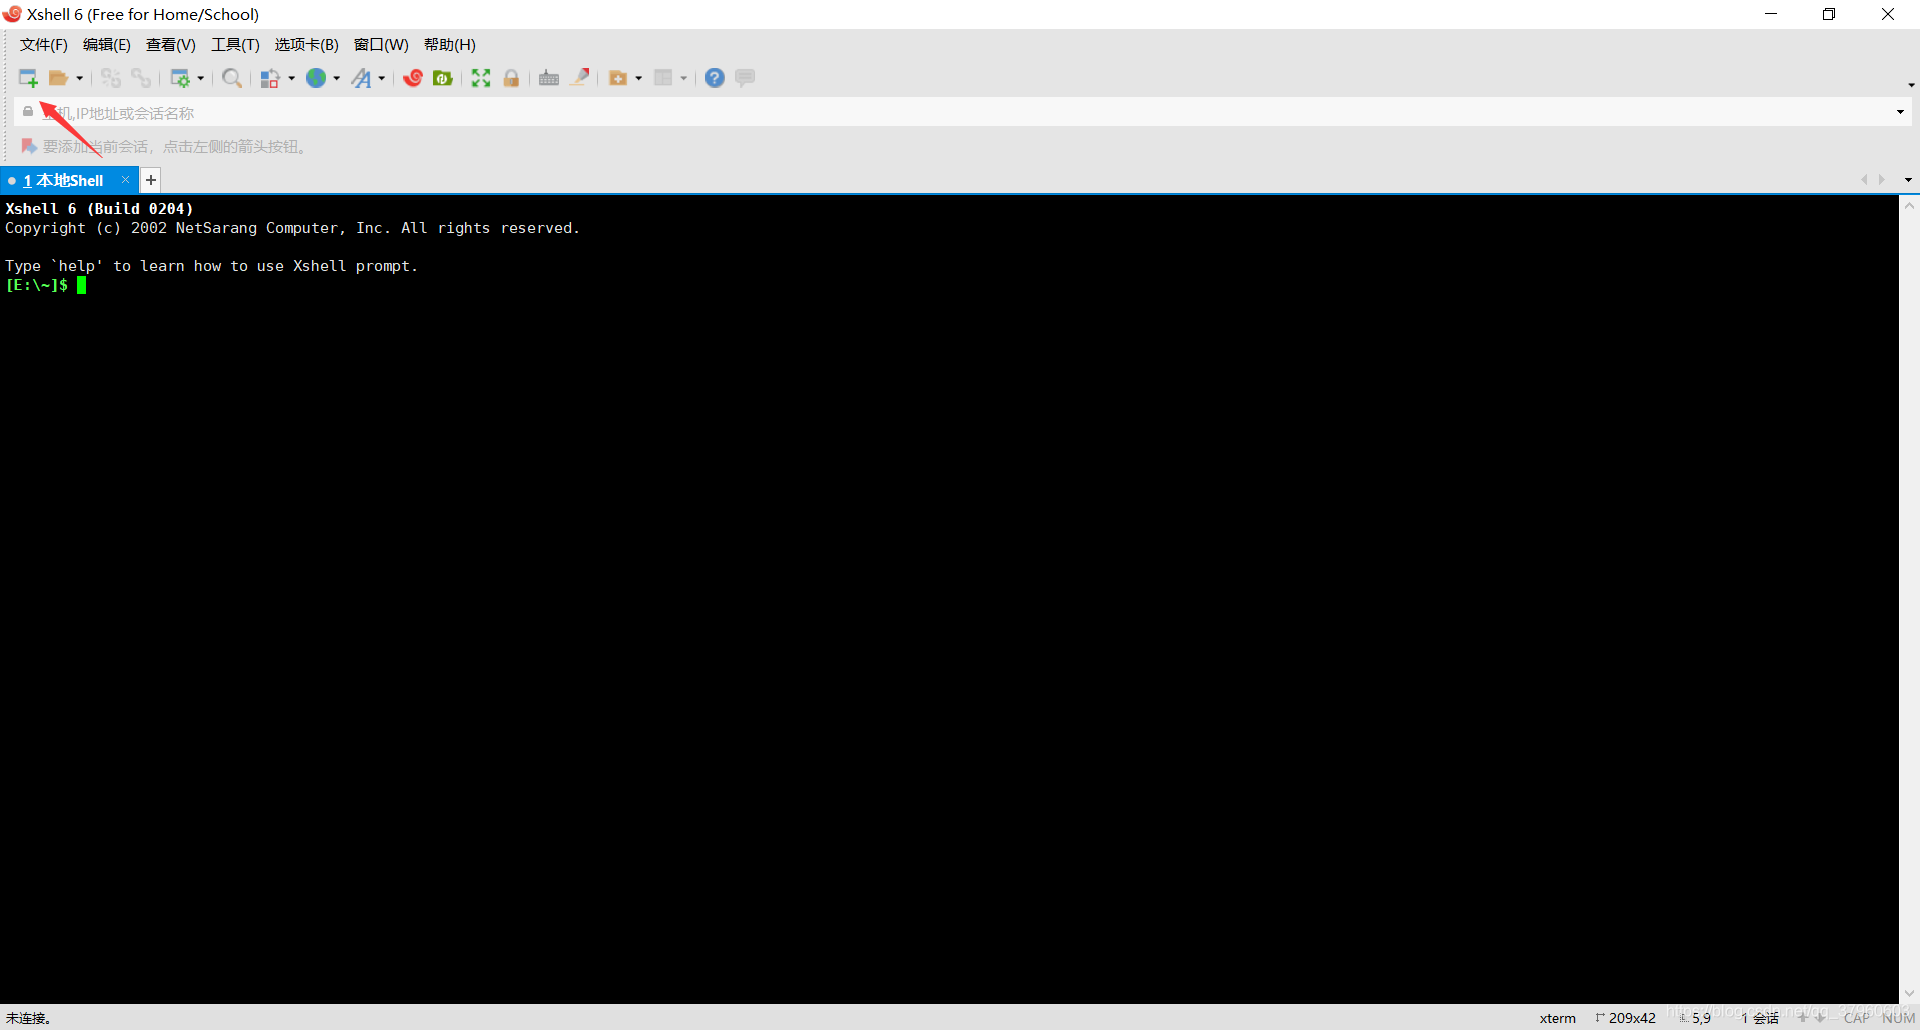
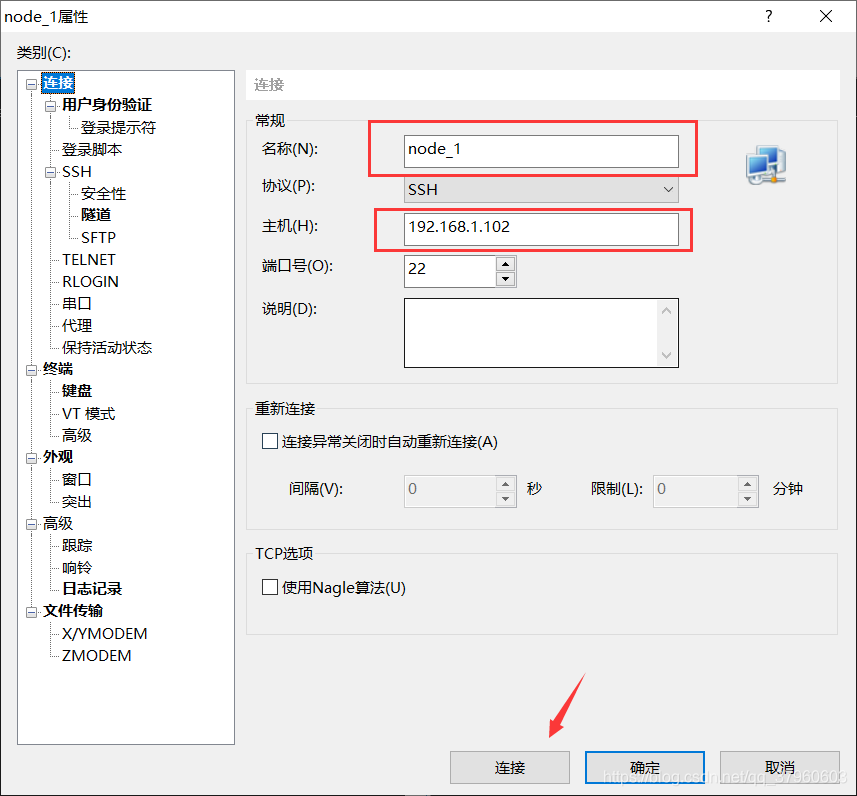
输入名称和虚拟机IP地址,点击连接。
 点击接受并保存。
  输入用户名(一般是
root),选择记住用户名,点击确定。 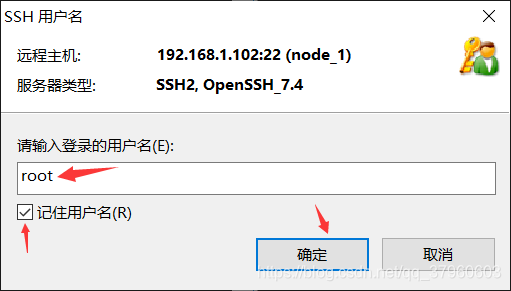 输入密码,选择记住密码,点击确定。
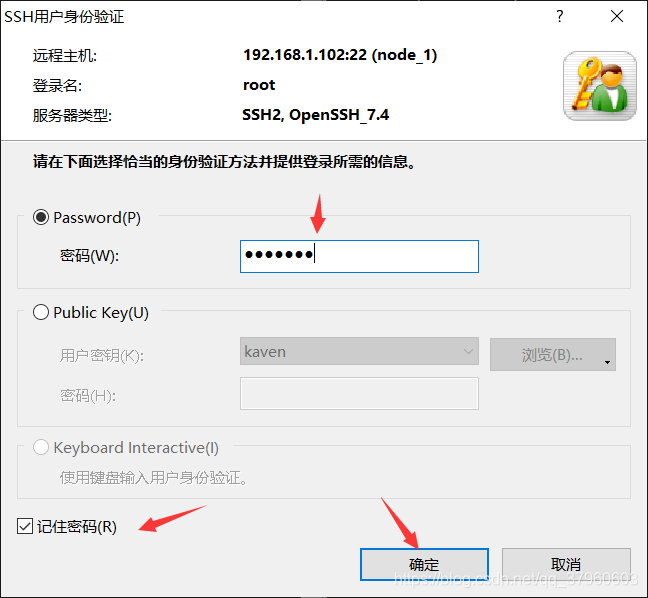
Xshell成功连接虚拟机。 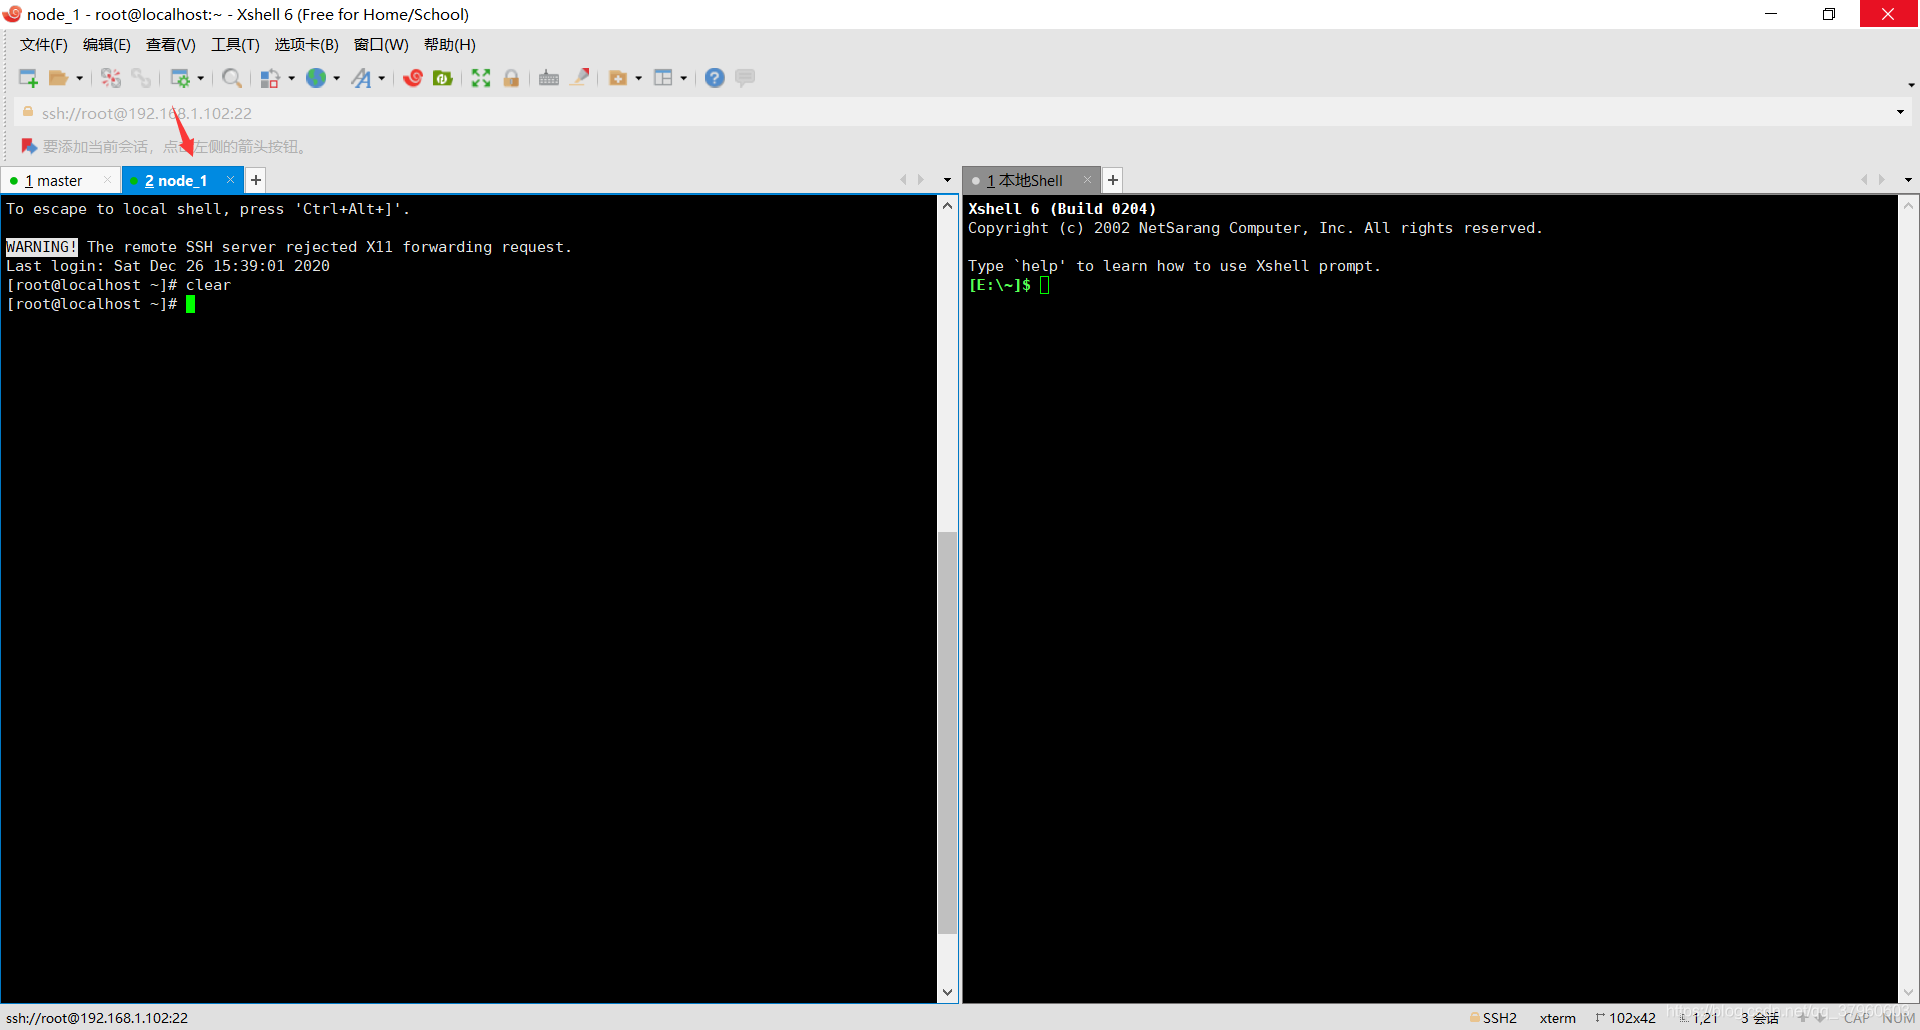 点击这个图标,可以在一个
Xshell界面里面创建多个会话。 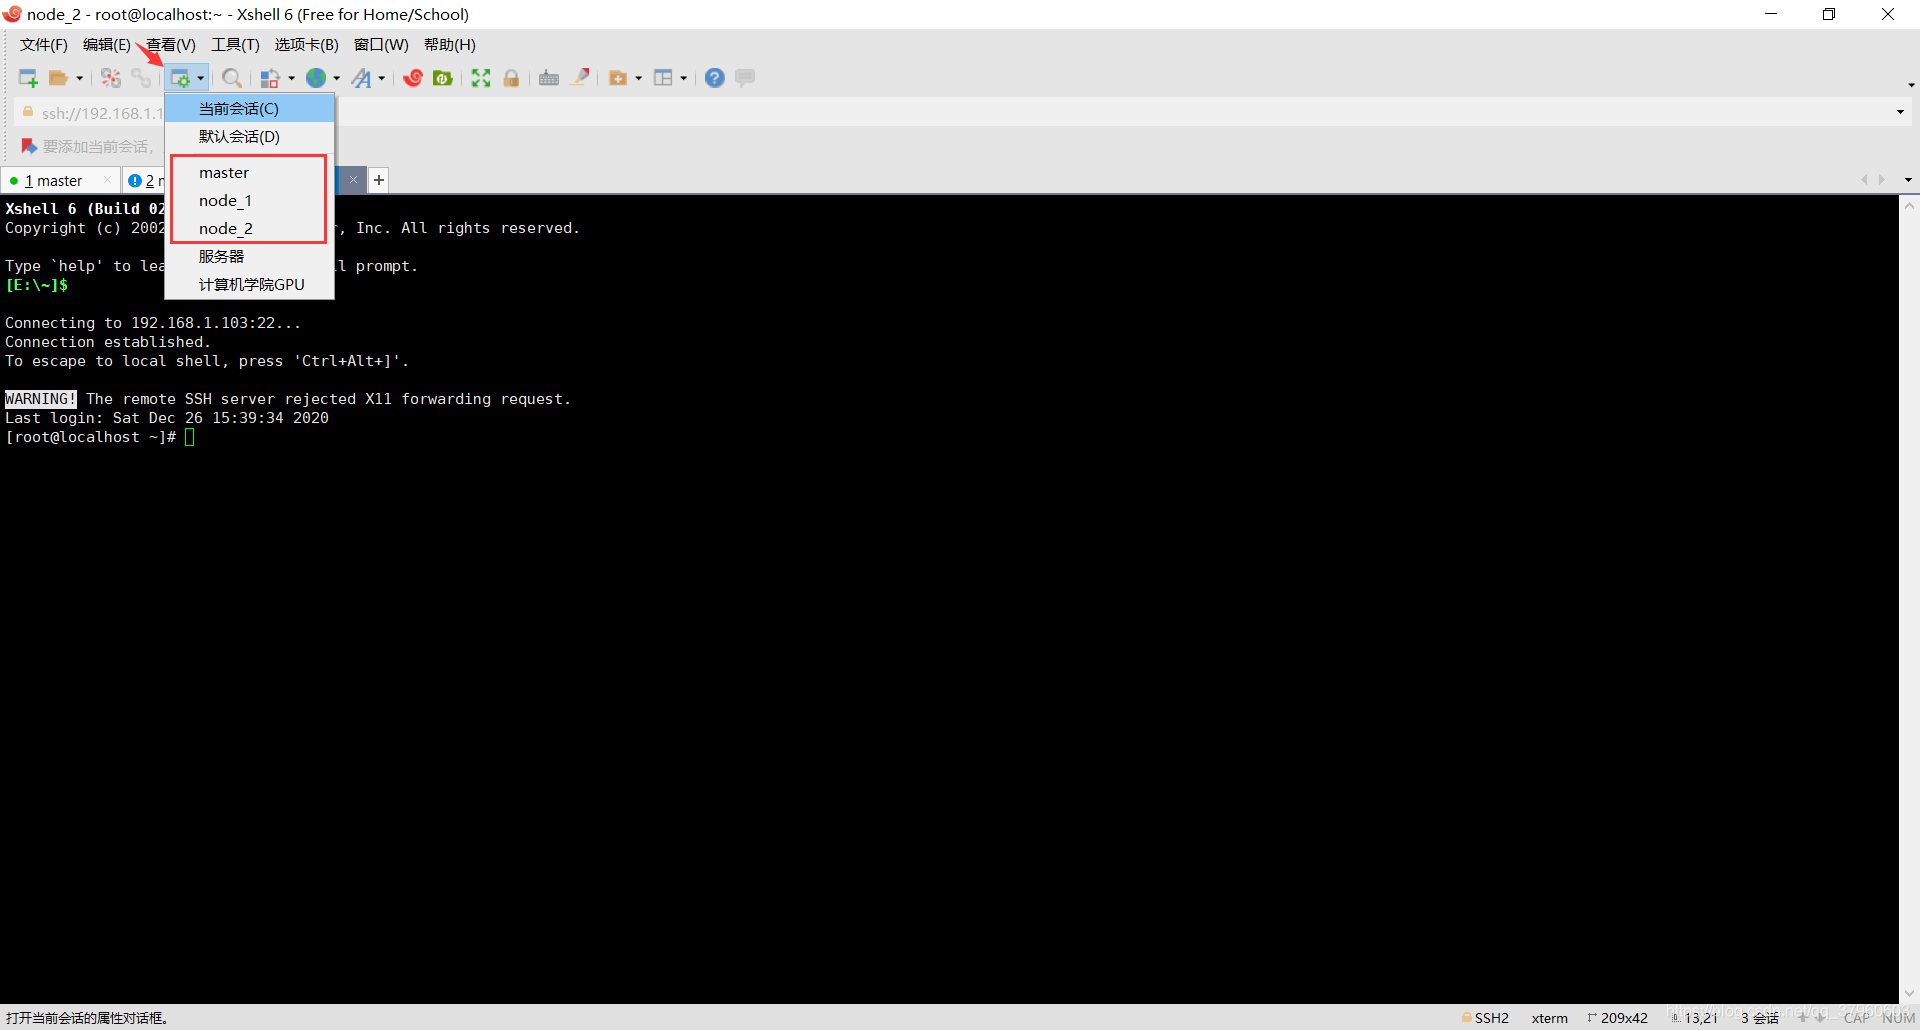
另外两台虚拟机的连接就不演示了。
修改两个工作节点的主机名分别为node-1、node-3,这些名称大家可以随便起,但连接符不能使用_,可以使用-和.。修改工作节点的主机名,是为了三台虚拟机的主机名都不一样,否则会出现问题,如果大家三台机器的主机名已经各不一样,就不需要这些操作了。
hostnamectl set-hostname node-1
[root@localhost ~]# hostnamectl set-hostname node-1[root@node-1 ~]#
hostnamectl set-hostname node-3
[root@localhost ~]# hostnamectl set-hostname node-3[root@node-3 ~]#
安装runtime
三台虚拟机都要安装runtime。
从v1.14.0版本起,kubeadm将通过观察已知的UNIX域套接字来自动检测Linux节点上的runtime。 下表中是可检测到的正在运行的runtime和socket路径。
runtime | 域套接字 |
|---|---|
Docker | /var/run/docker.sock |
containerd | /run/containerd/containerd.sock |
CRI-O | /var/run/crio/crio.sock |
博主这里选择安装Docker,CentOS7安装Docker可以看一下下面这篇博客,建议大家不要使用脚本自动安装,最好手动安装指定版本的Docker,博主这里安装的Docker版本是19.03.13,大家也可以安装一样的版本,因为Kubernetes和Docker两者的版本有可能会导致兼容问题。
现在假设大家都安装好了Docker。
出现下面这个问题,应该是Docker没有启动,博主使用的是root用户,如果不是root用户,可以在命令前面加sudo,sudo是Linux系统管理指令,是允许系统管理员让普通用户执行一些或者全部的root命令的一个工具。
[root@localhost ~]# docker versionClient: Docker Engine - Community Version: 19.03.13 API version: 1.40 Go version: go1.13.15 Git commit: 4484c46d9d Built: Wed Sep 16 17:03:45 2020 OS/Arch: linux/amd64 Experimental: falseCannot connect to the Docker daemon at unix:///var/run/docker.sock. Is the docker daemon running?
直接启动Docker即可。
[root@localhost ~]# service docker startRedirecting to /bin/systemctl start docker.service[root@localhost ~]# docker versionClient: Docker Engine - Community Version: 19.03.13 API version: 1.40 Go version: go1.13.15 Git commit: 4484c46d9d Built: Wed Sep 16 17:03:45 2020 OS/Arch: linux/amd64 Experimental: falseServer: Docker Engine - Community Engine: Version: 19.03.13 API version: 1.40 (minimum version 1.12) Go version: go1.13.15 Git commit: 4484c46d9d Built: Wed Sep 16 17:02:21 2020 OS/Arch: linux/amd64 Experimental: false containerd: Version: 1.3.7 GitCommit: 8fba4e9a7d01810a393d5d25a3621dc101981175 runc: Version: 1.0.0-rc10 GitCommit: dc9208a3303feef5b3839f4323d9beb36df0a9dd docker-init: Version: 0.18.0 GitCommit: fec3683
安装kubeadm、kubelet和kubectl
需要在每台虚拟机上安装以下的软件包:
kubeadm:用来初始化集群的指令。kubelet:在集群的每个节点上,用来启动pod和容器等。kubectl:用来与集群通信的命令行工具。
使用阿里云的yum镜像仓库,官方的yum镜像仓库安装会超时:
cat </etc/yum.repos.d/kubernetes.repo[kubernetes]name=Kubernetesbaseurl=http://mirrors.aliyun.com/kubernetes/yum/repos/kubernetes-el7-x86_64enabled=1gpgcheck=0repo_gpgcheck=0gpgkey=http://mirrors.aliyun.com/kubernetes/yum/doc/yum-key.gpg http://mirrors.aliyun.com/kubernetes/yum/doc/rpm-package-key.gpgEOF
[root@localhost ~]# cat </etc/yum.repos.d/kubernetes.repo> [kubernetes]> name=Kubernetes> baseurl=http://mirrors.aliyun.com/kubernetes/yum/repos/kubernetes-el7-x86_64> enabled=1> gpgcheck=0> repo_gpgcheck=0> gpgkey=http://mirrors.aliyun.com/kubernetes/yum/doc/yum-key.gpg> http://mirrors.aliyun.com/kubernetes/yum/doc/rpm-package-key.gpg> EOF
将SELinux设置为permissive模式(相当于将其禁用), 这是允许容器访问主机文件系统所必须的,例如正常使用pod网络。 你必须这么做,直到kubelet做出升级支持SELinux为止。
setenforce 0sed -i 's/^SELINUX=enforcing$/SELINUX=permissive/' /etc/selinux/config
[root@localhost ~]# setenforce 0[root@localhost ~]# sed -i 's/^SELINUX=enforcing$/SELINUX=permissive/' /etc/selinux/config
接下来安装kubeadm、kubelet和kubectl。
yum install -y kubelet kubeadm kubectl --disableexcludes=kubernetes
[root@localhost ~]# yum install -y kubelet kubeadm kubectl --disableexcludes=kubernetes已加载插件:fastestmirrorLoading mirror speeds from cached hostfile * base: mirrors.163.com * extras: mirrors.163.com * updates: mirrors.163.combase | 3.6 kB 00:00:00 docker-ce-stable | 3.5 kB 00:00:00 extras | 2.9 kB 00:00:00 kubernetes | 1.4 kB 00:00:00 updates | 2.9 kB 00:00:00 kubernetes/primary | 83 kB 00:00:00 kubernetes 612/612正在解决依赖关系--> 正在检查事务---> 软件包 kubeadm.x86_64.0.1.20.1-0 将被 安装--> 正在处理依赖关系 kubernetes-cni >= 0.8.6,它被软件包 kubeadm-1.20.1-0.x86_64 需要--> 正在处理依赖关系 cri-tools >= 1.13.0,它被软件包 kubeadm-1.20.1-0.x86_64 需要---> 软件包 kubectl.x86_64.0.1.20.1-0 将被 安装---> 软件包 kubelet.x86_64.0.1.20.1-0 将被 安装--> 正在处理依赖关系 socat,它被软件包 kubelet-1.20.1-0.x86_64 需要--> 正在处理依赖关系 conntrack,它被软件包 kubelet-1.20.1-0.x86_64 需要--> 正在检查事务---> 软件包 conntrack-tools.x86_64.0.1.4.4-7.el7 将被 安装--> 正在处理依赖关系 libnetfilter_cttimeout.so.1(LIBNETFILTER_CTTIMEOUT_1.1)(64bit),它被软件包 conntrack-tools-1.4.4-7.el7.x86_64 需要--> 正在处理依赖关系 libnetfilter_cttimeout.so.1(LIBNETFILTER_CTTIMEOUT_1.0)(64bit),它被软件包 conntrack-tools-1.4.4-7.el7.x86_64 需要--> 正在处理依赖关系 libnetfilter_cthelper.so.0(LIBNETFILTER_CTHELPER_1.0)(64bit),它被软件包 conntrack-tools-1.4.4-7.el7.x86_64 需要--> 正在处理依赖关系 libnetfilter_queue.so.1()(64bit),它被软件包 conntrack-tools-1.4.4-7.el7.x86_64 需要--> 正在处理依赖关系 libnetfilter_cttimeout.so.1()(64bit),它被软件包 conntrack-tools-1.4.4-7.el7.x86_64 需要--> 正在处理依赖关系 libnetfilter_cthelper.so.0()(64bit),它被软件包 conntrack-tools-1.4.4-7.el7.x86_64 需要---> 软件包 cri-tools.x86_64.0.1.13.0-0 将被 安装---> 软件包 kubernetes-cni.x86_64.0.0.8.7-0 将被 安装---> 软件包 socat.x86_64.0.1.7.3.2-2.el7 将被 安装--> 正在检查事务---> 软件包 libnetfilter_cthelper.x86_64.0.1.0.0-11.el7 将被 安装---> 软件包 libnetfilter_cttimeout.x86_64.0.1.0.0-7.el7 将被 安装---> 软件包 libnetfilter_queue.x86_64.0.1.0.2-2.el7_2 将被 安装--> 解决依赖关系完成依赖关系解决================================================================================================================================================================================================================= Package 架构 版本 源 大小=================================================================================================================================================================================================================正在安装: kubeadm x86_64 1.20.1-0 kubernetes 8.3 M kubectl x86_64 1.20.1-0 kubernetes 8.5 M kubelet x86_64 1.20.1-0 kubernetes 20 M为依赖而安装: conntrack-tools x86_64 1.4.4-7.el7 base 187 k cri-tools x86_64 1.13.0-0 kubernetes 5.1 M kubernetes-cni x86_64 0.8.7-0 kubernetes 19 M libnetfilter_cthelper x86_64 1.0.0-11.el7 base 18 k libnetfilter_cttimeout x86_64 1.0.0-7.el7 base 18 k libnetfilter_queue x86_64 1.0.2-2.el7_2 base 23 k socat x86_64 1.7.3.2-2.el7 base 290 k事务概要=================================================================================================================================================================================================================安装 3 软件包 (+7 依赖软件包)总下载量:61 M安装大小:262 MDownloading packages:(1/10): conntrack-tools-1.4.4-7.el7.x86_64.rpm | 187 kB 00:00:00 (2/10): e4c317024d29cf4972b71bde08e7bde5648beb1897005d3f3ebfe363d4d89b1b-kubeadm-1.20.1-0.x86_64.rpm | 8.3 MB 00:00:01 (3/10): f431ef4494e7301b760c73f9e2ea3048c7d6a443bf71602b41c86190a604a479-kubectl-1.20.1-0.x86_64.rpm | 8.5 MB 00:00:01 (4/10): 15c57dcc3d83abca74b887cba9e53c0be2b3329bcf4a0c534b99a76653971810-kubelet-1.20.1-0.x86_64.rpm | 20 MB 00:00:02 (5/10): libnetfilter_cttimeout-1.0.0-7.el7.x86_64.rpm | 18 kB 00:00:00 (6/10): libnetfilter_queue-1.0.2-2.el7_2.x86_64.rpm | 23 kB 00:00:00 (7/10): socat-1.7.3.2-2.el7.x86_64.rpm | 290 kB 00:00:00 (8/10): libnetfilter_cthelper-1.0.0-11.el7.x86_64.rpm | 18 kB 00:00:00 (9/10): db7cb5cb0b3f6875f54d10f02e625573988e3e91fd4fc5eef0b1876bb18604ad-kubernetes-cni-0.8.7-0.x86_64.rpm | 19 MB 00:00:02 (10/10): 14bfe6e75a9efc8eca3f638eb22c7e2ce759c67f95b43b16fae4ebabde1549f3-cri-tools-1.13.0-0.x86_64.rpm | 5.1 MB 00:00:08 -----------------------------------------------------------------------------------------------------------------------------------------------------------------------------------------------------------------总计 7.4 MB/s | 61 MB 00:00:08 Running transaction checkRunning transaction testTransaction test succeededRunning transaction 正在安装 : libnetfilter_cthelper-1.0.0-11.el7.x86_64 1/10 正在安装 : socat-1.7.3.2-2.el7.x86_64 2/10 正在安装 : libnetfilter_cttimeout-1.0.0-7.el7.x86_64 3/10 正在安装 : cri-tools-1.13.0-0.x86_64 4/10 正在安装 : kubectl-1.20.1-0.x86_64 5/10 正在安装 : libnetfilter_queue-1.0.2-2.el7_2.x86_64 6/10 正在安装 : conntrack-tools-1.4.4-7.el7.x86_64 7/10 正在安装 : kubernetes-cni-0.8.7-0.x86_64 8/10 正在安装 : kubelet-1.20.1-0.x86_64 9/10 正在安装 : kubeadm-1.20.1-0.x86_64 10/10 验证中 : conntrack-tools-1.4.4-7.el7.x86_64 1/10 验证中 : kubernetes-cni-0.8.7-0.x86_64 2/10 验证中 : libnetfilter_queue-1.0.2-2.el7_2.x86_64 3/10 验证中 : kubectl-1.20.1-0.x86_64 4/10 验证中 : kubeadm-1.20.1-0.x86_64 5/10 验证中 : cri-tools-1.13.0-0.x86_64 6/10 验证中 : libnetfilter_cttimeout-1.0.0-7.el7.x86_64 7/10 验证中 : socat-1.7.3.2-2.el7.x86_64 8/10 验证中 : libnetfilter_cthelper-1.0.0-11.el7.x86_64 9/10 验证中 : kubelet-1.20.1-0.x86_64 10/10 已安装: kubeadm.x86_64 0:1.20.1-0 kubectl.x86_64 0:1.20.1-0 kubelet.x86_64 0:1.20.1-0 作为依赖被安装: conntrack-tools.x86_64 0:1.4.4-7.el7 cri-tools.x86_64 0:1.13.0-0 kubernetes-cni.x86_64 0:0.8.7-0 libnetfilter_cthelper.x86_64 0:1.0.0-11.el7 libnetfilter_cttimeout.x86_64 0:1.0.0-7.el7 libnetfilter_queue.x86_64 0:1.0.2-2.el7_2 socat.x86_64 0:1.7.3.2-2.el7 完毕!
启动kubelet。
systemctl enable --now kubelet
[root@localhost ~]# systemctl enable --now kubeletCreated symlink from /etc/systemd/system/multi-user.target.wants/kubelet.service to /usr/lib/systemd/system/kubelet.service.
配置虚拟机环境
三台虚拟机都要配置环境。
关闭虚拟机的防火墙。
systemctl stop firewalld
查看虚拟机防火墙的状态。
systemctl status firewalld
[root@localhost ~]# systemctl stop firewalld[root@localhost ~]# systemctl status firewalld ● firewalld.service - firewalld - dynamic firewall daemon Loaded: loaded (/usr/lib/systemd/system/firewalld.service; enabled; vendor preset: enabled) Active: inactive (dead) since 六 2020-12-26 21:41:39 CST; 48min ago Docs: man:firewalld(1) Main PID: 658 (code=exited, status=0/SUCCESS)12月 26 21:39:29 localhost.localdomain firewalld[658]: WARNING: COMMAND_FAILED: '/usr/sbin/iptables -w10 -t nat -D OUTPUT -m addrtype --dst-type LOCAL -j DOCKER' failed: iptables: No chain/tar...by that name.12月 26 21:39:29 localhost.localdomain firewalld[658]: WARNING: COMMAND_FAILED: '/usr/sbin/iptables -w10 -t nat -D PREROUTING' failed: iptables: Bad rule (does a matching rule exist in that chain?).12月 26 21:39:29 localhost.localdomain firewalld[658]: WARNING: COMMAND_FAILED: '/usr/sbin/iptables -w10 -t nat -D OUTPUT' failed: iptables: Bad rule (does a matching rule exist in that chain?).12月 26 21:39:29 localhost.localdomain firewalld[658]: WARNING: COMMAND_FAILED: '/usr/sbin/iptables -w10 -t filter -X DOCKER' failed: iptables: Too many links.12月 26 21:39:29 localhost.localdomain firewalld[658]: WARNING: COMMAND_FAILED: '/usr/sbin/iptables -w10 -t filter -X DOCKER-ISOLATION-STAGE-1' failed: iptables: Too many links.12月 26 21:39:29 localhost.localdomain firewalld[658]: WARNING: COMMAND_FAILED: '/usr/sbin/iptables -w10 -t filter -F DOCKER-ISOLATION' failed: iptables: No chain/target/match by that name.12月 26 21:39:29 localhost.localdomain firewalld[658]: WARNING: COMMAND_FAILED: '/usr/sbin/iptables -w10 -t filter -X DOCKER-ISOLATION' failed: iptables: No chain/target/match by that name.12月 26 21:39:29 localhost.localdomain firewalld[658]: WARNING: COMMAND_FAILED: '/usr/sbin/iptables -w10 -D FORWARD -i docker0 -o docker0 -j DROP' failed: iptables: Bad rule (does a matching r...that chain?).12月 26 21:41:39 localhost.localdomain systemd[1]: Stopping firewalld - dynamic firewall daemon...12月 26 21:41:39 localhost.localdomain systemd[1]: Stopped firewalld - dynamic firewall daemon.Hint: Some lines were ellipsized, use -l to show in full.
再执行下面这条命令。
systemctl enable docker.service
再创建daemon.json。
vi /etc/docker/daemon.json
输入以下内容:
{ "exec-opts":["native.cgroupdriver=systemd"]} 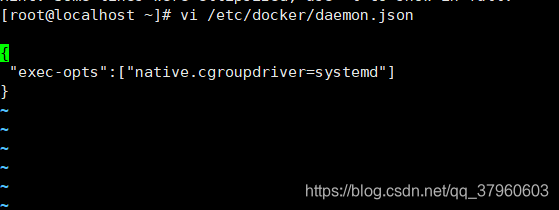
systemctl restart docker systemctl status docker
[root@localhost ~]# systemctl status docker● docker.service - Docker Application Container Engine Loaded: loaded (/usr/lib/systemd/system/docker.service; enabled; vendor preset: disabled) Active: active (running) since 六 2020-12-26 22:38:39 CST; 8s ago Docs: https://docs.docker.com Main PID: 15618 (dockerd) Tasks: 21 Memory: 76.2M CGroup: /system.slice/docker.service └─15618 /usr/bin/dockerd -H fd:// --containerd=/run/containerd/containerd.sock12月 26 22:38:39 localhost.localdomain dockerd[15618]: time="2020-12-26T22:38:39.233733538+08:00" level=info msg="ignoring event" module=libcontainerd namespace=moby topic=/tasks/delete type="...s.TaskDelete"12月 26 22:38:39 localhost.localdomain dockerd[15618]: time="2020-12-26T22:38:39.233762335+08:00" level=info msg="ignoring event" module=libcontainerd namespace=moby topic=/tasks/delete type="...s.TaskDelete"12月 26 22:38:39 localhost.localdomain dockerd[15618]: time="2020-12-26T22:38:39.427987979+08:00" level=info msg="Removing stale sandbox f97dd1457382757e80c758b2e96a099dc36b43fb1203fa55402ecf7...c703891c889)"12月 26 22:38:39 localhost.localdomain dockerd[15618]: time="2020-12-26T22:38:39.434206692+08:00" level=warning msg="Error (Unable to complete atomic operation, key modified) deleting object [...retrying...."12月 26 22:38:39 localhost.localdomain dockerd[15618]: time="2020-12-26T22:38:39.449258659+08:00" level=info msg="There are old running containers, the network config will not take affect"12月 26 22:38:39 localhost.localdomain dockerd[15618]: time="2020-12-26T22:38:39.483874720+08:00" level=info msg="Loading containers: done."12月 26 22:38:39 localhost.localdomain dockerd[15618]: time="2020-12-26T22:38:39.517010578+08:00" level=info msg="Docker daemon" commit=4484c46d9d graphdriver(s)=overlay2 version=19.03.1312月 26 22:38:39 localhost.localdomain dockerd[15618]: time="2020-12-26T22:38:39.517959158+08:00" level=info msg="Daemon has completed initialization"12月 26 22:38:39 localhost.localdomain dockerd[15618]: time="2020-12-26T22:38:39.543602109+08:00" level=info msg="API listen on /var/run/docker.sock"12月 26 22:38:39 localhost.localdomain systemd[1]: Started Docker Application Container Engine.Hint: Some lines were ellipsized, use -l to show in full.
再执行下面这条命令。
#禁用当前的 swapswapoff -a
使用kubeadm创建集群
在master节点使用kubeadm创建集群,工作节点不需要执行下面的各种命令。
博主假设大家在三台虚拟机上都配置好了环境,接下来需要在master节点使用kubeadm创建集群。
查看kubeadm命令有哪些参数。
kubeadm --help
[root@localhost ~]# kubeadm --help ┌──────────────────────────────────────────────────────────┐ │ KUBEADM │ │ Easily bootstrap a secure Kubernetes cluster │ │ │ │ Please give us feedback at: │ │ https://github.com/kubernetes/kubeadm/issues │ └──────────────────────────────────────────────────────────┘Usage: kubeadm [command]Available Commands: alpha Kubeadm experimental sub-commands certs Commands related to handling kubernetes certificates completion Output shell completion code for the specified shell (bash or zsh) config Manage configuration for a kubeadm cluster persisted in a ConfigMap in the cluster help Help about any command init Run this command in order to set up the Kubernetes control plane join Run this on any machine you wish to join an existing cluster reset Performs a best effort revert of changes made to this host by 'kubeadm init' or 'kubeadm join' token Manage bootstrap tokens upgrade Upgrade your cluster smoothly to a newer version with this command version Print the version of kubeadmFlags: --add-dir-header If true, adds the file directory to the header of the log messages -h, --help help for kubeadm --log-file string If non-empty, use this log file --log-file-max-size uint Defines the maximum size a log file can grow to. Unit is megabytes. If the value is 0, the maximum file size is unlimited. (default 1800) --one-output If true, only write logs to their native severity level (vs also writing to each lower severity level --rootfs string [EXPERIMENTAL] The path to the 'real' host root filesystem. --skip-headers If true, avoid header prefixes in the log messages --skip-log-headers If true, avoid headers when opening log files -v, --v Level number for the log level verbosityUse "kubeadm [command] --help" for more information about a command.
示例用法:创建一个双节点集群,一个控制平面节点(即master节点,用来控制集群)和一个工作节点(你的工作负载,如Pods和Deployments的运行)。这里提到了两个命令:kubeadm init(控制平面节点) 和kubeadm join <arguments-returned-from-init> (工作节点)。
Example usage: Create a two-machine cluster with one control-plane node (which controls the cluster), and one worker node (where your workloads, like Pods and Deployments run). ┌──────────────────────────────────────────────────────────┐ │ On the first machine: │ ├──────────────────────────────────────────────────────────┤ │ control-plane# kubeadm init │ └──────────────────────────────────────────────────────────┘ ┌──────────────────────────────────────────────────────────┐ │ On the second machine: │ ├──────────────────────────────────────────────────────────┤ │ worker# kubeadm join│ └──────────────────────────────────────────────────────────┘ You can then repeat the second step on as many other machines as you like.
kubeadm init:执行此命令,初始化Kubernetes集群的控制平面。kubeadm join:执行此命令,加入到现有的Kubernetes集群中。
查看kubeadm init命令的参数。
kubeadm init --help
参数比较多,这里就不列举了,就介绍一下kubeadm init命令常用的参数:
--kubernetes-version:指定Kubernetes的版本,博主选择v1.20.1这个版本,因为该版本的Kubernetes和博主安装的Docker版本兼容。--pod-network-cidr: 指定pod网络的IP地址,它的值取决于你选择哪个网络,比如博主选择的是Flannel网络,因此值需要指定为10.244.0.0/16,因为Flannel网络相对于其他网络要简单一些,对于刚开始搭建Kubernetes集群比较友好,需要的配置较少,功能也较为完善。--apiserver-advertise-address: 指定master节点发布的IP地址,如果不指定,则会自动检测网络接口,通常是内网IP。--ignore-preflight-errors:检查错误将显示为检查的警告列表。值为all会忽略所有检查中的错误。--image-repository:选择一个Container Registry从中拉取控制平面镜像(默认为k8s.gcr.io,这个Container Registry拉取镜像特别慢,会导致超时,博主会换成阿里云的Container Registry)。
Kubernetes集群需要的硬件资源,如果本地环境没办法满足,可以通过设置--ignore-preflight-errors=all来避免出现问题。
现在终于可以执行kubeadm init命令了。博主搭建的Kubernetes集群的master节点IP地址为192.168.1.238,大家这里填自己master节点的IP地址即可。
kubeadm init --kubernetes-version=v1.20.1 --pod-network-cidr=10.244.0.0/16 --apiserver-advertise-address=192.168.1.238 --ignore-preflight-errors=all --image-repository=registry.aliyuncs.com/google_containers
[root@localhost ~]# kubeadm init --kubernetes-version=v1.20.1 --pod-network-cidr=10.244.0.0/16 --apiserver-advertise-address=192.168.1.238 --ignore-preflight-errors=all --image-repository=registry.aliyuncs.com/google_containers[init] Using Kubernetes version: v1.20.1[preflight] Running pre-flight checks [WARNING NumCPU]: the number of available CPUs 1 is less than the required 2[preflight] Pulling images required for setting up a Kubernetes cluster[preflight] This might take a minute or two, depending on the speed of your internet connection[preflight] You can also perform this action in beforehand using 'kubeadm config images pull'[certs] Using certificateDir folder "/etc/kubernetes/pki"[certs] Generating "ca" certificate and key[certs] Generating "apiserver" certificate and key[certs] apiserver serving cert is signed for DNS names [kubernetes kubernetes.default kubernetes.default.svc kubernetes.default.svc.cluster.local localhost.localdomain] and IPs [10.96.0.1 192.168.1.238][certs] Generating "apiserver-kubelet-client" certificate and key[certs] Generating "front-proxy-ca" certificate and key[certs] Generating "front-proxy-client" certificate and key[certs] Generating "etcd/ca" certificate and key[certs] Generating "etcd/server" certificate and key[certs] etcd/server serving cert is signed for DNS names [localhost localhost.localdomain] and IPs [192.168.1.238 127.0.0.1 ::1][certs] Generating "etcd/peer" certificate and key[certs] etcd/peer serving cert is signed for DNS names [localhost localhost.localdomain] and IPs [192.168.1.238 127.0.0.1 ::1][certs] Generating "etcd/healthcheck-client" certificate and key[certs] Generating "apiserver-etcd-client" certificate and key[certs] Generating "sa" key and public key[kubeconfig] Using kubeconfig folder "/etc/kubernetes"[kubeconfig] Writing "admin.conf" kubeconfig file[kubeconfig] Writing "kubelet.conf" kubeconfig file[kubeconfig] Writing "controller-manager.conf" kubeconfig file[kubeconfig] Writing "scheduler.conf" kubeconfig file[kubelet-start] Writing kubelet environment file with flags to file "/var/lib/kubelet/kubeadm-flags.env"[kubelet-start] Writing kubelet configuration to file "/var/lib/kubelet/config.yaml"[kubelet-start] Starting the kubelet[control-plane] Using manifest folder "/etc/kubernetes/manifests"[control-plane] Creating static Pod manifest for "kube-apiserver"[control-plane] Creating static Pod manifest for "kube-controller-manager"[control-plane] Creating static Pod manifest for "kube-scheduler"[etcd] Creating static Pod manifest for local etcd in "/etc/kubernetes/manifests"[wait-control-plane] Waiting for the kubelet to boot up the control plane as static Pods from directory "/etc/kubernetes/manifests". This can take up to 4m0s[apiclient] All control plane components are healthy after 19.501884 seconds[upload-config] Storing the configuration used in ConfigMap "kubeadm-config" in the "kube-system" Namespace[kubelet] Creating a ConfigMap "kubelet-config-1.20" in namespace kube-system with the configuration for the kubelets in the cluster[upload-certs] Skipping phase. Please see --upload-certs[mark-control-plane] Marking the node localhost.localdomain as control-plane by adding the labels "node-role.kubernetes.io/master=''" and "node-role.kubernetes.io/control-plane='' (deprecated)"[mark-control-plane] Marking the node localhost.localdomain as control-plane by adding the taints [node-role.kubernetes.io/master:NoSchedule][bootstrap-token] Using token: ramuta.ko6wlounsq2uxzyt[bootstrap-token] Configuring bootstrap tokens, cluster-info ConfigMap, RBAC Roles[bootstrap-token] configured RBAC rules to allow Node Bootstrap tokens to get nodes[bootstrap-token] configured RBAC rules to allow Node Bootstrap tokens to post CSRs in order for nodes to get long term certificate credentials[bootstrap-token] configured RBAC rules to allow the csrapprover controller automatically approve CSRs from a Node Bootstrap Token[bootstrap-token] configured RBAC rules to allow certificate rotation for all node client certificates in the cluster[bootstrap-token] Creating the "cluster-info" ConfigMap in the "kube-public" namespace[kubelet-finalize] Updating "/etc/kubernetes/kubelet.conf" to point to a rotatable kubelet client certificate and key[addons] Applied essential addon: CoreDNS[addons] Applied essential addon: kube-proxyYour Kubernetes control-plane has initialized successfully!To start using your cluster, you need to run the following as a regular user: mkdir -p $HOME/.kube sudo cp -i /etc/kubernetes/admin.conf $HOME/.kube/config sudo chown $(id -u):$(id -g) $HOME/.kube/configAlternatively, if you are the root user, you can run: export KUBECONFIG=/etc/kubernetes/admin.confYou should now deploy a pod network to the cluster.Run "kubectl apply -f [podnetwork].yaml" with one of the options listed at: https://kubernetes.io/docs/concepts/cluster-administration/addons/Then you can join any number of worker nodes by running the following on each as root:kubeadm join 192.168.1.238:6443 --token ramuta.ko6wlounsq2uxzyt \ --discovery-token-ca-cert-hash sha256:aacb271cc8b80f1eda32aef55158c83ce69ba391138fd14533f4c05400bbc5c4
如果是root用户,执行下面这条命令。
export KUBECONFIG=/etc/kubernetes/admin.conf
如果不是root用户,执行下面这些命令。
mkdir -p $HOME/.kubesudo cp -i /etc/kubernetes/admin.conf $HOME/.kube/configsudo chown $(id -u):$(id -g) $HOME/.kube/config
再执行下面这条命令。
kubectl apply -f https://raw.githubusercontent.com/coreos/flannel/master/Documentation/kube-flannel.yml
出现问题,如果你没有出现问题,就不需要下面这些操作。
[root@localhost ~]# kubectl apply -f https://raw.githubusercontent.com/coreos/flannel/master/Documentation/kube-flannel.ymlThe connection to the server raw.githubusercontent.com was refused - did you specify the right host or port?
网上很多办法都不行(打开VPN也不行),博主打开VPN直接访问https://raw.githubusercontent.com/coreos/flannel/master/Documentation/kube-flannel.yml,再复制里面的内容。
 在本地直接创建一个
yaml文件。  点击下方图标,本地需要安装
Xftp。  直接使用
直接使用Xftp拖进去即可。 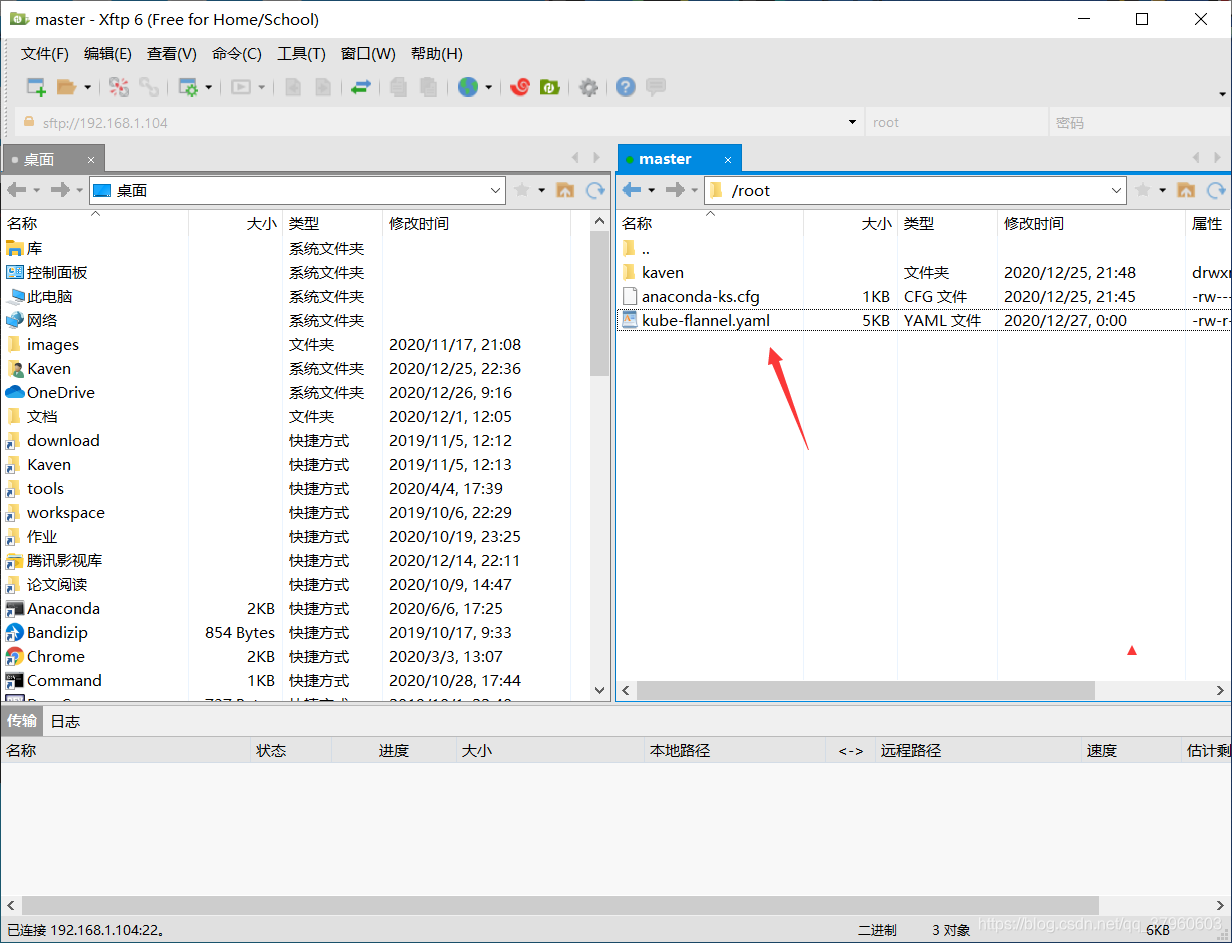
[root@localhost ~]# ll总用量 8-rw-------. 1 root root 1245 12月 25 21:45 anaconda-ks.cfg-rw-r--r--. 1 root root 5042 12月 27 00:00 kube-flannel.yaml[root@localhost ~]# kubectl apply -f kube-flannel.yamlpodsecuritypolicy.policy/psp.flannel.unprivileged createdclusterrole.rbac.authorization.k8s.io/flannel createdclusterrolebinding.rbac.authorization.k8s.io/flannel createdserviceaccount/flannel createdconfigmap/kube-flannel-cfg createddaemonset.apps/kube-flannel-ds created
这样一个master节点的Kubernetes集群就搭建好了,之后就需要往Kubernetes集群中加入工作节点了。
工作节点加入Kubernetes集群
工作节点加入Kubernetes集群,两台工作节点虚拟机需要执行下面这些命令要。
默认情况下,令牌会在24小时后过期。如果要在当前令牌过期后将节点加入集群, 则可以通过在控制平面节点上运行以下命令来创建新令牌:
kubeadm token create
输出类似于以下内容:
5didvk.d09sbcov8ph2amjw
如果你没有--discovery-token-ca-cert-hash的值,则可以通过在控制平面节点上执行以下命令链来获取它:
openssl x509 -pubkey -in /etc/kubernetes/pki/ca.crt | openssl rsa -pubin -outform der 2>/dev/null | \ openssl dgst -sha256 -hex | sed 's/^.* //'
输出类似于以下内容:
8cb2de97839780a412b93877f8507ad6c94f73add17d5d7058e91741c9d5ec78
在两台工作节点虚拟机中执行下面命令,将工作节点加入到Kubernetes集群中,大家这里填自己的--token和--discovery-token-ca-cert-hash。
kubeadm join 192.168.1.238:6443 --token ramuta.ko6wlounsq2uxzyt \ --discovery-token-ca-cert-hash sha256:aacb271cc8b80f1eda32aef55158c83ce69ba391138fd14533f4c05400bbc5c4 \ --ignore-preflight-errors=all
node-1加入Kubernetes集群。
[root@localhost ~]# kubeadm join 192.168.1.238:6443 --token ramuta.ko6wlounsq2uxzyt \> --discovery-token-ca-cert-hash sha256:aacb271cc8b80f1eda32aef55158c83ce69ba391138fd14533f4c05400bbc5c4 \> --ignore-preflight-errors=all [preflight] Running pre-flight checks [WARNING Hostname]: hostname "node-1" could not be reached [WARNING Hostname]: hostname "node-1": lookup node-1 on 192.168.1.1:53: no such host[preflight] Reading configuration from the cluster...[preflight] FYI: You can look at this config file with 'kubectl -n kube-system get cm kubeadm-config -o yaml'[kubelet-start] Writing kubelet configuration to file "/var/lib/kubelet/config.yaml"[kubelet-start] Writing kubelet environment file with flags to file "/var/lib/kubelet/kubeadm-flags.env"[kubelet-start] Starting the kubelet[kubelet-start] Waiting for the kubelet to perform the TLS Bootstrap...This node has joined the cluster:* Certificate signing request was sent to apiserver and a response was received.* The Kubelet was informed of the new secure connection details.Run 'kubectl get nodes' on the control-plane to see this node join the cluster.
node-2加入Kubernetes集群。
[root@localhost ~]# kubeadm join 192.168.1.238:6443 --token ramuta.ko6wlounsq2uxzyt \> --discovery-token-ca-cert-hash sha256:aacb271cc8b80f1eda32aef55158c83ce69ba391138fd14533f4c05400bbc5c4 \> --ignore-preflight-errors=all[preflight] Running pre-flight checks [WARNING FileAvailable--etc-kubernetes-kubelet.conf]: /etc/kubernetes/kubelet.conf already exists [WARNING FileAvailable--etc-kubernetes-bootstrap-kubelet.conf]: /etc/kubernetes/bootstrap-kubelet.conf already exists [WARNING Hostname]: hostname "node-3" could not be reached [WARNING Hostname]: hostname "node-3": lookup node-3 on 192.168.1.1:53: no such host [WARNING Port-10250]: Port 10250 is in use [WARNING FileAvailable--etc-kubernetes-pki-ca.crt]: /etc/kubernetes/pki/ca.crt already exists[preflight] Reading configuration from the cluster...[preflight] FYI: You can look at this config file with 'kubectl -n kube-system get cm kubeadm-config -o yaml'[kubelet-start] Writing kubelet configuration to file "/var/lib/kubelet/config.yaml"[kubelet-start] Writing kubelet environment file with flags to file "/var/lib/kubelet/kubeadm-flags.env"[kubelet-start] Starting the kubelet[kubelet-start] Waiting for the kubelet to perform the TLS Bootstrap...This node has joined the cluster:* Certificate signing request was sent to apiserver and a response was received.* The Kubelet was informed of the new secure connection details.Run 'kubectl get nodes' on the control-plane to see this node join the cluster.
在master节点上执行下面这条命令,可以获取Kubernetes集群的所有节点。
kubectl get node
[root@localhost ~]# kubectl get nodeNAME STATUS ROLES AGE VERSIONlocalhost.localdomain Ready control-plane,master 25m v1.20.1node-1 Ready18m v1.20.1node-3 Ready 6m31s v1.20.1
Xshell连接虚拟机和搭建Kubernetes基础集群就介绍到这里。
大家可能会因为硬件、网络各种原因,导致出现各种各样博主没有踩到过的坑,大家可以留言,博主会尽量解决。
写博客是博主记录自己的学习过程,如果有错误,请指正,谢谢!
转载地址:https://kaven.blog.csdn.net/article/details/111767977 如侵犯您的版权,请留言回复原文章的地址,我们会给您删除此文章,给您带来不便请您谅解!
发表评论
最新留言
关于作者
