本文共 13757 字,大约阅读时间需要 45 分钟。
目录
关于Fragment官方文档:
Fragment详解见链接

以下是自己的笔记:
静态添加碎片
fragment1.xml
fragment2.xml
Fragment1.java
import android.os.Bundle;import android.support.annotation.NonNull;import android.support.annotation.Nullable;import android.support.v4.app.Fragment;import android.view.LayoutInflater;import android.view.View;import android.view.ViewGroup;public class Fragment1 extends Fragment { // 当系统第一次绘制UI的时候调用,通过这个方法让fragment显示自己的布局 @Nullable @Override public View onCreateView(@NonNull LayoutInflater inflater, @Nullable ViewGroup container, @Nullable Bundle savedInstanceState) { View view = inflater.inflate(R.layout.fragment1, container, false); return view; }} 笔记批注:
Activity 的 onCreate() 方法与 Fragment 的 onCreateView() 方法稍微不同,在 Activity 的 onCreate() 方法中,我们可以调用 setContentView() 来为 该 Activity 设置布局。在 Fragment 中,我们需要根据 XML 布局资源 ID 获得 视图,并在 onCreateView() 方法中返回该视图。
我们来看看这里onCreateView()参数的意思,这里R.layout.fragment1 是对应用资源中保存的名为 fragment1.xml 的布局资源的引用。传递到 onCreateView() 的 container 参数是Fragment布局,将插入到的父 ViewGroup(来自 Activity 的布局)。savedInstanceState 参数是在恢复Fragment时,提供上一个Fragment实例相关数据的 Bundle。(同样与 Activity 一样,假使 Activity 的进程被终止,而您需要在重建 Activity 时恢复Fragment状态,您也可以使用 Bundle 保留Fragment的状态。您可以在Fragment的 onSaveInstanceState() 回调期间保存状态,并可在 onCreate()、onCreateView() 或 onActivityCreated() 期间恢复状态。如需了解有关保存状态的详细信息,请参阅 Activity 文档)
inflate() 方法带有三个参数:
1.您想要扩展的布局的资源 ID;
2.将作为扩展布局父项的 ViewGroup。传递 container 对系统向扩展布局的根视图(由其所属的父视图指定)应用布局参数具有重要意义; 3.指示是否应该在扩展期间将扩展布局附加至 ViewGroup(第二个参数)的布尔值。(在本例中,其值为 false,因为系统已经将扩展布局插入 container — 传递 true 值会在最终布局中创建一个多余的视图组。)
Fragment2.java
import android.os.Bundle;import android.support.annotation.NonNull;import android.support.annotation.Nullable;import android.support.v4.app.Fragment;import android.view.LayoutInflater;import android.view.View;import android.view.ViewGroup;public class Fragment2 extends Fragment { @Nullable @Override public View onCreateView(@NonNull LayoutInflater inflater, @Nullable ViewGroup container, @Nullable Bundle savedInstanceState) { View view = inflater.inflate(R.layout.fragment2, container, false); return view; }} activity_main.xml
笔记批注:
可以看到,使用<fragment>标签在布局中添加碎片,其中我们需要指定android:name属性来显式指明要添加的碎片类名,记得一定要把包名加上。<fragment> 中的 android:name 属性指定要在布局中实例化的 Fragment 类。当系统创建此 Activity 布局时(setContentView(R.layout.activity_main)),会实例化在布局中指定的每个fragment,并为每个fragment调用 onCreateView() 方法,以检索每个fragment的布局(这里是R.layout.fragmemt1和R.layout.fragment2)。系统会直接插入fragment返回的 View 来替代 <fragment> 元素。
MainActivity.java
import android.support.v7.app.AppCompatActivity;import android.os.Bundle;public class MainActivity extends AppCompatActivity { @Override protected void onCreate(Bundle savedInstanceState) { super.onCreate(savedInstanceState); setContentView(R.layout.activity_main); }} 至于MainActivity,由于我们使用的V4包,必须将MainActivity派生自FragmentActivity,否则根本无法启动程序!报错Trying to instantiate a class example.com.fragment_rumen.Fragment1 that is not a Fragment。因为系统的Activity只能用来盛装系统自带的Fragment,而无法盛装V4包中的Fragment,因为系统的Activity根本无法识别V4包中的Fragment,因为这根本就不是一块的代码!如果不使用V4包,使用系统自带的Fragment则不必将MainActivity派生自FragmentActivity。
那为什么这里extends AppCompatActivity可以,但是extends Activity会报错呢?
public class AppCompatActivity extends android.support.v4.app.FragmentActivity implements android.support.v7.app.AppCompatCallback, android.support.v4.app.TaskStackBuilder.SupportParentable, android.support.v7.app.ActionBarDrawerToggle.DelegateProvider
继承了FragmentActivity,所以不报错。
这种简单的碎片用法实际不会采用,用于理解,接下来看看高级一点的使用。
动态添加碎片
动态添加碎片主要分为5步。
1.创建待添加碎片的的实例。
2.获取FragmentManager,在活动中可以直接通过调用getSupportFragmentManager()方法得到。
3.开启一个事务,通过调用beginTransaction()方法开启。
4.向容器中添加或替换碎片,一般使用replace()方法实现,需要传入容器的id和待添加的碎片实例。
5.提交事务,调用commit()方法来完成。
目录结构

MainActivity.java
import android.graphics.Point;import android.os.Bundle;import android.support.v4.app.FragmentManager;import android.support.v4.app.FragmentTransaction;import android.support.v7.app.AppCompatActivity;public class MainActivity extends AppCompatActivity { @Override protected void onCreate(Bundle savedInstanceState) { super.onCreate(savedInstanceState); setContentView(R.layout.activity_main); Point point = new Point(); getWindowManager().getDefaultDisplay().getRealSize(point); int width = point.x; int height = point.y; FragmentManager fragmentManager = getSupportFragmentManager(); FragmentTransaction fragmentTransaction = fragmentManager.beginTransaction(); if (height > width) { // 竖屏 // android.R.id.content 代表当前手机的窗体 fragmentTransaction.replace(android.R.id.content, new Fragment1()); } else { // 横屏 fragmentTransaction.replace(android.R.id.content, new Fragment2()); } fragmentTransaction.commit(); }} 笔记批注:
关于Fragment有两个不同的包下的Fragment选择,一个是系统内置的android.app.Fragment,一个是support-v4库中的android.support.v4.app.Fragment。这里强烈建议使用support-v4库中的Fragment,因为它可以让碎片在所有android系统版本中保持功能的一致性。比如Fragment是api11(android 3.0)才开始支持的,在之前系统版本的手机中无法运行。又比如在Fragment中嵌套Fragment,这个功能是在api 17(android 4.2)才开始支持的,如果使用的是内置的Fragment,那么4.2之前的系统设备运行就会崩溃,说是不支持的方法。而使用support-v4库中的Fragment就不会出现这个问题,会自动向下兼容,只要保证support-v4库是最新的就行的。
另外,我们并不需要在build.gradle文件中添加support-v4库的依赖,因为build.gradle文件中已经添加了appcompat-v7库的依赖,而这个库会把support-v4库也一起引入进来。
Fragment1.java
import android.os.Bundle;import android.support.v4.app.Fragment;import android.view.LayoutInflater;import android.view.View;import android.view.ViewGroup;/** * A simple {@link Fragment} subclass. */public class Fragment1 extends Fragment { public Fragment1() { // Required empty public constructor } @Override public View onCreateView(LayoutInflater inflater, ViewGroup container, Bundle savedInstanceState) { View view = inflater.inflate(R.layout.fragment1, container, false); return view; }} Fragment2.java
import android.os.Bundle;import android.support.v4.app.Fragment;import android.view.LayoutInflater;import android.view.View;import android.view.ViewGroup;/** * A simple {@link Fragment} subclass. */public class Fragment2 extends Fragment { public Fragment2() { // Required empty public constructor } @Override public View onCreateView(LayoutInflater inflater, ViewGroup container, Bundle savedInstanceState) { View view = inflater.inflate(R.layout.fragment2, container, false); return view; }} activity_main.xml
fragment1.xml
fragment2.xml
运行结果:


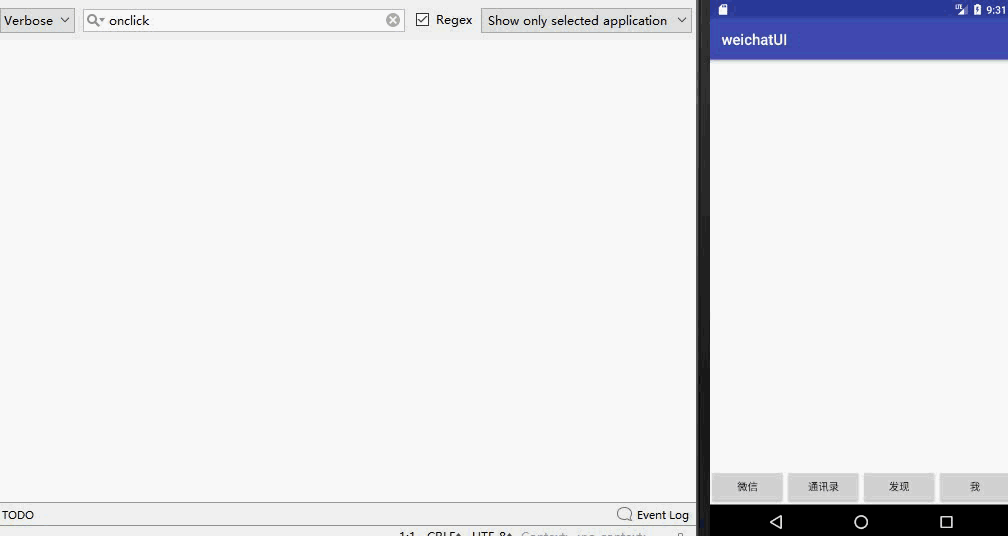
模拟微信主界面
运行效果图:
目录结构

MainActivity.java
import android.os.Bundle;import android.support.v4.app.FragmentManager;import android.support.v4.app.FragmentTransaction;import android.support.v7.app.AppCompatActivity;import android.view.View;public class MainActivity extends AppCompatActivity { @Override protected void onCreate(Bundle savedInstanceState) { super.onCreate(savedInstanceState); setContentView(R.layout.activity_main); } public void click(View view) { // 获取管理者 FragmentManager fragmentManager = getSupportFragmentManager(); FragmentTransaction fragmentTransaction = fragmentManager.beginTransaction(); switch (view.getId()) { case R.id.btn_wx: fragmentTransaction.replace(R.id.ll_layout, new WxFragment()); break; case R.id.btn_contact: fragmentTransaction.replace(R.id.ll_layout, new ContactFragment()); break; case R.id.btn_discover: fragmentTransaction.replace(R.id.ll_layout, new DiscoverFragment()); break; case R.id.btn_me: fragmentTransaction.replace(R.id.ll_layout, new MeFragment()); break; } fragmentTransaction.commit(); }} WxFragment.java
import android.os.Bundle;import android.support.v4.app.Fragment;import android.util.Log;import android.view.LayoutInflater;import android.view.View;import android.view.ViewGroup;/** * A simple {@link Fragment} subclass. */public class WxFragment extends Fragment { private static final String TAG = "WxFragment"; public WxFragment() { // Required empty public constructor } @Override public View onCreateView(LayoutInflater inflater, ViewGroup container, Bundle savedInstanceState) { View view = inflater.inflate(R.layout.fragment_wx, container, false); // 测试按钮如何点击 view.findViewById(R.id.btn_test).setOnClickListener(new View.OnClickListener() { @Override public void onClick(View v) { Log.d(TAG, "================onClick: "); } }); return view; }} ContactFragment.java
import android.os.Bundle;import android.support.v4.app.Fragment;import android.util.Log;import android.view.LayoutInflater;import android.view.View;import android.view.ViewGroup;/** * A simple {@link Fragment} subclass. */public class ContactFragment extends Fragment { private static final String TAG = "WxFragment"; public ContactFragment() { // Required empty public constructor } @Override public View onCreateView(LayoutInflater inflater, ViewGroup container, Bundle savedInstanceState) { View view = inflater.inflate(R.layout.fragment_contact, container, false); return view; }} DiscoverFragment.java
import android.os.Bundle;import android.support.v4.app.Fragment;import android.view.LayoutInflater;import android.view.View;import android.view.ViewGroup;/** * A simple {@link Fragment} subclass. */public class DiscoverFragment extends Fragment { private static final String TAG = "WxFragment"; public DiscoverFragment() { // Required empty public constructor } @Override public View onCreateView(LayoutInflater inflater, ViewGroup container, Bundle savedInstanceState) { View view = inflater.inflate(R.layout.fragment_discover, container, false); return view; }} MeFragment.java
import android.os.Bundle;import android.support.v4.app.Fragment;import android.view.LayoutInflater;import android.view.View;import android.view.ViewGroup;/** * A simple {@link Fragment} subclass. */public class MeFragment extends Fragment { private static final String TAG = "WxFragment"; public MeFragment() { // Required empty public constructor } @Override public View onCreateView(LayoutInflater inflater, ViewGroup container, Bundle savedInstanceState) { View view = inflater.inflate(R.layout.fragment_me, container, false); return view; }} activity_main.xml
fragment_wx.xml
fragment_contact.xml
fragment_discover.xml
fragment_me.xml
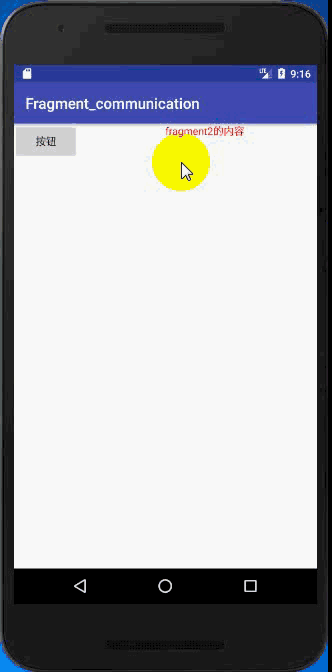
Fragment之间的通信
示例效果图:
目录结构图:

MainActivity.java
import android.support.v4.app.FragmentManager;import android.support.v4.app.FragmentTransaction;import android.support.v7.app.AppCompatActivity;import android.os.Bundle;public class MainActivity extends AppCompatActivity { @Override protected void onCreate(Bundle savedInstanceState) { super.onCreate(savedInstanceState); setContentView(R.layout.activity_main); FragmentManager supportFragmentManager = getSupportFragmentManager(); FragmentTransaction fragmentTransaction = supportFragmentManager.beginTransaction(); fragmentTransaction.replace(R.id.ll1, new Fragment1()); fragmentTransaction.replace(R.id.ll2, new Fragment2()); fragmentTransaction.commit(); }} Fragment1.java
import android.os.Bundle;import android.support.annotation.NonNull;import android.support.annotation.Nullable;import android.support.v4.app.Fragment;import android.view.LayoutInflater;import android.view.View;import android.view.ViewGroup;public class Fragment1 extends Fragment { // 当系统第一次绘制UI的时候调用,通过这个方法让fragment显示自己的布局 @Nullable @Override public View onCreateView(@NonNull LayoutInflater inflater, @Nullable ViewGroup container, @Nullable Bundle savedInstanceState) { View view = inflater.inflate(R.layout.fragment1, container, false); view.findViewById(R.id.btn_update).setOnClickListener(new View.OnClickListener() { @Override public void onClick(View v) { // 通过fragment的公共桥梁---->activity Fragment2 fragment2 = (Fragment2) getActivity().getSupportFragmentManager().findFragmentById(R.id.ll2); fragment2.setText("hello world!"); // 不能通过new对象操作,会空指针异常,找不到textview控件,因为new出来不会执行CreateView } }); return view; }} Fragment2.java
import android.os.Bundle;import android.support.annotation.NonNull;import android.support.annotation.Nullable;import android.support.v4.app.Fragment;import android.view.LayoutInflater;import android.view.View;import android.view.ViewGroup;import android.widget.TextView;public class Fragment2 extends Fragment { private TextView tv_content; @Nullable @Override public View onCreateView(@NonNull LayoutInflater inflater, @Nullable ViewGroup container, @Nullable Bundle savedInstanceState) { View view = inflater.inflate(R.layout.fragment2, container, false); tv_content = (TextView) view.findViewById(R.id.tv_content); return view; } public void setText(String text) { tv_content.setText(text); }} activity_main.xml
fragment1.xml
fragment2.xml
====================Talk is cheap, show me the code=====================
转载地址:https://liuchenyang0515.blog.csdn.net/article/details/83412364 如侵犯您的版权,请留言回复原文章的地址,我们会给您删除此文章,给您带来不便请您谅解!
发表评论
最新留言
关于作者
