本文共 11784 字,大约阅读时间需要 39 分钟。
文章目录
线程的创建及启动方式
以下只展示较为常见的6中将建方式,更多完整的创建方式见下文:
import java.util.concurrent.*;public class T02_HowToCreateThread { /** * 继承 Thread, 重写 run() */ static class MyThread extends Thread { @Override public void run() { // super.run(); System.out.println("Hello MyThread, extends Thread !"); } } /** * 实现 Runnable, 重写run() */ static class MyRun implements Runnable { @Override public void run() { System.out.println("Hello MyRun, implements Runnable !"); } } /** * 实现 Callable, 重写call() */ static class MyCallWithoutV implements Callable { @Override public Object call() throws Exception { System.out.println("Hello MyCallWithoutV, implements Callable"); return "success, implements Callable "; } } /** * 实现 Callable , 重写call() */ static class MyCallWithString implements Callable { @Override public String call() throws Exception { System.out.println("Hello MyCallWithString, implements Callable "); return "success, implements Callable "; } } public static void main(String[] args) { //第一种 new MyThread().start(); //第二种 new Thread(new MyRun()).start(); //第三种: Lambda表达式 new Thread(() -> { System.out.println("Hello Lambda !"); }).start(); //第四种 //方式1:相当于继承了Thread类,作为子类重写run()实现 new Thread() { public void run() { System.out.println("匿名内部类创建线程方式1..."); }; }.start(); //方式2:实现Runnable,Runnable作为匿名内部类 new Thread(new Runnable() { public void run() { System.out.println("匿名内部类创建线程方式2..."); } } ).start(); //第五种: FutureTask + Callable new Thread(new FutureTask (new MyCallWithoutV())).start(); new Thread(new FutureTask<>(new MyCallWithString())).start(); //第六种: Executors.newCachedThreadPool() ExecutorService executorService = Executors.newCachedThreadPool(); executorService.execute(() -> { System.out.println("Hello Executors.newCachedThreadPool and Lambda !"); }); executorService.shutdown(); //优雅的关闭线程池, 用shutdown() }} Hello 【Lambda】 !【匿名内部类】创建线程方式2...Hello MyThread, 【extends Thread】 !【匿名内部类】创建线程方式1...Hello MyRun, 【implements Runnable】 !Hello MyCallWithoutV, 【implements Callable】Hello MyCallWithString, 【implements Callable <返回值类型> 】【线程池实现】②Executors.newCachedThreadPool and Lambda !【定时器方式】定时任务延迟0(即立刻执行),每隔1000ms执行一次【线程池实现】①Executors.newFixedThreadPool(线程数), 线程pool-1-thread-1 is running【线程池实现】①Executors.newFixedThreadPool(线程数), 线程pool-1-thread-1 is running【线程池实现】①Executors.newFixedThreadPool(线程数), 线程pool-1-thread-1 is running【线程池实现】①Executors.newFixedThreadPool(线程数), 线程pool-1-thread-1 is running【线程池实现】①Executors.newFixedThreadPool(线程数), 线程pool-1-thread-1 is running【线程池实现】①Executors.newFixedThreadPool(线程数), 线程pool-1-thread-4 is running【线程池实现】①Executors.newFixedThreadPool(线程数), 线程pool-1-thread-1 is running【线程池实现】①Executors.newFixedThreadPool(线程数), 线程pool-1-thread-3 is running【线程池实现】①Executors.newFixedThreadPool(线程数), 线程pool-1-thread-2 is running【线程池实现】①Executors.newFixedThreadPool(线程数), 线程pool-1-thread-5 is running【定时器方式】定时任务延迟0(即立刻执行),每隔1000ms执行一次【定时器方式】定时任务延迟0(即立刻执行),每隔1000ms执行一次…………【定时器方式】定时任务延迟0(即立刻执行),每隔1000ms执行一次
8种创建方式
1、继承 Thread 类
-
extends Thread, @Override run() -
无返回值、无法抛出异常
创建: 编写一个类 MyThread 让它继承 Thread 类,并把需要多线程运行的程序放到 public void run() 方法里。
启动: 在主函数中,new 出 MyThread 类的实例。
运行: 调用 MyThread 类的实例的 start() 方法即可。
/** * 继承 Thread, 重写 run() */static class MyThread extends Thread { @Override public void run() { super.run(); System.out.println("Hello MyThread, 【extends Thread】 !"); }}public static void main(String[] args) { new MyThread().start();} 2、实现 Runnable 接口
-
implements Runnable, @Override run() -
无返回值、无法抛出异常
创建: 编写一个类 MyThread 让它实现 Runnable 接口,并且要重写 run() 方法(把需要多线程运行的程序放到 public void run() 方法里)。
启动: 在主函数中,new 出 MyThread 类的实例,new 出Thread 类(带有 target 的构造方法),把MyThread 类的实例作为参数传入Thread 类的构造方法里。
运行: 调用 Thread 类的实例的 start() 方法即可。
/** * 实现 Runnable接口, 重写run() */static class MyRun implements Runnable { @Override public void run() { System.out.println("Hello MyRun, 【implements Runnable】 !"); }}public static void main(String[] args) { new Thread(new MyRun()).start();} 3、Lambda 表达式
-
书写简便
-
可以抛出异常(需要有
try\catch)
public static void main(String[] args) { new Thread(() -> { System.out.println("Hello 【Lambda】 !"); }).start();} 4、匿名内部类的方式(2种方式)
- 适用于
创建启动线程次数较少的环境,书写更加简便 - 无返回值、无法抛出异常
- 2种方式
- 方式①相当于
继承了Thread类,作为子类重写run()实现 - 方式②相当于
实现了Runnable接口,Runnable作为匿名内部类
- 方式①相当于
public static void main(String[] args) { //方式1: 相当于继承了Thread类,作为子类重写run()实现 new Thread() { public void run() { System.out.println("【匿名内部类】创建线程方式1..."); }; }.start(); //方式2: 相当于实现了Runnable接口,Runnable作为匿名内部类 new Thread(new Runnable() { public void run() { System.out.println("【匿名内部类】创建线程方式2..."); } } ).start();} 5、FutureTask + Callable
implements Callable<返回值类型>, @Override call()- 带返回值、可抛出异常
创建: 编写一个类 MyThread 让它实现 Callable 接口,并且实现 call() 方法,注意 call() 方法是有返回值的。
启动: new 出Callable 接口的实现类MyCallable,new 出 FutureTask 类的实例 task,把call() 方法的返回值放入FutureTask 类的构造方法里,把 task 放入 new 出的 Thread 构造方法里。
运行: 调用 Thread 类的实例的 start() 方法即可。
public static void main(String[] args) { new Thread(new FutureTask (new MyCallWithoutV())).start(); new Thread(new FutureTask<>(new MyCallWithString())).start();} 6、线程池的实现(2种方式)
降低了创建线程和销毁线程的时间开销减少了资源浪费- 返回的实际上是
ExecutorService,而ExecutorService是Executor的子接口- 方式①
Executors.newFixedThreadPool(线程数) - 方式②
Executors.newCachedThreadPool()
- 方式①
public static void main(String[] args) { //方式1 Executors.newFixedThreadPool(线程数) //创建带有5个线程的线程池 ExecutorService threadPool_1 = Executors.newFixedThreadPool(5); for(int i = 0 ;i < 10 ; i++) { threadPool_1.execute(new Runnable() { public void run() { System.out.println("【线程池实现】①Executors.newFixedThreadPool(线程数), 线程"+Thread.currentThread().getName()+" is running"); } }); } threadPool_1.shutdown(); //优雅的关闭线程池, 用shutdown() //方式2 Executors.newCachedThreadPool() ExecutorService threadPool_2 = Executors.newCachedThreadPool(); threadPool_2.execute(() -> { System.out.println("【线程池实现】②Executors.newCachedThreadPool and Lambda !"); }); threadPool_2.shutdown(); //优雅的关闭线程池, 用shutdown()} 值得注意的是:
方式2创建的是
CachedThreadPool则不需要指定线程数量,线程数量多少取决于线程任务,不够用则创建线程,够用则回收。这2种方式都有个很关键的问题,那就是:如果缺少了
shutdown()销毁线程池的话,即使程序运行完毕了,但是程序并没有停止, 原因是 线程池没有被销毁。 如果没有销毁线程池,会浪费资源的。一般会选择shutdown()来优雅关闭线程池的。
- 无论是哪种方式,返回的类型都是
ExecutorService。作为Executor的子接口的ExecutorService才有shutdown()方法。- 如果返回的是
Executor类型,那么是没有shutdown()方法的。Executor只有一个方法,那就是void execute(Runnable command)。
线程池的关闭方法(3个)
ExecutorService里有下面这3种关闭方法:shutdown():停止接收新任务,原来的任务继续执行shutdownNow():停止接收新任务,原来的任务停止执行awaitTermination(long timeOut, TimeUnit unit):当前线程阻塞
- 关闭功能“从强到弱”依次是:
shuntdownNow()>shutdown()>awaitTermination()- 1、优雅的关闭,用
shutdown() - 2、想立马关闭,并得到未执行任务列表,用
shutdownNow() - 3、优雅的关闭,并允许关闭声明后新任务能提交,用
awaitTermination()
- 1、优雅的关闭,用
线程池的种类(4种)
这里只展示了FixedThreadPool和CachedThreadPool这两种线程池,但是,还有其他两种为SingleThreadPool和ScheduledThreadPool。
-
SingleThreadPool-
该线程池
只有一条线程来执行任务 -
应用场景:
有顺序的任务、任务量少,并且不需要并发执行
-
-
CachedThreadPool可缓存的线程池- 应用场景:
耗时少、任务量大、处理任务速度 > 提交任务速度
-
FixedThreadPool可重用的定长(固定线程数)的线程池- 可控制线程最大并发数,
超出的线程会在队列中等待 - 可以通过控制最大线程来使服务器达到最大的使用率,又可以保证即时流量的突然增大也不会占用服务器过多的资源。
- 应用场景:
有其他条件限制或固定要求的任务量
-
ScheduledThreadPool-
周期性执行任务的线程池 -
应用场景:执行
周期性任务
-
7、定时器的方式
- Java提供了定时器
Timer,但是自带的定时器有不可控的缺点 - 这种方式,当
任务未执行完毕或我们每次想执行不同任务的时候,实现起来比较麻烦- 建议使用
作业调度框架quartz
- 建议使用
import java.util.Timer;import java.util.TimerTask;public class CreateThreadUseTimer { public static void main(String[] args) { Timer timer = new Timer(); timer.schedule(new TimerTask() { @Override public void run() { System.out.println("定时任务延迟0(即立刻执行),每隔1000ms执行一次"); } }, 0, 1000); }} 8、Spring实现多线程
- Spring通过
任务执行器TaskExecutor来实现多线程和并发编程。 - 使用
TreadPoolTaskExecutor可实现一个基于线程池的TaskExecutor。 - 实际开发任务
一般是非阻碍的,即异步的,所以我们要在配置类中通过@EnableAsync开启对异步任务的支持,并通过在实际执行的Bean中的方法使用@Async注解来声明这是一个异步任务。
0. 同步和异步
-
同步交互:指发送一个请求,需要等待返回,然后才能够发送下一个请求,有个等待过程; -
异步交互:指发送一个请求,不需要等待返回,随时可以再发送下一个请求,即不需要等待。
区别:一个需要等待,一个不需要等待。
在部分情况下,我们的项目开发中都会优先选择不需要等待的异步交互方式。
1. 引入 Maven 依赖
org.springframework.boot spring-boot-starter 2.4.4
2. 异步执行的配置类 AsyncConfig
package com.melodyjerry.thread;import org.springframework.context.annotation.ComponentScan;import org.springframework.context.annotation.Configuration;import org.springframework.scheduling.annotation.AsyncConfigurer;import org.springframework.scheduling.annotation.EnableAsync;import org.springframework.scheduling.concurrent.ThreadPoolTaskExecutor;import java.util.concurrent.Executor;/** * @classname AsyncConfig * @description 开启异步执行的配置类 */@Configuration@EnableAsync //开启异步执行@ComponentScan("com.melodyjerry.thread")public class AsyncConfig implements AsyncConfigurer { @Override public Executor getAsyncExecutor() { ThreadPoolTaskExecutor threadPoolTaskExecutor = new ThreadPoolTaskExecutor(); //线程池中的线程的名称前缀 threadPoolTaskExecutor.setThreadNamePrefix("SpringBoot线程池的前缀-"); //线程池的核心线程数大小 threadPoolTaskExecutor.setCorePoolSize(4); //线程池的最大线程数 threadPoolTaskExecutor.setMaxPoolSize(8); //等待队列的大小 threadPoolTaskExecutor.setQueueCapacity(25); //执行初始化 threadPoolTaskExecutor.initialize(); return threadPoolTaskExecutor; }} 3. 异步任务的执行类
package com.melodyjerry.thread;import org.springframework.scheduling.annotation.Async;import org.springframework.stereotype.Service;/** * @classname AsyncTaskService * @description 异步任务的执行类 */@Servicepublic class AsyncTaskService { @Async //异步方法 public void executeAsyncTask(Integer i) { System.out.println("执行异步任务: "+i); } @Async //异步方法 public void executeAsyncTaskPlus(Integer i) { System.out.println("执行异步任务+1: " + (i+1)); }}
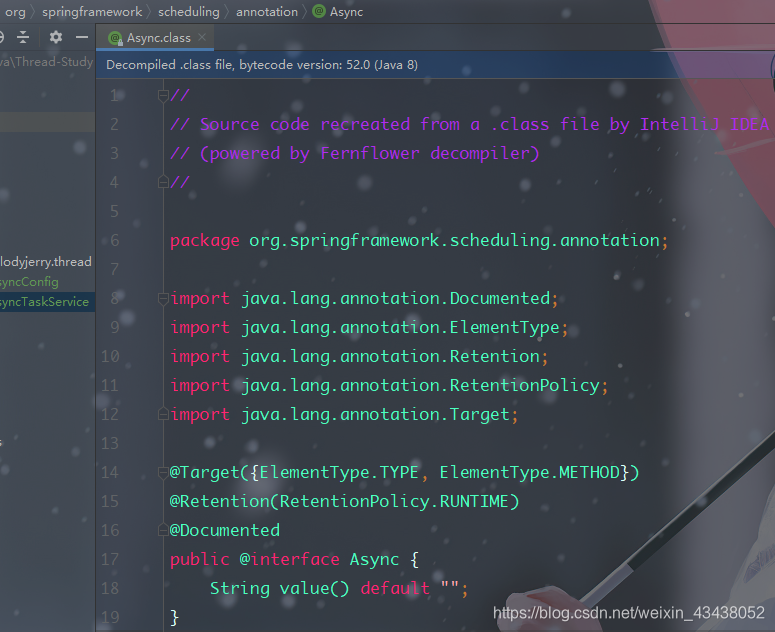
@Async注解表明该方法是个异步方法。从Async注解接口可以看到,
Target即可以在方法也可以在类型上,如果注解在类型上,表明该类所有的方法都是异步方法。
4. 测试效果 TestThreadApplication
package com.melodyjerry.thread;import org.springframework.boot.SpringApplication;import org.springframework.boot.autoconfigure.SpringBootApplication;import org.springframework.context.ConfigurableApplicationContext;/** * @classname TestThreadApplication * @description 测试异步任务 */@SpringBootApplicationpublic class TestThreadApplication { public static void main(String[] args) { ConfigurableApplicationContext context = SpringApplication.run(TestThreadApplication.class, args); AsyncTaskService asyncTaskService = context.getBean(AsyncTaskService.class); for (int i = 0; i < 10; i++) { asyncTaskService.executeAsyncTask(i); asyncTaskService.executeAsyncTaskPlus(i); } System.out.println("This Program has Begun successfully"); }} This Program has Begun successfully执行异步任务: 0执行异步任务: 2执行异步任务+1: 1执行异步任务+1: 3执行异步任务: 3执行异步任务: 4执行异步任务+1: 5执行异步任务: 5执行异步任务+1: 6执行异步任务+1: 2执行异步任务: 6执行异步任务+1: 4执行异步任务: 7执行异步任务: 8执行异步任务+1: 9执行异步任务: 9执行异步任务+1: 10执行异步任务+1: 7执行异步任务+1: 8执行异步任务: 1
4种启动方式
new Thread().start();new Thread(Runnable).start();Executors.newCachedThreadPool().execute()- 注意:
线程池的关闭
- 注意:
FutureTask + Callable
能直接调用Thread类的run()方法?
- 当然可以直接调用,但是如果我们调用了
Thread的run()方法,它的行为就会和普通的方法一样,是在当前线程执行 - 为了
在新的线程中执行我们的代码,必须使用Thread.start()方法。
转载地址:https://melodyjerry.blog.csdn.net/article/details/116093474 如侵犯您的版权,请留言回复原文章的地址,我们会给您删除此文章,给您带来不便请您谅解!
发表评论
最新留言
关于作者
