本文共 7543 字,大约阅读时间需要 25 分钟。
文章目录
上拉菜单actionSheet 的使用
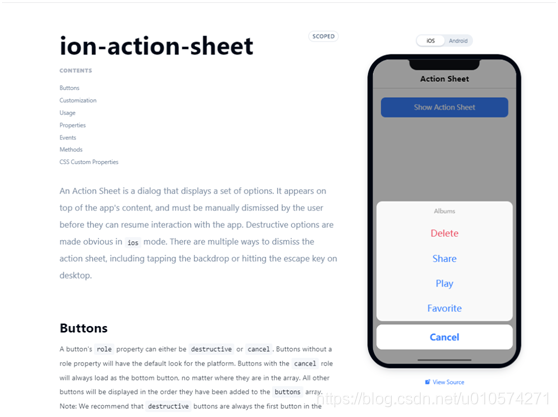
ion-action-sheet的使用参考https://ionicframework.com/docs/api/action-sheet
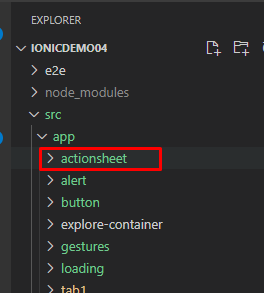
新建页面
首先我们在项目中新建页面用于actionSheet 的使用
ionic g page actionsheet
跳转到actionsheet页面
新建按钮并添加点击事件
actionsheet.page.html
Click me
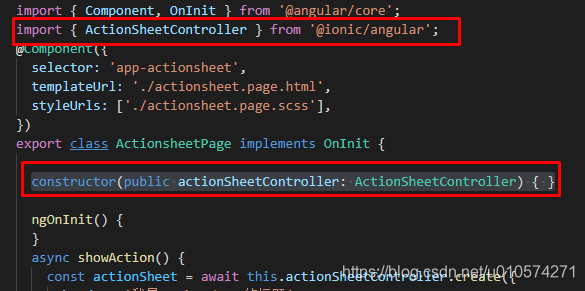
ts中引入ActionSheetController并声明
actionsheet.page.ts:
定义showAction方法
actionsheet.page.ts:
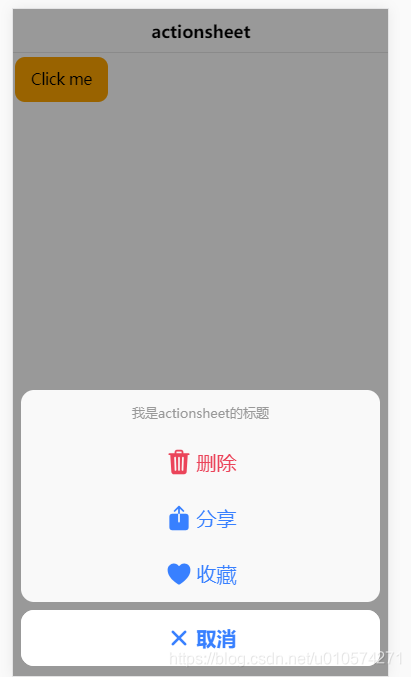
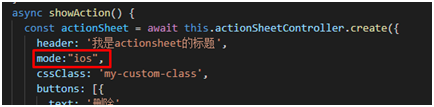
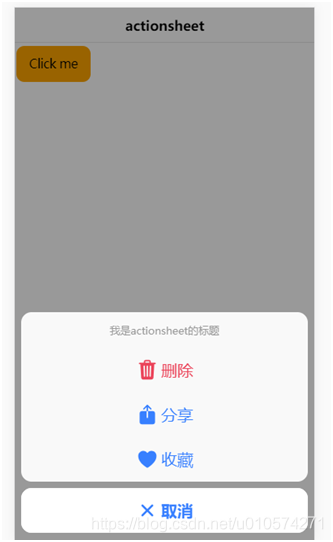
async showAction() { const actionSheet = await this.actionSheetController.create({ header: '我是actionsheet的标题', cssClass: 'my-custom-class', buttons: [{ text: '删除', role: 'destructive', icon: 'trash', handler: () => { console.log('Delete clicked'); } }, { text: '分享', icon: 'share', handler: () => { console.log('Share clicked'); } }, { text: '收藏', icon: 'heart', handler: () => { console.log('Favorite clicked'); } }, { text: '取消', icon: 'close', role: 'cancel', handler: () => { console.log('Cancel clicked'); } }] }); await actionSheet.present(); } 页面上点击后弹出如下:
不同平台显示效果
如果我们想所有平台使用ios形式的可以配置mode:“ios”
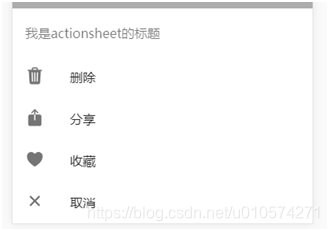
 所有平台使用android形式的可以配置mode:“md”
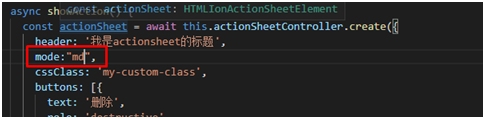
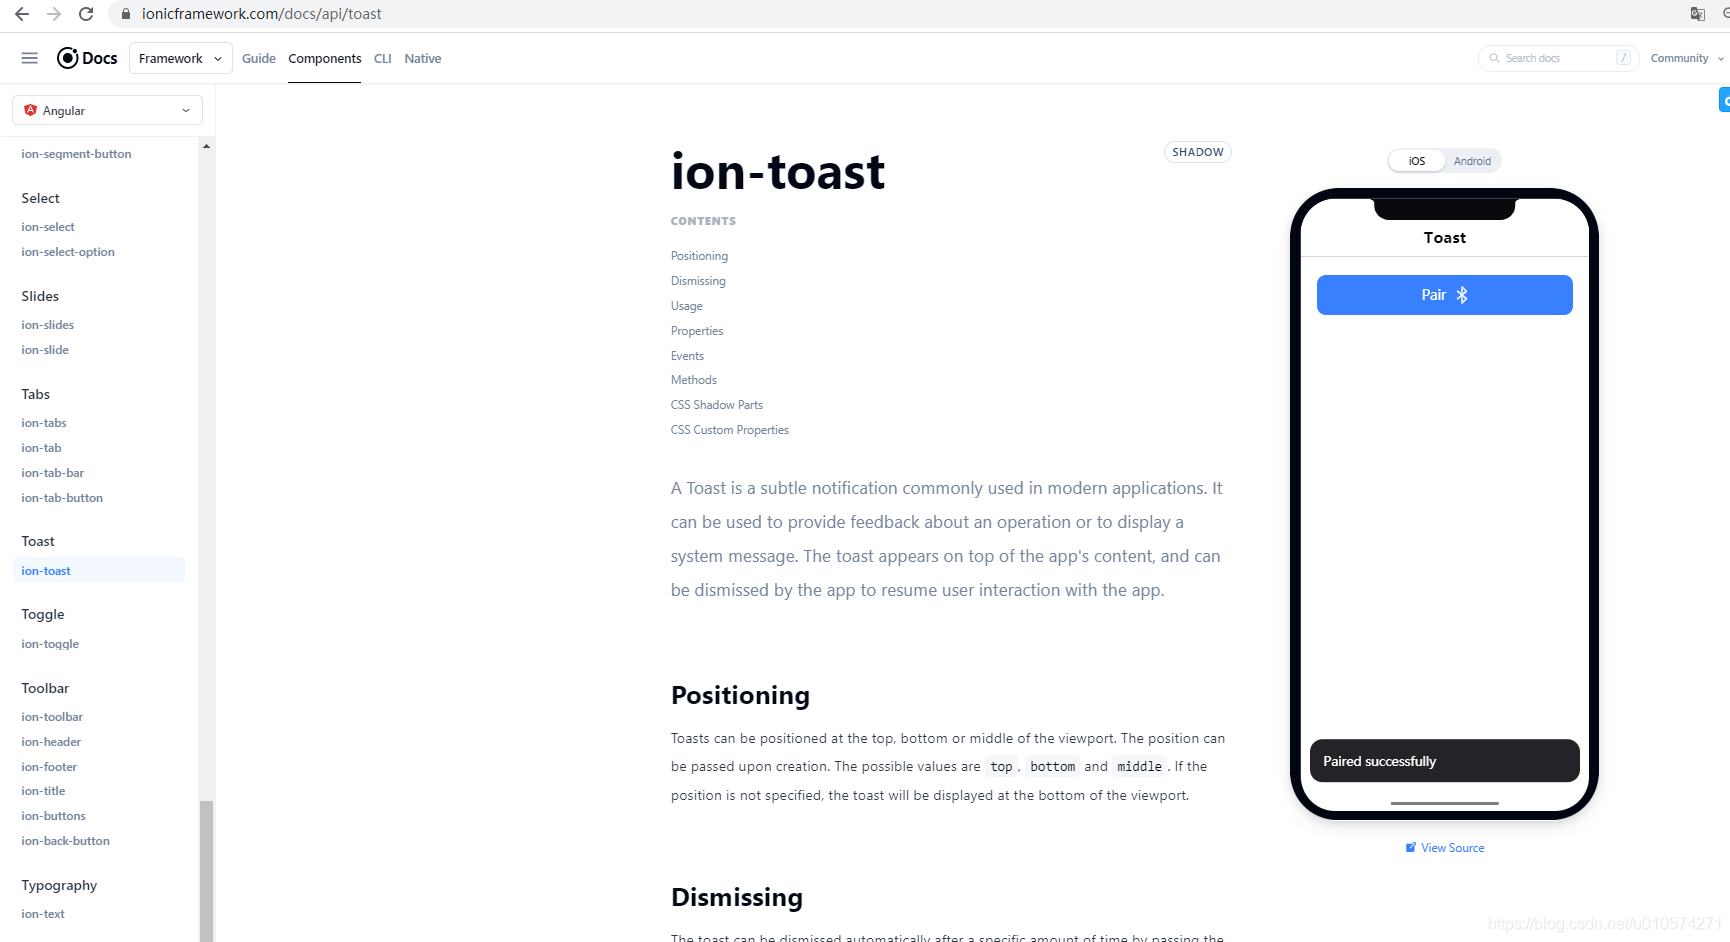
Toast 提示框
Toast 的使用参考https://ionicframework.com/docs/api/toast
新建页面
首先我们在项目中新建页面用于toast 的使用
ionic g page toast
跳转到toast页面
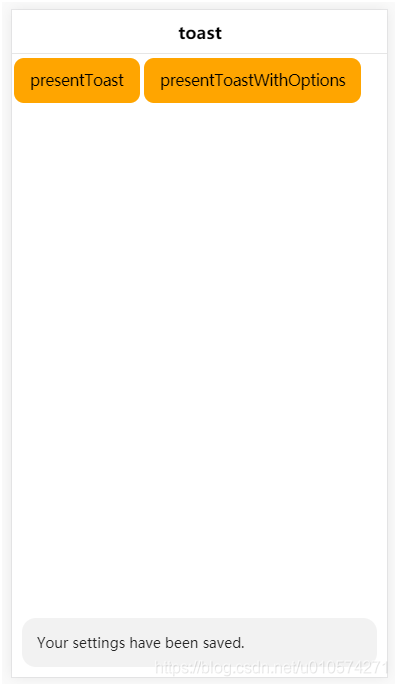
新建按钮并添加点击事件
toast.page.html:
presentToast presentToastWithOptions
ts中引入ToastController 并声明
toast.page.ts:

ts中新建相应方法
toast.page.ts:
async presentToast() { const toast = await this.toastController.create({ message: 'Your settings have been saved.', duration: 2000 }); toast.present(); }async presentToastWithOptions() { const toast = await this.toastController.create({ header: 'Toast header', message: 'Click to Close', position: 'top', buttons: [ { side: 'start', icon: 'star', text: 'Favorite', handler: () => { console.log('Favorite clicked'); } }, { text: 'Done', role: 'cancel', handler: () => { console.log('Cancel clicked'); } } ] }); await toast.present(); const { role } = await toast.onDidDismiss(); console.log('onDidDismiss resolved with role', role);} 点击presentToast后:
 点击presentToastWithOptions后:
 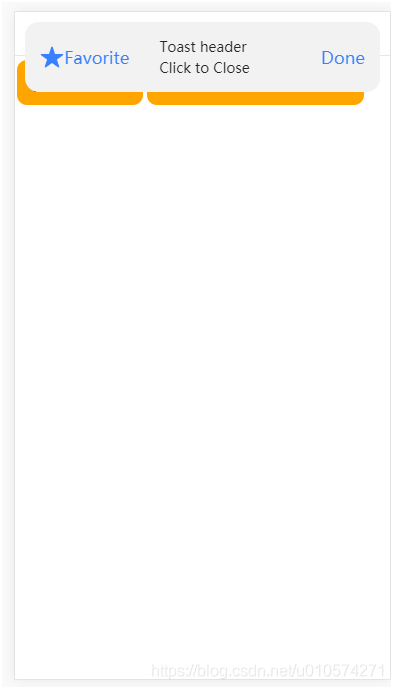 presentToast中message表示弹出的文字信息、duration表示提示框显示事件,我们还可以用color来定义提示框的颜色
 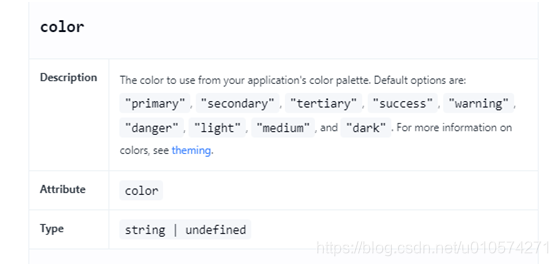 改造代码:
改造代码: 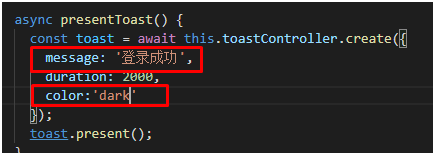 点击presentToast后
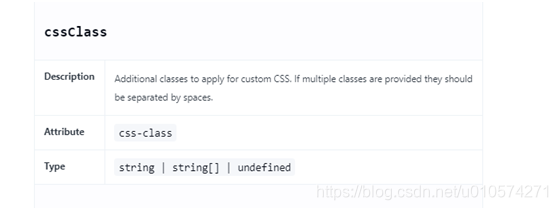
 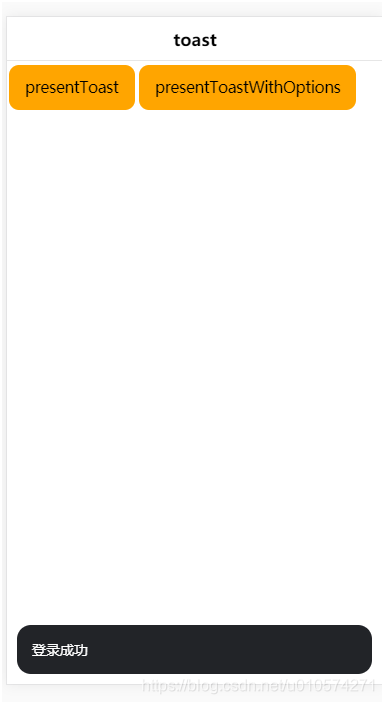 我们如果想要提示框居于界面中间并适应文字长度我们可以position定义文字在提示框的位置;cssClass定义提示框的其他内联样式在资料中显示如下:
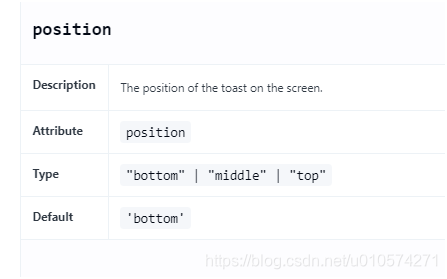
 ts中presentToast改造如下:
 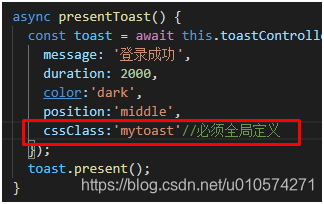 接下来,我们就需要定义全局的样式 theme/variables.scss:
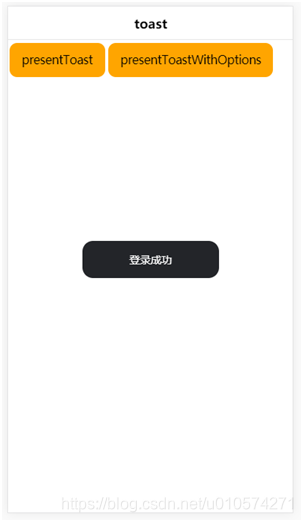
 //toast自定义css.mytoast { width:200px; text-align:center; left:50%; margin-left:-100px;} 点击presentToast后显示如下
loading加载样式
加载的使用参考资料https://ionicframework.com/docs/api/loading
新建页面
ionic g page loading
跳转到Loading页面
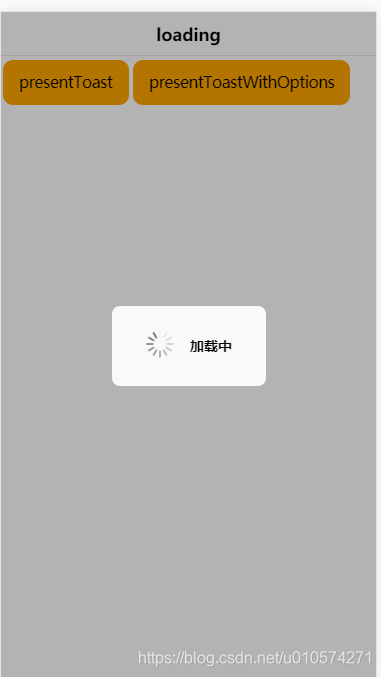
新建按钮并添加点击事件
loading.page.html:
presentToast presentToastWithOptions
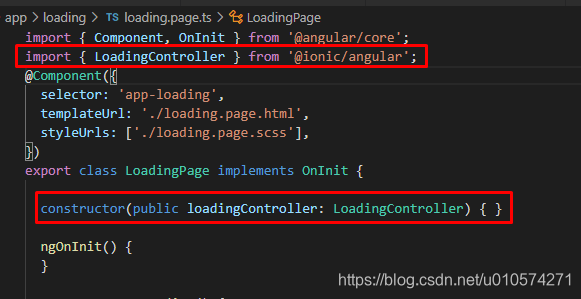
ts中引入loadingController并声明
loading.page.ts:
ts中新建相应方法
async presentLoading() { const loading = await this.loadingController.create({ cssClass: 'my-custom-class', message: '加载中', duration: 2000 }); await loading.present(); const { role, data } = await loading.onDidDismiss();//返回在加载终止时解析的承诺 console.log('Loading dismissed!'); } async presentLoadingWithOptions() { const loading = await this.loadingController.create({ //spinner: null,//是否显示圈圈 duration: 5000,//延迟时间 message: 'Click the backdrop to dismiss early...', translucent: true,//表示半透明的效果 cssClass: 'custom-class custom-loading', //注意自定义样式要写在全局 backdropDismiss: true //单击背景时,加载指示器将被取消 }); await loading.present(); const { role, data } = await loading.onDidDismiss(); console.log('Loading dismissed with role:', role); } 当点击presentLoading时显示如下:
 且在加载消失后,打印日志如下
 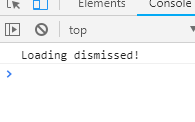 当点击presentLoadingWithOptions显示如下
 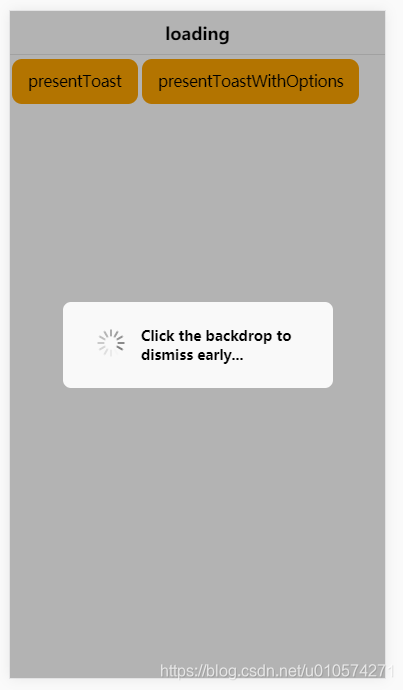 加载结束时打印日志如下:
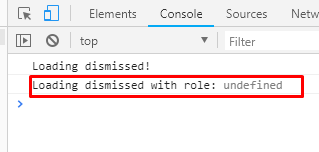
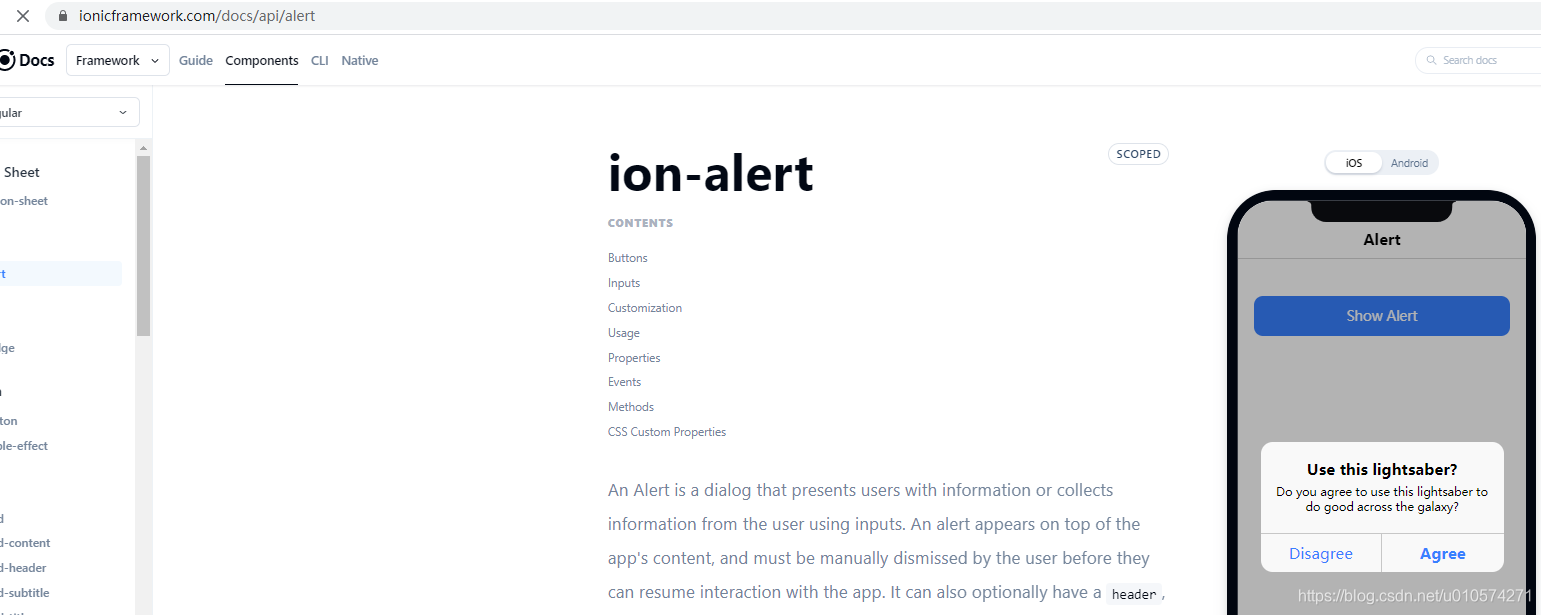
alert弹窗
关于弹窗的使用,我们可以参考https://ionicframework.com/docs/api/toast
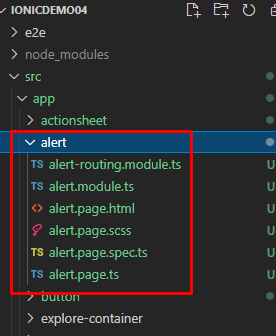
新建页面
我们使用命令新建一个alert页面
ionic g page alert
跳转到alert页面
官方文档中给出的弹窗的例子有很多,我们选取几个来讲讲
新建按钮并添加点击事件
presentAlert presentAlertMultipleButtons presentAlertConfirm presentAlertPrompt
ts中引入AlertController并声明
alert.page.ts:

ts中新建相应方法
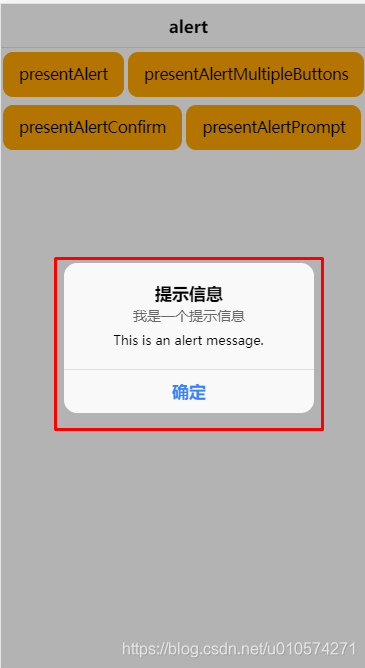
presentAlert我们就定义一个普通提示信息的弹窗如下:
async presentAlert() { const alert = await this.alertController.create({ cssClass: 'my-custom-class', header: '提示信息', subHeader: '我是一个提示信息', message: 'This is an alert message.', buttons: ['确定'] }); await alert.present(); const { role } = await alert.onDidDismiss(); console.log('onDidDismiss resolved with role', role);} 点击presentAlert按钮后显示如下:
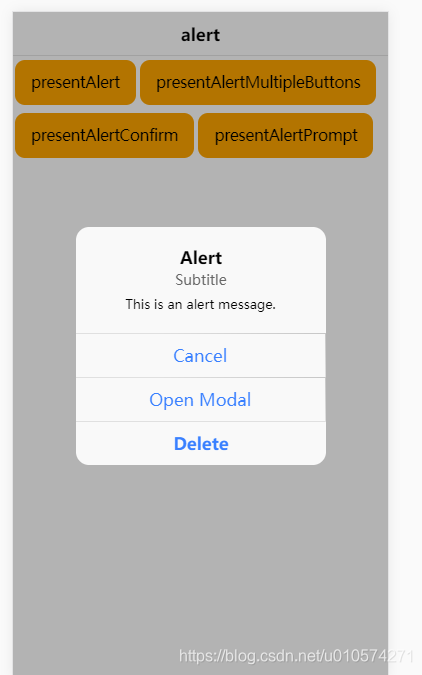
 presentAlertMultipleButtons我们定义一个不光有提示信息,还有各种按钮如Cancel、Open Modal、Delete的弹窗,代码如下:
 async presentAlertMultipleButtons() { const alert = await this.alertController.create({ cssClass: 'my-custom-class', header: 'Alert', subHeader: 'Subtitle', message: 'This is an alert message.', buttons: ['Cancel', 'Open Modal', 'Delete'] }); await alert.present();} 点击presentAlertMultipleButtons按钮后显示如下:
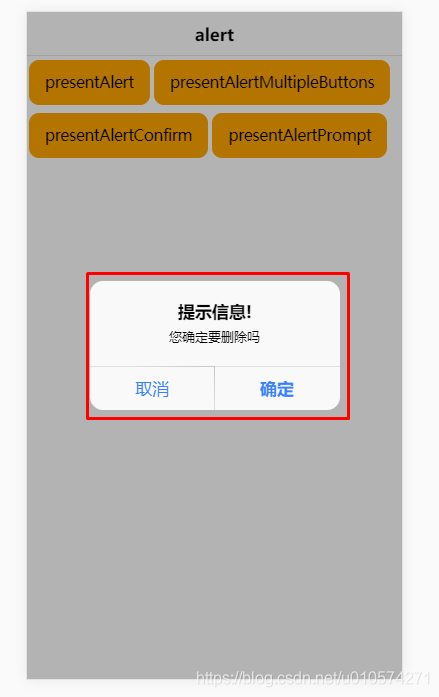
 这些按钮需要由具体的功能,所有我们在presentAlertConfirm中定义弹窗有确定和取消两个按钮,点击确定执行具体的任务,点击取消任务取消弹窗消失:
 async presentAlertConfirm() { const alert = await this.alertController.create({ cssClass: 'my-custom-class', header: '提示信息!', message: '您确定要删除吗', buttons: [ { text: '取消', role: 'cancel', cssClass: 'secondary',//注意自定义class写在全局 handler: (blah) => { console.log('Confirm Cancel: blah'); } }, { text: '确定', handler: () => { console.log('Confirm Okay'); } } ] }); await alert.present();} 点击presentAlertConfirm后显示如下:
 点击确定后日志如下:
 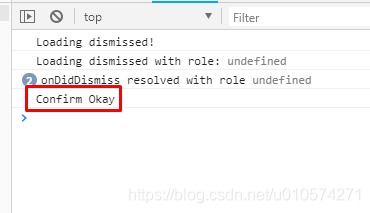 点击取消日志如下:
 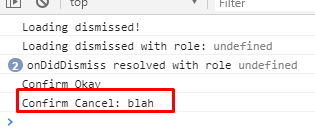 还有一种最常用的弹窗,就是表单弹窗,代码如下:
 //alert放表单async presentAlertPrompt() { const alert = await this.alertController.create({ cssClass: 'my-custom-class', header: 'Prompt!', inputs: [ { name: 'name1', type: 'text', placeholder: 'Placeholder 1' }, { name: 'name2', type: 'text', id: 'name2-id', value: 'hello', placeholder: 'Placeholder 2' }, // multiline input. { name: 'paragraph', id: 'paragraph', type: 'textarea', placeholder: 'Placeholder 3' }, { name: 'name3', value: 'http://ionicframework.com', type: 'url', placeholder: 'Favorite site ever' }, // input date with min & max { name: 'name4', type: 'date', min: '2017-03-01', max: '2018-01-12' }, // input date without min nor max { name: 'name5', type: 'date' }, { name: 'name6', type: 'number', min: -5, max: 10 }, { name: 'name7', type: 'number' }, { name: 'name8', type: 'password', placeholder: 'Advanced Attributes', cssClass: 'specialClass', attributes: { maxlength: 4, inputmode: 'decimal' } } ], buttons: [ { text: 'Cancel', role: 'cancel', cssClass: 'secondary', handler: () => { console.log('Confirm Cancel'); } }, { text: 'Ok', handler: (result) => { //获取表单输入的值 console.log(result); } } ] }); await alert.present();} 我们在最后OK的按钮上绑定了一个钩子,用于获取表单的数据,我们在页面上使用如下
点击presentAlertPrompt: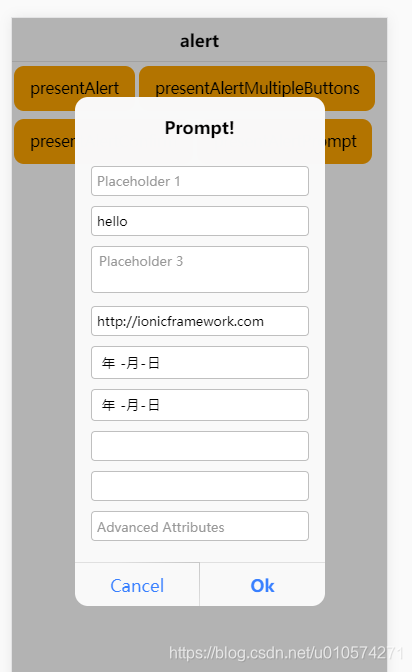 我们随便填入一些信息:
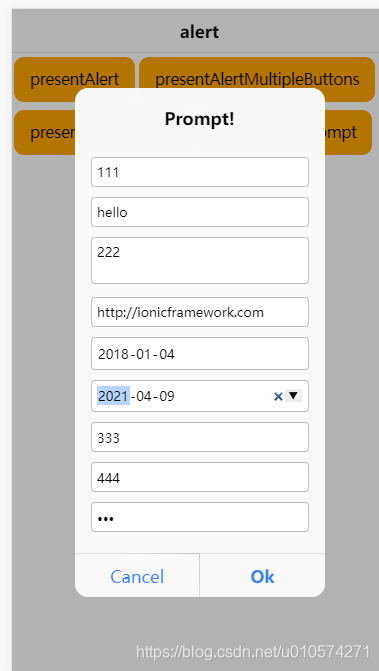
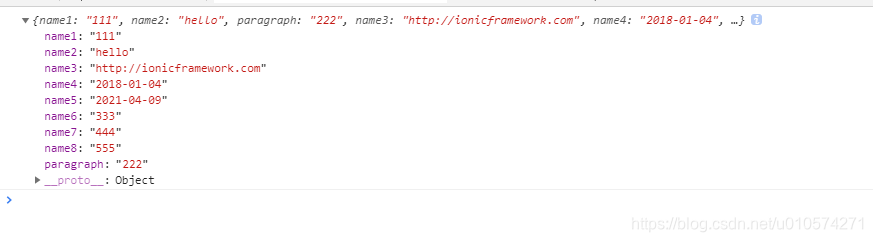
点击ok 后弹窗消失,并且日志打印我们表单的信息
转载地址:https://blog.csdn.net/u010574271/article/details/116175310 如侵犯您的版权,请留言回复原文章的地址,我们会给您删除此文章,给您带来不便请您谅解!
发表评论
最新留言
关于作者
